
A building’s facade is its largest untapped energy asset. Every square meter of sun-facing cladding that absorbs and dissipates solar radiation as heat is an opportunity cost — energy that could instead power the building itself. Solar panel cladding, also called BIPV facade cladding, converts that facade surface into a dual-purpose building envelope that weathers the elements and generates clean electricity simultaneously.
This guide is not about rooftop solar. It’s about the considerably more complex — and considerably more rewarding — process of integrating photovoltaic cladding onto an existing building’s vertical facade. Whether you’re an architect, a building owner, a facilities manager, or a developer assessing retrofit potential, the decisions you make before a single panel is ordered will determine whether your project delivers on its energy, financial, and aesthetic promise.
According to the IEA-PVPS BIPV Technical Guidebook (2025), BIPV systems on facades and fenestrations represent one of the fastest-growing segments of the renewable energy market — with the global BIPV facade market valued at $4.1 billion in 2024 and projected to reach $28.3 billion by 2034 at a CAGR of 21.3%. The convergence of tightening energy codes, improving product performance, and maturing installation practices means that facade cladding projects that would have been financially marginal five years ago are now clearly viable.
This guide walks you through every phase: structural feasibility, regulatory compliance, technology selection, structural preparation, design, installation workflow, electrical integration, maintenance planning, cost modeling, and real-world case studies — with the practical specificity that makes the difference between a successful project and an expensive lesson.
Assessing Compatibility with Existing Facades
Structural Feasibility and Load Considerations
Before any product is selected or any contractor is contacted, the first question to answer is deceptively simple: can your existing facade carry the additional load? BIPV cladding panels — particularly glass-glass laminated modules — weigh 20–35 kg/m². On a 500 m² facade, that’s 10,000–17,500 kg of additional dead load that must transfer through the cladding substructure into the building’s primary structure.
For most steel-framed or reinforced concrete commercial buildings built after 1990, this is manageable with appropriate engineering. For older masonry buildings, pre-cast panel facades, or lightweight curtain wall systems not designed for point loads, a full structural assessment is non-negotiable. According to research published in Energy and Buildings (2025), structural incompatibility is the single most common reason that BIPV facade retrofit projects are redesigned or cancelled after the design phase — a problem that costs significantly more to resolve late than early.
Wind suction loads are equally critical. On a high-rise facade at elevation, wind suction at corner zones per ASCE 7 can exceed 3.5 kPa — an outward force that tries to pull panels off the building. The mounting system must transfer these loads through the module frame, into the substructure, and into the building’s primary structure. A structural engineer’s stamped calculations are required, not optional.
Facade Material Compatibility and Attachment Methods
Not every existing facade surface is a suitable substrate for BIPV attachment. The compatibility between your current cladding material and the proposed BIPV substructure determines installation complexity, weatherproofing strategy, and long-term durability.
| Existing Facade Material | BIPV Attachment Suitability | Preferred Attachment Method | Key Risk | 緩和策 |
|---|---|---|---|---|
| Reinforced Concrete / Masonry | Good | Drilled anchor bolts into concrete; bracket subframe | Moisture penetration at anchor points | Sealed anchor sleeves; ventilated cavity design |
| Steel Frame + Insulated Panel | Excellent | Clamped rail to existing steel; BIPV in glazing pocket | Thermal bridge at steel connection | Thermal break pads at all steel-to-bracket contacts |
| Aluminum Curtain Wall | Excellent | BIPV modules replace existing glass in curtain wall pockets | Weight difference vs. original spec glass | Structural glazing review; gasket system upgrade |
| Brick Veneer | Moderate | Standoff bracket system anchored into backup structure | Brick inconsistency; limited load capacity at veneer | Anchors must reach backup wall, not just brick |
| EIFS / Render | Poor (direct attachment) | Independent substructure anchored past EIFS into substrate | EIFS puncture compromises moisture management | Full EIFS bypass; independent wall bracket system |
| Timber Frame | Moderate | Ventilated rainscreen rail on timber studs | Timber dimensional instability; fire classification | Non-combustible module; fire-rated cavity barrier |
Aesthetic and Performance Implications
Solar cladding on an existing facade is simultaneously a structural intervention and a visual redesign. The aesthetic outcome depends on four decisions made before any product is ordered: the module color and finish relative to the building’s existing palette; the module dimension and coursing alignment with existing architectural features (window lines, floor plates, mullion grids); the joint width and treatment between panels; and the transition detail where BIPV cladding meets adjacent non-BIPV surfaces.
Research from the MDPI Berlin BIPV Facade Case Study (2025) — a full-scale living laboratory on a multi-story residential building — found that the most successful facade integrations shared one characteristic: the BIPV module grid was co-designed with the building’s fenestration pattern from the start, rather than retrofitted over an existing architectural composition. The visual result reads as intentional rather than applied.

Pre-design structural and aesthetic assessment is the most cost-effective investment in any BIPV facade retrofit project. Problems identified at concept stage cost a fraction of what they cost to resolve during construction. Photo: Unsplash
Regulatory and Permitting Considerations
Building Codes and Zoning Implications
A BIPV facade cladding installation sits at the intersection of three regulatory domains simultaneously: building codes (covering the physical envelope, structural loads, fire performance, and weatherproofing), electrical codes (covering DC wiring, inverters, and grid interconnection), and in some jurisdictions, zoning regulations that govern reflective surfaces, glare, and visual character in commercial or historic districts.
In the United States, the primary building code reference is the IBC, while the electrical installation is governed by NEC Article 690. In the EU, the Construction Products Regulation (CPR) requires CE marking for BIPV products permanently incorporated into building envelopes. The Whole Building Design Guide’s BIPV resource provides a useful overview of the regulatory landscape for US-based projects.
Permitting Workflow and Documentation
Most BIPV facade projects require two permit streams that ideally run in parallel: a building permit and an electrical permit. Starting both simultaneously — rather than sequentially — reduces the overall timeline by 4–8 weeks on a typical commercial project.
| Permit Document | Who Prepares It | Typical Review Time | Common Rejection Reason |
|---|---|---|---|
| Building permit drawings | Licensed architect/engineer | 3–8 weeks | Waterproofing detail incomplete; fire rating not documented |
| Structural calculations | Licensed structural engineer | 2–4 weeks | Wind uplift analysis missing; load path not shown |
| Electrical permit (single-line diagram) | Licensed electrician | 2–5 weeks | Rapid shutdown compliance not addressed |
| Utility interconnection application | Owner/installer | 3–10 weeks (utility-dependent) | System size exceeds export limit; insufficient documentation |
| IEC/UL product certification | Module manufacturer (provided) | N/A (pre-existing) | Certification for standard module, not BIPV version |
| Fire classification (NFPA 285 / BS 8414) | Testing laboratory | 8–16 weeks if not pre-tested | Assembly test not matching proposed configuration |
Warranty and Compliance Requirements
From a warranty standpoint, BIPV facade installations involve at least three overlapping coverage documents: the module manufacturer’s product warranty (typically 12–15 years against material defects), the module manufacturer’s power performance warranty (25–30 years, guaranteeing ≥80% of nameplate output), and the installation contractor’s workmanship warranty (minimum 10 years for facade-grade work). Read every exclusion clause. “Damage from improper installation,” “soiling” and “acceptable color variation” are the three most commonly invoked exclusions that shift liability to the building owner.
In the EU, the EPBD (Energy Performance of Buildings Directive) recast increasingly requires near-zero-energy performance for commercial retrofits — creating a regulatory tailwind that makes BIPV facade compliance not just financially attractive but, in many new-build and major renovation contexts, legally necessary by 2030. Proactively designing for these requirements now avoids costly retroactive upgrades.
Understanding Solar Panel Cladding Technologies
Monolithic vs. Modular Cladding Systems
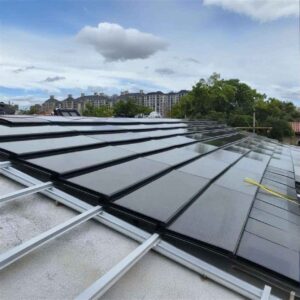
Monolithic systems — typically large-format BIPV glass panels used in curtain wall and structural glazing applications — create seamless, uninterrupted facade surfaces. Individual panels can span 1.0–2.5 m in width and 1.5–4.0 m in height. The visual result is architectural and premium; the logistical reality is that custom glass sizes require 8–20 week manufacturing lead times, and replacing a single damaged panel at height is a significant access and cost event.
Modular systems use standardized panel formats — typically 1.0–1.7 m² per module — installed on a rail or cassette substructure. Modular systems are faster to install, easier to replace, and more tolerant of facade geometry variations than monolithic systems. The trade-off is the visible joint pattern between panels, which must be designed as a deliberate architectural element rather than an afterthought. Manufacturers like Jia Mao BIPV’s laminated glass facade line offer modular formats with customizable joint widths (12–25 mm) and coloring that integrate the joint into the facade grid rather than fighting it.
Photovoltaic Material Types and Efficiency
| テクノロジー | Cell Efficiency | Temp. Coefficient (%/°C) | 透明性 | Best Facade Application | 25-Year Degradation |
|---|---|---|---|---|---|
| Mono c-Si (N-type/TOPCon) | 21–24% | –0.29 to –0.35 | Semi (cell spacing) | Opaque spandrel / rainscreen | ~10% total |
| CdTe Thin-Film | 14–19% | –0.20 to –0.25 | Yes (laser patterned) | Vision glass / curtain wall | ~12% total |
| CIGS Thin-Film | 13–17% | –0.30 to –0.36 | Limited | Curved surfaces / rainscreen | ~14% total |
| a-Si Thin-Film | 6–10% | –0.20 | Yes (uniform) | Large-area architectural glazing | ~15–20% total |
| HJT (Heterojunction) | 22–25% | –0.25 to –0.28 | Semi | High-performance opaque facade | ~8% total |
Source: IEA-PVPS Technical Guidebook 2025; SolarTechOnline BIPV Facade Guide 2025. Efficiency ranges reflect commercially available facade-format modules.
One frequently overlooked performance advantage of thin-film (CdTe, CIGS) on facades is the lower temperature coefficient. A facade panel in direct afternoon sun can reach 70–85°C. At those temperatures, a monocrystalline c-Si module loses approximately 18–22% of its rated power, while a CdTe module loses only 11–15%. For hot-climate or west-facing facade zones, that difference translates to measurable additional annual yield.
Mounting Systems and Integration Options
The three primary mounting architectures for facade BIPV are: stick-built curtain wall integration (BIPV modules set into an aluminium mullion-transom frame, replacing conventional glass), unitized curtain wall integration (BIPV modules factory-assembled into pre-wired curtain wall units that hook onto the building structure), and ventilated rainscreen cassette systems (BIPV panels mounted on rail/bracket substructure with a drained air cavity behind them). For detailed mounting design guidance — including module selection, inverter architecture, and weatherproofing coordination — Jia Mao BIPV’s facade design reference guide covers all three system types with real-specification detail.
▶ BIPV Engineering Principles: structural safety, electrical integration, and real-world facade system design explained step-by-step. (YouTube)
Structural Assessment and Preparation
Roof-to-Wall Connection Details and Reinforcement
On multi-story buildings, the BIPV facade substructure must transfer loads — both down (gravity) and outward (wind suction) — through connection points to the building’s primary structure: typically the floor slabs or structural columns. The floor-slab edge or the column face is where the bracket anchors, and the quality of that connection determines both structural safety and long-term weatherproofing integrity.
Expansion anchors into concrete are the most common attachment method. For concrete aged 30+ years, carbonation depth testing (to verify concrete alkalinity and anchor capacity) should accompany the structural survey. Where anchor capacity is insufficient due to concrete condition, post-installed chemical anchors or surface-mounted steel angles welded to exposed rebar may be required — both of which add cost and should be identified in the structural assessment phase, not during installation.
Wind Load and Seismic Considerations
Wind load governs facade panel design in the vast majority of commercial BIPV projects. Per ASCE 7-16 component and cladding provisions, wind pressure on facade panels varies significantly by location on the building face: mid-facade zones typically see ±1.0–1.8 kPa; edge zones see ±1.5–2.5 kPa; and corner zones can reach ±2.5–4.0 kPa at heights above 60 m. Every glass size and mounting bracket in the BIPV system must be engineered for the worst-case zone in which it appears.
In seismic zones (particularly the western US, Japan, Chile, and Turkey), facade cladding must accommodate inter-story drift — the relative horizontal displacement between floor levels during an earthquake. For glass-glass BIPV panels, the typical maximum allowable in-plane racking is 1/200 of the story height; panels specified without considering drift allowance can crack or dislodge during moderate seismic events well below design earthquake intensity.
Surface Preparation and Weatherproofing
The backup wall — whatever surface the BIPV substructure attaches to — must be assessed for condition before the substructure is installed. Cracks, spalling, delaminated render, deteriorated expansion joints, and failed perimeter sealants all represent moisture-management vulnerabilities that a new BIPV cladding layer will trap rather than repair. The general principle is: remediate the backup wall before installing the BIPV system, not after. Water that enters a cavity behind a BIPV cladding panel causes corrosion of the substructure, accelerates gasket degradation, and in cold climates produces ice-expansion failures at fasteners — all of which are significantly more expensive to remediate after the BIPV system is in place.

Scaffold-level inspection of the existing facade surface condition is a prerequisite — not an optional step — before any BIPV substructure is installed. Moisture damage and structural deficiencies discovered at this stage cost far less to address than after the cladding is on. Photo: Unsplash
Design and Aesthetic Considerations
Color, Texture, and Architectural Harmony
Dark-colored BIPV modules absorb 80–95% of incident solar radiation and convert 12–22% to electricity — the rest is heat. Standard black modules maximize electrical yield. But on a facade that is the building’s public face, color is a non-negotiable design variable, and the color choice carries a real efficiency cost that must be quantified and factored into the energy model.
Note: Dielectric interference coatings achieve the upper end of each range. Ceramic frit coatings typically fall at the lower end. Color performance is affected by cell technology (TOPCon/HJT outperform PERC at equivalent color treatment). Individual project results require manufacturer-specific testing data.
Orientation, Shading Analysis, and Performance Goals
Facade orientation is fixed by the building’s geometry, but its implications for BIPV performance are not uniform. South-facing facades (in the Northern Hemisphere) deliver 80–200 kWh/m²/year depending on climate. East and west facades yield 55–75% of the south-facing figure. North facades rarely justify BIPV investment, delivering only 25–40 kWh/m²/year from diffuse radiation.
Shading from adjacent structures, projecting floor slabs, and architectural overhangs must be modeled with 3D simulation tools — not estimated by rule of thumb. At the time of the energy report, buildings in dense urban centers may receive less than 60% of the solar irradiation of an unobstructed site at the same latitude. Use NREL’s PVWatts calculator for initial feasibility estimates, then advance to full 3D irradiance modeling (tools: Autodesk Insight, DesignBuilder, Radiance/Daysim) for the design-phase energy model that underpins your ROI case.
Customization Options and Branding Opportunities
BIPV facade cladding has moved beyond black-panel pragmatism. Current product options from advanced manufacturers include: pixel-pattern printing directly on the glass surface (enabling corporate graphics or artistic designs); custom module dimensions to match existing facade grid geometry; gradient transparency effects transitioning from opaque to semi-transparent zones; and perforated metal-backed configurations that read as conventional ventilated cladding from street level while housing PV cells in the upper layer. These are not prototype features — they are commercially available with full IEC certification and have been deployed on flagship corporate headquarters, public buildings, and cultural facilities globally. For a project-specific product consultation on customized BIPV glass options, Jia Mao BIPV’s facade systems review provides a useful independent benchmark.
インストール手順とベストプラクティス
Step-by-Step Installation Workflow
Safety Protocols and Risk Management
Facade cladding installation combines three of the highest-risk activities in construction: work at height, electrical work, and glazing (heavy glass handling). Each requires specific competencies, PPE, and supervision protocols. The US DOE’s guide on solar fire safety covers the electrical risk management protocols that apply to any PV system installation, including facade-mounted systems.
⚠️ Critical Safety Rule: DC circuits on BIPV systems are energized whenever modules are exposed to light — even on overcast days, even when the inverter is disconnected. There is no safe way to make a BIPV facade panel completely de-energized during daylight hours without physically covering it. Rapid-shutdown compliance per NEC 690.12 is non-negotiable, and all site personnel must be briefed on DC circuit hazards before installation begins. Per documented solar installation safety data, DC arc events are among the highest-severity incidents in PV installation — prevention through design (correct string sizing, arc-fault detection, proper connector torque) is always preferable to emergency response.
Quality Assurance and Inspection Checkpoints
Three quality gates should be formally documented during installation: (1) Pre-install module inspection — visual and EL imaging check of every panel before installation, with any damage recorded and reported to the manufacturer before the module is placed; (2) String-level electrical verification — open-circuit voltage and short-circuit current check before each string is connected to the inverter, confirming that installed performance matches the factory test data within ±5%; and (3) Post-installation thermal imaging — a full-facade infrared scan performed within 30 days of commissioning, identifying any hot spots that indicate connection issues, cell damage, or shading problems not visible to the naked eye.
Electrical Integration and Compliance
DC Wiring, Inverters, and Grid Interconnection
The inverter topology for a facade BIPV system is among the most consequential electrical design decisions — because the shading patterns on a vertical facade are fundamentally different from those on a tilted rooftop. Progressive shading from floor slabs, varying orientation across the facade, and partial shadows from adjacent structures all create mismatch conditions that a simple string inverter handles poorly.
Based on: SolarTechOnline BIPV Guide 2025; EnergySage inverter comparison data. Distribution reflects typical project mix, not universal recommendation.
For complex facades, module-level power electronics — either power optimizers or microinverters — recover 8–20% of energy that would otherwise be lost to mismatch and partial shading, per documented EnergySage inverter performance analysis. For facade systems, this recovery can mean the difference between a viable and a marginal ROI case. The inverter range at Jia Mao BIPV includes grid-interactive options with smart-inverter functions (reactive power support, frequency ride-through, ramp-rate control) suited to commercial facade installations.
Electrical Codes, Labeling, and Permits
All DC conductors, junction boxes, combiners, and disconnects must be labeled per NEC 690.31 (or regional equivalent) with the maximum system voltage, current, and the warning that PV circuits may remain energized after disconnection. Rapid-shutdown compliance per NEC 690.12 requires that all conductors outside the array boundary (beyond 1 foot of the array edge, or beyond 3 feet from a building) be de-energized to 30V within 30 seconds of rapid-shutdown initiation — a requirement that applies to facade systems and is typically met through module-level electronics or a dedicated rapid-shutdown transmitter/receiver system.
Utility interconnection requires a formal application to the distribution utility, which typically involves providing system single-line diagrams, equipment specifications, and in some jurisdictions a NEM (Net Energy Metering) or export-limitation agreement. Processing times range from 3 to 10 weeks depending on the utility and system size.
Monitoring, Fault Detection, and Performance Metrics
Modern BIPV facade systems should achieve performance ratios of 0.75–0.85. Any sustained reading below 0.70 warrants investigation. Module-level monitoring — provided by optimizer or microinverter platforms — allows automatic detection of underperforming zones through comparison of actual versus predicted output for each panel’s location, orientation, and current irradiance. Fault alerts can be configured to trigger via email or SMS when individual module output drops more than 15% below the fleet average for its zone, enabling same-week response before issues compound. The monitoring and accessories portfolio from Jia Mao BIPV includes commissioning tools and dashboard platforms compatible with major BIM documentation environments.
Maintenance, Cleaning, and Longevity
Cleaning Schedules and Residue Management
Facade BIPV modules accumulate soiling differently from rooftop arrays. Urban particulate matter, bird droppings, and building exhaust deposits adhere to vertical surfaces and are not self-cleaned by light rain as effectively as on tilted roof panels. Documented yield losses from soiling on vertical BIPV facades in urban environments run 3–8% annually — rising to 10–15% near construction sites or heavy-traffic corridors. These are not one-time losses; they compound year-on-year in the absence of regular cleaning.
| Environment Type | Cleaning Frequency | Annual Soiling Loss (uncleaned) | Access Method | Estimated Annual Cleaning Cost |
|---|---|---|---|---|
| Low-density residential area | 1× per year | 3–5% | MEWP or rope access | $800–$2,500 / 500 m² |
| Urban commercial district | 2–3× per year | 6–10% | BMU or suspended platform | $2,500–$6,000 / 500 m² |
| Near highway / industrial zone | 4× per year (quarterly) | 10–15% | Rope access team | $5,000–$12,000 / 500 m² |
| Coastal (salt spray) | 4–6× per year | 8–12% | BMU with deionized water rinse | $6,000–$15,000 / 500 m² |
Sources: Colitetech Solar Maintenance Guide 2025; EnergySavingTrust Solar Maintenance Data. Cost estimates are indicative for US/UK markets and vary with building height, access complexity, and contract structure.
Inspection Routines for Facade Systems
Annual inspection protocols for BIPV facades should cover four domains: electrical (string I-V curve tracing, insulation resistance check, connector visual inspection); glass/panel condition (visual inspection for delamination, edge seal integrity, micro-cracks, discoloration); mounting system (fastener torque spot-checks, corrosion inspection of exposed hardware, gasket condition at panel perimeters); and weatherproofing (perimeter sealant inspection, drainage channel clearance, expansion joint condition). Any thermal imaging anomalies detected in the monthly monitoring data should trigger a targeted field inspection within 30 days — not deferred to the next scheduled annual visit.
Replacement Cycles and Warranty Considerations
The practical reality of BIPV facade replacement is that logistics and access costs often exceed the replacement module cost. A single panel replacement on a 20th-floor facade via rope access team costs $2,000–$5,000 in labor and access — comparable to the panel material cost itself. This economics means that investing in higher-quality modules with better long-term reliability profiles (evidenced by extended damp heat test data, stronger encapsulant specifications, and glass-glass construction) pays back through avoided replacements over the system’s life. Always order 5–8% excess panels at initial procurement and store them properly — a color-matched replacement panel from the original manufacturing batch is worth far more than its unit cost when you need it five years later and the product has been updated.
Cost, ROI, and Financing Options
Capex vs. Opex Considerations
The correct financial model for BIPV facade cladding is not “cost of solar system” — it is “incremental cost over the conventional cladding it replaces.” A high-performance BIPV glass facade costs €200–€625/m² installed (per MET Solar BIPV cost analysis), compared to €120–€300/m² for premium conventional glazed cladding. The BIPV premium — the true incremental Capex — is €80–€325/m², and that is the figure that must be recovered through energy generation value, not the gross system cost.
Energy Yield Modeling and Payback Period
Note: All facade orientations deliver 30–40% less annual yield than an optimally tilted roof array at the same location. Site-specific 3D shading modeling is required for design-phase calculations.
The payback calculation should be structured as: (Net Capex after incentives) ÷ (Annual energy value + Annual avoided cooling/heating cost + Annual operational carbon credit value). For a 500 m² south-facing commercial facade in Southern Europe at €0.18/kWh retail rate, the rough math is: 500 m² × 180 kWh/m² × €0.18 = €16,200/year energy value against a BIPV premium of approximately €120,000 (at €240/m²) — yielding a straightforward payback of 7.4 years before incentives. Layer in the EU’s available grants and carbon pricing mechanisms, and sub-7-year paybacks are achievable for well-sited commercial projects.
Financing, Incentives, and Subsidy Programs
In the US, the federal Investment Tax Credit (ITC) for commercial solar allows businesses to deduct 30% of the total installed cost from federal taxes — with bonus credits available for projects meeting domestic content and energy-community requirements. The DSIRE database is the authoritative resource for state-level rebates, property tax exemptions, and utility incentive programs by location. In the EU, national SEAI (Ireland), BAFA (Germany), and Enova (Norway) programs supplement pan-EU green building financing mechanisms. On the commercial financing side, PACE (Property Assessed Clean Energy) loans, green bonds, and on-bill utility financing all have applicability to facade BIPV depending on jurisdiction and building type.
Case Studies and Real-World Applications
Residential Facade Installations
Case Study — Multi-Story Residential, Northern Europe (New Build): A three-story residential building in Denmark specified BIPV facade cladding using laminated photovoltaic glass on south and west-facing elevations as part of an energy-positive design brief. The BIPV glass replaced conventional composite cladding at a material cost premium of approximately 22%. That premium was 80% offset against the avoided conventional cladding specification. First-year metered production: 9,800 kWh — combined with 14 cm wall insulation and an air-source heat pump, the building delivered 2,100 kWh of net annual export to the grid. The building owner’s verdict: “The payback model made more sense once we stopped comparing the BIPV cost to rooftop panels and started comparing it to what we’d have spent on premium rainscreen cladding anyway.”
Case Study — Colored BIPV Residential Retrofit, Hong Kong (Energy and Buildings, 2025): A modular housing demonstration project retrofitted colored BIPV panels across a visible facade. The efficiency loss from the color treatment was approximately 7% versus uncoated modules — well within the project’s acceptable range — while passing the housing authority’s aesthetic review that had previously rejected conventional black panels. The enabling factor was early engagement between the BIPV supplier and the building’s facade subcontractor, who co-designed the module grid, joint widths, and electrical routing at concept stage. Net energy consumption reduction: 15% across the full building, confirmed by 12 months of post-installation metering data.
Commercial and Multi-Story Buildings
Case Study — Full-Scale BIPV Facade, Berlin (MDPI, 2025): A multi-story commercial/residential mixed-use building in Berlin replaced conventional aluminum curtain wall panels with BIPV glass cladding across south, east, and west-facing facade zones. The south-facing zone delivered 131 kWh/m²/year; east and west zones delivered 67 and 58 kWh/m²/year respectively. Payback period for the south zone — measured against a conventional premium aluminum facade alternative — was calculated at 14 years. The overall system payback incorporating all zones was 17 years: economically viable for a building owner with a 25-year asset horizon and a specific aesthetic brief that rack-mounted panels would never satisfy. The study conclusion: “BIPV economics require zone-by-zone analysis, not a single system-level calculation.”

Commercial BIPV facade installations on multi-story office buildings now achieve performance ratios of 0.78–0.85 with mature curtain-wall integration techniques. The incremental cost over premium conventional glazing — not the gross BIPV cost — is the correct basis for ROI calculation. Photo: Unsplash
Lessons Learned and Best Practices
Across documented BIPV facade projects globally, five lessons recur with remarkable consistency:
- Co-design at concept stage eliminates the majority of problems. Projects where the BIPV supplier engaged with the architect at concept stage — not at procurement — consistently performed better against cost, schedule, and aesthetic targets.
- Zone-by-zone yield modeling is not optional. System-level estimates based on total module count reliably overestimate output. Every facade zone must be modeled independently with shading, temperature, and orientation-specific irradiance.
- Waterproofing failures are the most expensive outcome. In every case that documented remedial work, the root cause was a waterproofing joint not independently verified during installation. Water-test before you cover anything.
- Color-matching requires a written supplier commitment. Every project that specified a colored product without a written color-stability warranty encountered visible mismatch between original and replacement panels within 7 years.
- Module-level monitoring is the best long-term ROI protection. Projects with panel-level monitoring identified underperforming zones within 3–6 months. Projects with only string-level monitoring missed similar issues for 18 months to 3 years.
Conclusion: Recap and Next Steps for Stakeholders
Installing solar panel cladding on an existing facade is one of the highest-value building retrofits available to commercial property owners — but it demands a quality of engineering coordination and specification discipline that standard solar installations do not. The buildings that achieve the best outcomes treat the BIPV facade as what it actually is: a building envelope component that also happens to be a power plant, with all the complexity that dual accountability implies.
The key decision factors to carry forward: assess structural capacity and facade substrate compatibility before specifying any product; model energy yield zone-by-zone with real shading analysis, not datasheet numbers; select the inverter topology based on your specific shading and orientation conditions; design the weatherproofing as a primary engineering activity; and run permit and utility interconnection processes in parallel, not sequentially.
- ☐ Structural capacity not verified by a licensed engineer before specification
- ☐ Wind uplift analysis missing for corner and edge zones at full building height
- ☐ Permit applications started sequentially rather than in parallel
- ☐ Fire classification test not confirmed for the complete assembly (not just the module)
- ☐ Backup wall condition not assessed and remediated before substructure installation
- ☐ Color-stability warranty not obtained in writing before module order
- ☐ Replacement panel stock (5–8% overage) not ordered with initial procurement
- ☐ Module-level monitoring deprioritized as a cost-cutting measure
- ☐ Electrical and glazing scopes placed with separate contractors without clear coordination protocol
For stakeholders who are ready to move from assessment to specification, the most productive next step is a pre-design feasibility study that models energy yield, establishes cost benchmarks, identifies regulatory requirements, and defines the aesthetic parameters — before a module is specified or a contractor is engaged. Manufacturers with deep BIPV facade experience, including Jia Mao BIPV, provide technical consultation during this phase, drawing on deployment data from projects across multiple climate zones and building typologies to help design teams set realistic expectations and avoid the specification errors that become construction-phase change orders.
Resources for further planning: the BIPV installation and design guide covers the complete project workflow; the BIPV building envelope integration guide addresses the coordination between envelope and electrical disciplines in step-by-step format; and the WBDG BIPV resource provides a code and standards overview for US-based projects.
Planning a Solar Facade Cladding Project?
Jia Mao BIPV manufactures laminated BIPV glass, transparent photovoltaic panels, and custom facade cladding systems — with full technical data, real certification documentation, and pre-specification consultation for architects, developers, and building owners.
Explore BIPV Facade Products →


-300x300.jpg)