A contractor in Portland, Oregon recently shared a costly lesson: he measured twelve window openings for a solar glass retrofit using the outside frame dimension instead of the rough opening. The custom BIPV units arrived from the factory eight weeks later, each 18 mm too wide to seat in the frame. Re-order, re-wait, project delayed by three months. A $600 measurement error turned into a $14,000 scheduling loss.
Solar glass windows are not like ordering a replacement pane from the hardware store. They sit at the intersection of glazing engineering, electrical systems, and smart home connectivity — and every stage from initial survey through long-term maintenance carries decision points that can silently compound into expensive mistakes if rushed. This step-by-step tutorial walks you through the entire workflow: assessing your site, measuring correctly, specifying glass performance values, ordering units, running electrical infrastructure, connecting to your smart home platform, commissioning, and maintaining the system for decades.
This guide is written for homeowners undertaking a renovation or new build, builders and general contractors coordinating subcontract scopes, architects and designers specifying glazing systems, and smart home integrators connecting the electrical output to energy management platforms. Technical terms are defined the first time they appear; a full glossary sits at the end of the article.
Assessing Needs and Site Readiness
Define Goals, Energy Targets, and Aesthetic Requirements
Before any tape measure leaves the drawer, write down three numbers: (1) your current annual electricity bill in kWh, (2) the total glazed area on south-, east-, and west-facing elevations, and (3) your acceptable budget for the solar glass premium over standard double-glazing. These three figures determine whether solar glass windows will meaningfully offset your energy use — or whether a rooftop panel array would deliver better ROI from the same budget.
A 2025 field study monitored by the U.S. Department of Energy found that semi-transparent BIPV glazing covering 30 m² of south-facing facade in a Seattle home generated approximately 2,100 kWh/year — roughly 18% of the household’s annual consumption. In Phoenix, the same area on a similar orientation generated 3,600 kWh/year (31% of consumption). Climate and orientation are the two variables that most determine whether your energy target is achievable with the glazed area you have.
Aesthetic requirements matter equally. Solar glass comes in transparency levels from 10% to 60% VLT. A home office where you need clear outward views requires ≥40% VLT; a bathroom or stairwell window where privacy is preferred can use 15–25% VLT with higher power density. Settle on aesthetic requirements before comparing product specs — otherwise you will optimize for the wrong dimension.
Pre-Installation Site Survey
The site survey has four components. First, a solar access audit: use a tool like the NREL PVWatts Calculator to model annual irradiance on each facade. Enter the tilt (wall = 90°), azimuth, and location. This gives you estimated kWh/m²/year for each orientation. Second, a shading analysis: note obstructions (trees, adjacent buildings, overhangs) and their seasonal shadow paths using a sun-path diagram or a tool like SunCalc. Third, a structural inspection: solar glass units are heavier than standard glazing — typically 2–4 kg/m² more — so verify that existing or planned frames and lintels can carry the load. Fourth, an electrical survey: identify where the inverter will be located, how far DC cabling must run, and whether a dedicated sub-panel or additional breaker capacity is needed.
Measuring Window Openings Accurately

Tools and Measurement Methods
You need four tools: a calibrated steel tape measure (not a fabric tape — it stretches), a digital level, a moisture meter, and a notepad with a sketch of each opening. For large or complex openings, a laser distance measurer accurate to ±1 mm eliminates parallax errors.
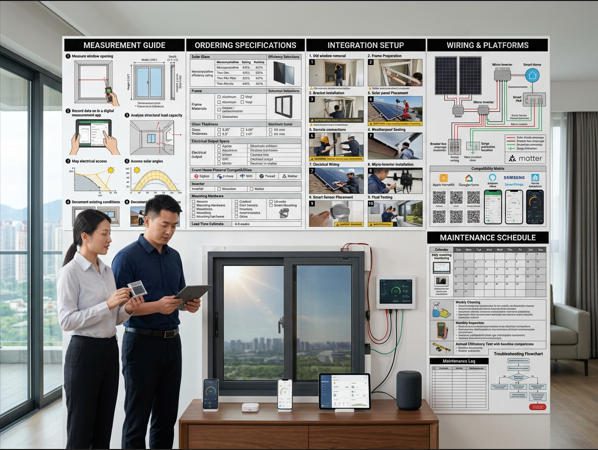
Measure every opening in three places — top, middle, and bottom for width; left, centre, and right for height. Record the smallest dimension in each axis. Custom solar glass units must fit the smallest measurement, not the average. For a replacement installation where an existing window frame will be retained, measure the inside frame dimension (the daylight opening), then subtract the manufacturer’s specified edge clearance (typically 10–15 mm per side) to derive the glass unit size.
For new construction where the unit replaces the frame entirely, measure the rough opening (the structural aperture in the wall), then subtract the frame manufacturer’s specified bite (the amount of glass edge gripped by the frame) plus a 6 mm perimeter clearance for setting blocks and sealant.
Common Measurement Pitfalls
The five most frequent measurement errors, in order of how often they appear in factory return records, are:
- Measuring the outer frame instead of the rough opening. This adds frame material thickness — typically 50–100 mm — to each dimension, producing a unit that cannot be installed.
- Using only one horizontal and one vertical measurement. Out-of-square openings are common in older homes. Always measure all three positions per dimension.
- Ignoring sill slope. Exterior sills are deliberately sloped for drainage. If the factory square-cuts the unit bottom to match a sloped sill, it will not sit flat. Specify sill angle separately.
- Neglecting thermal movement allowance. BIPV glass units expand and contract with temperature. The factory’s installation manual specifies minimum edge clearance for the expected temperature range at your site.
- Not checking squareness with a diagonal measurement. Compare the diagonal distances (corner to corner both ways). If they differ by more than 5 mm, the opening is not square and the frame or lintel may need correction before the window ships.
Selecting Solar Glass Window Specifications
Glass Types and Solar Transmittance
Solar glass windows are not one product — they are a family of glazing technologies with meaningfully different performance profiles. The primary choices are: semi-transparent crystalline silicon cells laminated between glass panes, thin-film (CIGS or CdTe) deposited on glass, and organic photovoltaic layers. Each affects transparency, colour rendering, and power density differently.
Photovoltaic glass windows from specialist BIPV manufacturers like Jia Mao Bipv are available with transparency options from 10% to 60% VLT and power densities of 40–180 W/m², depending on the cell technology and spacing. The company’s ultra-clear tempered glass substrate achieves 91.5% light transmittance before the PV layer is applied — 8% above standard float glass — which means more useful daylight for a given cell density.
| Glass Type | VLT Range | Power Density (W/m²) | U-Factor (W/m²K) | SHGC | Best Application | Relative Cost |
|---|---|---|---|---|---|---|
| Semi-transparent c-Si | 10–40% | 80–160 | 0.9–1.4 | 0.15–0.35 | South facade, living room, study | Medium |
| Thin-film CIGS (glass) | 15–40% | 40–90 | 0.8–1.2 | 0.12–0.28 | Skylight, atrium, curtain wall | Medium |
| Thin-film CdTe (glass) | 10–30% | 50–100 | 0.85–1.3 | 0.10–0.25 | Commercial facade, canopy | Medium |
| Transparent BIPV (OPV/DSSC) | 40–70% | 20–50 | 0.7–1.0 | 0.18–0.40 | Vision glass, bedroom, balcony | High |
| Standard low-E double IGU (reference) | 65–72% | 0 (no PV) | 0.25–0.35 | 0.20–0.30 | Energy-code baseline, no solar output | Low |
Sources: IEA-PVPS SHGC-BIPV Journal 2025, SolarTech Energy-Efficient Windows Guide, manufacturer datasheets.
U-factor, SHGC, and Safety Ratings
The U-factor tells you how well the window insulates against heat loss in winter. For cold climates (U.S. Climate Zones 4–8), the DOE recommends a U-factor ≤0.30. Most BIPV glass units achieve U-factor of 0.8–1.4 W/m²K — worse than premium triple-glazing — because the PV interlayer displaces the argon-gas cavity that provides insulation in a standard IGU. For cold climates, specify a triple-layer BIPV IGU configuration or pair the BIPV outer pane with an inner low-E pane.
SHGC measures solar heat admitted. For hot climates (Zones 1–3), target SHGC ≤0.25. For cold climates where passive solar gain is beneficial, SHGC 0.30–0.45 is more appropriate. BIPV glazing inherently reduces SHGC because the solar cells intercept radiation that would otherwise pass through, making BIPV glass a natural solar-control product.
Safety ratings for glass used in buildings include: tempered safety glass (required for windows below 450 mm from finished floor or within 300 mm of a door), laminated safety glass (required for overhead glazing, rooflight, and skylights), and Class A fire rating (required for openings in fire-rated assemblies). Confirm with your local AHJ which ratings apply to your specific window locations.
Sourcing and Ordering Window Units
Supplier Selection
Supplier selection for BIPV glass windows requires evaluating six dimensions simultaneously: technical capability (can they produce your specific VLT and size combination?), certification documentation (IEC 61215/IEC 61646 for PV performance, EN 12150 or ASTM C1048 for tempered glass safety), warranty structure (separate power, product, and glass warranties — know what each covers), electrical documentation (string layout, Voc/Isc data, connector types), field reference projects in your climate zone, and lead time commitments in writing.
For the glazing specification process itself, the WBDG Windows and Glazing resource provides a comprehensive framework for evaluating energy performance, structural loads, acoustic performance, and maintainability — a useful checklist before finalising supplier conversations. Manufacturers like Jia Mao Bipv offer customizable BIPV glass modules in configurable transparency levels, frame colours, and power outputs, with engineering documentation packages for permit applications.
Lead Times and Warranties
Warrant structure for BIPV glass windows is more complex than a standard window warranty. Ask for four separate warranty documents: (1) Power output warranty — typically guaranteeing ≥90% of rated output at year 10 and ≥80% at year 25; (2) Product workmanship warranty — covering delamination, frame defects, seal failure (10–15 years); (3) Glass safety warranty — covering breakage caused by manufacturing defect rather than impact; and (4) Weatherseal warranty — covering moisture ingress through the glazing assembly (10–20 years). A single bundled warranty document that does not distinguish these categories is a red flag.
Custom vs. Standard Sizes
Standard-size BIPV modules — typically 1,000×1,600 mm, 1,200×2,000 mm, and similar metric grids — are available at significantly lower cost and shorter lead times than custom units. If your window openings can be designed around standard module dimensions, you will typically save 15–30% on unit cost and cut lead time to 4–6 weeks. For retrofit projects where rough openings are fixed, custom sizing is unavoidable; factor the premium and lead time into the project programme from day one.
Handling Electrical and Power Requirements
Power Routing and In-Wall Enclosures
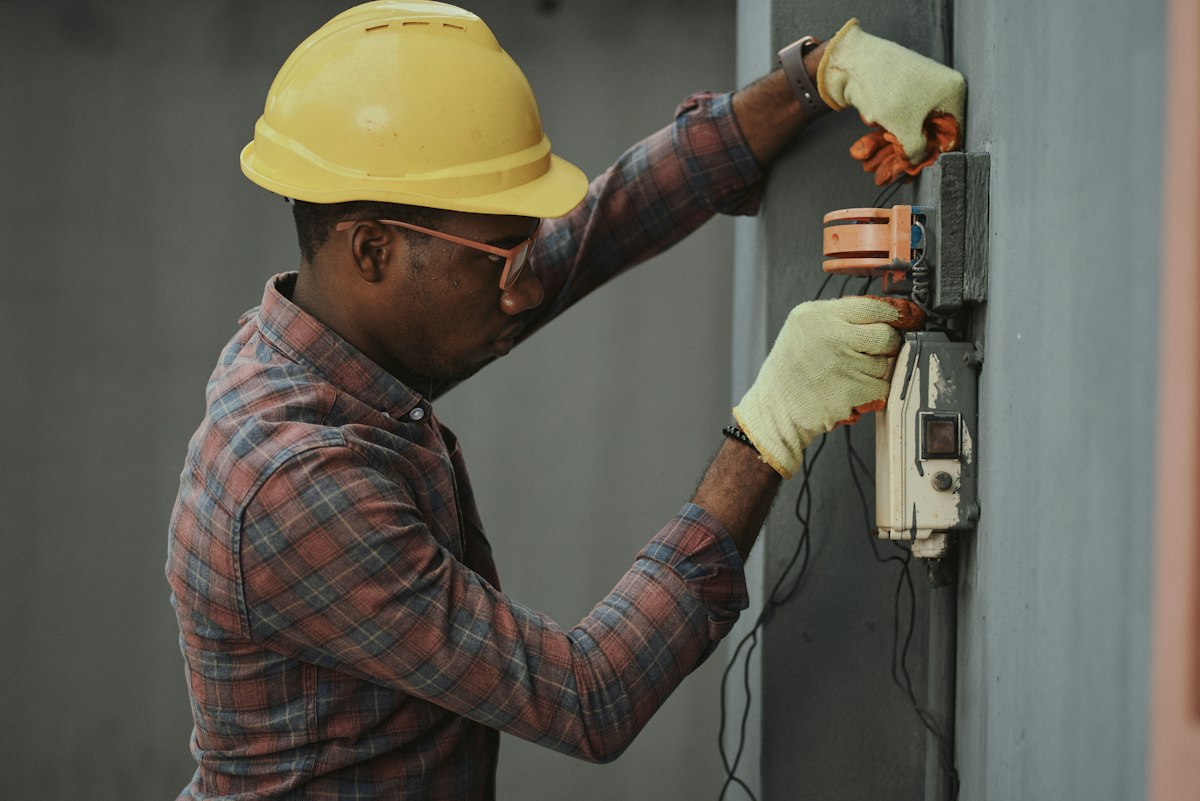
Each solar glass window generates DC electricity that must be routed to an inverter. NEC Article 690 — the U.S. National Electrical Code section governing PV systems — requires all PV source circuit conductors to be listed PV wire (minimum 12 AWG), routed in conduit where inside a building, and labelled with red-on-white “PV SOURCE CIRCUIT” markers at every junction box and penetration.
For multi-window installations, plan the string layout before the walls are closed. Windows on the same orientation and with similar shading can be strung in series to reach the inverter’s MPPT voltage window (typically 200–600V DC for residential microinverters, or 200–1000V for string inverters). Windows on different orientations should be on separate MPPT inputs to prevent the lower-output string from dragging down overall system performance.
In-wall junction boxes for DC wiring must be rated for outdoor or wet-location use (NEMA 3R minimum), mounted in accessible locations (not inside insulated wall cavities), and fitted with labelled terminals. Use conduit fill calculators to ensure the conduit diameter accommodates the number of conductors plus a 25% spare capacity for future additions.
Controller Power Needs
Smart home integration for solar glass windows typically involves three distinct electrical loads: the inverter itself (handled by the PV system), a smart controller or gateway device that monitors production and communicates with the home automation platform (2–10W continuous, usually USB or 12V DC powered), and any motorised blind or electrochromic switching layer in the glass (20–80W per window, switched by relay or Zigbee/Z-Wave module). Budget a dedicated 15A circuit at the inverter location for the inverter AC output, plus a switched outlet at the controller location. Document all load calculations in your permit drawings.
Safety and Code Considerations
The 2023 NEC update to Section 690.12 (Rapid Shutdown) applies to rooftop PV but also to building-integrated PV on facades. For window-integrated systems, verify with your AHJ whether rapid shutdown is required and which listed method — module-level power electronics (MLPEs), a listed hazard control system, or a specific conductor routing configuration — satisfies the requirement for your installation. Always install a DC disconnect switch accessible within sight of the inverter, and label it clearly in both English and with the NEC-required “WARNING: ELECTRIC SHOCK HAZARD” warning language.
Integrating with Smart Home Platforms
Source: Home Assistant community documentation, Apple HomeKit developer portal, author assessment (May 2026).
Supported Ecosystems
The dominant smart home protocols in 2025–2026 are Matter, Zigbee, Z-Wave, and MQTT. Solar glass window systems connect to these ecosystems at two points: the inverter (which reports generation data) and optional smart glass controllers (which manage electrochromic tinting or motorised blinds). Most modern residential inverters from brands like Enphase, SolarEdge, and Fronius expose their data via a local Modbus TCP or REST API, which Home Assistant can poll directly without cloud dependency.
Integration Methods — APIs, Hubs, and Bridges
For Apple HomeKit users, inverter data reaches HomeKit through a bridge: typically a Home Assistant or Homebridge instance running on a local server (Raspberry Pi, NUC, or Docker container) that translates the inverter’s Modbus or REST API into HomeKit-compatible accessory data. The result is a native Energy tile in the Home app showing real-time production, consumption, and grid export. For Google Home and Alexa, similar bridge configurations work via Matter over Wi-Fi, allowing voice commands like “Hey Google, show solar production” to pull current wattage from the inverter API.
If the solar glass windows include an electrochromic tinting layer (glass that changes opacity on command), integration is typically through a dedicated smart glass controller with Zigbee, Z-Wave, or RS-485 output. These controllers map the glass opacity to a “brightness” entity in Home Assistant or a “cover” entity in HomeKit, enabling automations like: “At 2 pm on south-facing windows, set tint to 40% when outdoor temperature exceeds 32°C.”
Network and Device Interoperability
IP Addressing, VLANs, and QoS
Solar glass window controllers, inverter gateways, and smart home hubs are IoT devices — and IoT devices are notoriously targeted by network intrusion attempts. Assign every solar and smart glass device to a dedicated VLAN separate from your primary home network. The XDA Developers IoT VLAN guide recommends allowing only the hub (e.g., Home Assistant server) to initiate connections into the IoT VLAN — IoT devices should not be able to reach your main network or the internet without proxying through the hub.
Assign static IP addresses to every solar and smart glass device to prevent DHCP lease expiry causing automation failures. Label each device in your router’s DHCP reservation table with a descriptive name (e.g., “inverter-south-facade,” “smart-glass-ctrl-bedroom-01”). Enable QoS rules that prioritise Modbus TCP and MQTT traffic from solar devices over low-priority background traffic like software updates.
Security Best Practices
Change all default device passwords immediately upon installation — inverter gateways frequently ship with passwords printed on the unit label, which are publicly indexed in manufacturer documentation. Enable WPA3 encryption on the IoT SSID if your access point supports it. Disable UPnP on your router. Schedule automated firmware updates for the hub and all connected devices. The Harvard University IoT security best practices guide recommends reviewing all device network permissions every 90 days — a calendar reminder costs nothing, and discovering an unexpected outbound connection before it causes damage is significantly cheaper than recovering from one.
Installation Best Practices and Safety
▶ Practical walkthrough of smart glass wiring: extending cables, hiding conduit, calculating power consumption, and connecting control options. (Source: YouTube)
Cutting, Sealing, and Glazing Steps
BIPV glass units should never be cut in the field. Unlike standard glass, the PV interlayer contains wiring, busbars, and encapsulant that will be irreparably damaged by site cutting. All sizing must be finalised before the order is placed. If a unit arrives undersized or damaged, return it to the manufacturer — attempting to adapt it with adhesive, filler, or edge extensions voids both the product and the power warranty.
The glazing sequence for a solar glass window is: (1) Install setting blocks at the sill in the prescribed locations (never at corners — this creates edge-stress concentration). (2) Bed the frame in compatible structural silicone at the perimeter, following the manufacturer’s joint-dimension specification. (3) Place the BIPV unit, ensuring the electrical exit cable emerges at the pre-planned position. (4) Insert face-glazing beads or pressure-plate caps. (5) Apply weatherseal backer rod and neutral-cure silicone (never acetoxy/acetic-acid-curing silicone — the acid off-gas corrodes the electrical connectors inside the glazing edge). (6) Route the exit cable into the pre-installed conduit immediately, sealing the cable entry point with a listed waterproof cable gland rated for the cable diameter.
Electrical Connections and Labelling
Connect the PV string wiring using the manufacturer’s specified connector type (typically MC4 or a proprietary waterproof plug). Do not mix connector brands — MC4-compatible connectors from different manufacturers may pass a pull test but can arc internally under load. NEC 690.33 requires all PV connectors to be polarised, rated for the system voltage and current, and listed for outdoor use. Label every junction box, conduit segment, and disconnect with the required NEC markers before the installation is inspected.
Post-Install Verification
Before energising the system, perform these four checks: (1) Continuity test on every string — confirm open-circuit voltage (Voc) at the inverter input matches the expected value calculated from the number of modules in series multiplied by single-module Voc. (2) Insulation resistance test between each conductor and earth (≥1 MΩ at 500V DC per IEC 62446-1). (3) Visual inspection of all sealant joints — no voids, bridging, or three-sided adhesion. (4) Weatherseal water test — spray the installed window from outside at 208 L/hr/m² for 15 minutes (per ASTM E331) and inspect for any interior moisture.
Testing, Calibration, and Commissioning

Performance Testing
Commission the PV system on a clear-sky day with the reference irradiance recorded (ideally using a calibrated pyranometer, or alternatively from a nearby weather station). Record open-circuit voltage, short-circuit current (Isc), and measured DC power for each string at the inverter input. Compare against manufacturer STC-rated values, corrected for measured irradiance and measured module temperature using the published temperature coefficient. A string producing less than 90% of corrected expected output indicates a wiring error, shading issue, or damaged unit.
Smart Integration Tests
After the PV system is producing power, verify the smart home integration in sequence. First, confirm the inverter’s local API is reachable from the hub’s IP address. Second, confirm the hub is correctly parsing power generation data — compare the hub’s displayed wattage against the inverter’s front-panel display or app simultaneously. Third, test automation triggers: create a test automation that sends a notification when solar production exceeds 500W, wait for a bright-sky period, and confirm the notification fires correctly. Fourth, if electrochromic glass is integrated, run each tint level (0%, 25%, 50%, 75%, 100%) from the hub and confirm the glass responds within the manufacturer’s specified transition time (typically 2–5 minutes for full range). Document any latency deviations for the maintenance record.
Documentation and Handover
| Document | Contents | Who Prepares | Retained By |
|---|---|---|---|
| As-built drawings | String layout, conduit routes, junction box locations, disconnect positions | Electrical contractor | Owner + AHJ file |
| Commissioning report | Measured Voc, Isc, DC power per string; insulation resistance; irradiance at test time | Installer / EPC | Owner + warranty file |
| Glazing certification pack | Unit serial numbers, IEC/UL certs, SHGC/U-factor test reports, safety-glass classification | Glass supplier | Owner + building permit file |
| Smart home config backup | Hub configuration file, automation YAML/JSON, device IP list, SSID/password vault entry | Smart home integrator / owner | Owner (offline encrypted backup) |
| Warranty registry | Registered product, power, glass, and weatherseal warranties with contact details | Owner | Owner |
| Maintenance schedule | Cleaning frequency, inspection checklist, inverter filter service interval, hub update policy | Installer | Owner |
Maintenance, Troubleshooting, and Long-Term Considerations
Dust, pollen, bird droppings, and mineral deposits on the glass surface reduce irradiance reaching cells
Seasonal changes in sun angle, new trees or structures, and blind/curtain deployment can create new shading losses
Loose connectors, corroded terminals, or failed bypass diodes in individual cells
Natural annual output decline of 0.25–0.7%/yr; above-normal degradation indicates encapsulant or busbar issue
MPPT mis-configuration, firmware bugs, or communication failure causing inverter to operate below peak efficiency
Source: Enphase troubleshooting data, Fluke PV diagnostics guide, author analysis.
Routine Maintenance
Clean the glass surface every 6–8 weeks in areas with normal urban dust levels; every 3–4 weeks in coastal, industrial, or agricultural environments where soiling is heavier. Use deionised or demineralised water with a soft squeegee or microfibre applicator — tap water leaves calcium deposits that reduce VLT and cell output by up to 12% over a season without visible cloudiness. Never use abrasive pads, solvents, or acid-based cleaners — these attack the PV encapsulant layer and void the product warranty.
Annually: inspect all weatherseal joints for cracking or separation; inspect visible cable runs and conduit for mechanical damage; check the inverter air filter (if present) for blockage; run a full string Voc measurement at the inverter input on a clear day and compare against the original commissioning baseline; review the smart home dashboard for any strings running more than 5% below their expected seasonal output. If your smart home hub has not flagged any alerts, that is reassuring — but it is not a substitute for the annual baseline check, as gradual degradation falls below alert thresholds.
Common Issues and Fixes
| Symptom | Likely Cause | Diagnosis Step | Fix |
|---|---|---|---|
| One string 20–40% below others on a clear day | Single panel disconnected or shaded | Check Voc per string at combiner box; walk the window line for new obstructions | Re-seat MC4 connectors; trim obstruction; replace damaged unit |
| All strings 10–15% below seasonal baseline | Dirty glass surface | Compare post-cleaning output against pre-cleaning reading | Clean with deionised water and squeegee; implement regular cleaning schedule |
| Inverter showing AC fault / grid disconnect | Grid voltage out of tolerance; islanding protection trip | Check grid voltage at AC disconnect; review inverter event log | Contact utility if grid voltage is the cause; update inverter firmware if known bug |
| Smart glass not changing tint on command | Controller offline; Zigbee/Z-Wave network gap | Ping controller IP from hub; check signal strength in hub diagnostics | Reboot controller; add Zigbee repeater between hub and glass controller |
| Moisture condensation inside glazing edge | IGU seal failure or glazing compound crack | Visual inspection of perimeter sealant; thermal imaging to identify cold-bridge path | Re-seal perimeter with compatible silicone; if IGU seal failed, replace unit under warranty |
Future-Proofing and Upgrades
The smart home landscape evolves faster than the glazing system. Plan your integration layer to be hardware-agnostic: use an open-protocol hub (Home Assistant is the current gold standard for longevity and community support) rather than a proprietary manufacturer app that may be discontinued. Store inverter communication credentials and API documentation offline — manufacturer cloud services have closed with no notice in several high-profile cases since 2020.
On the glazing side, leave capacity in your electrical conduit and sub-panel for additional strings when you renovate adjacent window openings in the future. The cost of running slightly oversized conduit during the initial installation is trivial compared to retrofitting new conduit through finished walls five years later. Comparing transparent solar panel options for future window openings is easier when you already have the conduit infrastructure in place.
From First Measurement to Long-Term Performance

The workflow from first measurement to long-term maintenance is not complicated, but it is unforgiving of skipped steps. Measure the rough opening in three positions per dimension. Order custom units 8–12 weeks before you need them on site. Specify U-factor, SHGC, VLT, and safety glass classification before asking for a price. Route DC wiring in listed conduit before walls are closed. Isolate solar devices on a dedicated VLAN. Commission with a measured baseline — not just a glance at the inverter screen. And build your maintenance cadence into the home automation platform so it reminds you when cleaning and inspections are due.
When these steps are followed in sequence, solar glass windows deliver on their dual promise: meaningful on-site energy generation (1,500–3,600 kWh/year per 30 m² south-facing facade, depending on climate) and seamless smart home integration that makes the system visible, manageable, and genuinely useful rather than a black-box appliance.
Ready to Specify Your Solar Glass Window System?
Whether you are planning a new build, a retrofit, or a commercial glazing project, Jia Mao Bipv provides custom BIPV glass units — from fully opaque solar modules to 60% VLT transparent architectural glazing — with complete engineering documentation, IEC certification packs, and 25-year power warranties. Request project-specific data on VLT, power density, U-factor, and SHGC for your opening dimensions.
Explore BIPV Glass Window Solutions →Glossary of Key Terms
Frequently Asked Questions
Source: Coulee Energy BIPV lead time data; Jia Mao Bipv custom panel lead time guide.
For BIPV glass specification support, Jia Mao Bipv’s certification and warranty verification guide walks through how to read and validate documentation before committing to an order.




-300x300.jpg)