
Introduction: Two Paths, One Goal
Solar siding — the integration of photovoltaic panels directly into a building’s vertical wall surface — sits at the intersection of construction management, electrical engineering, and code compliance. It is not the same decision as adding rack-mounted panels to a flat roof. When a panel becomes part of the building envelope, the stakes for correct installation are significantly higher.
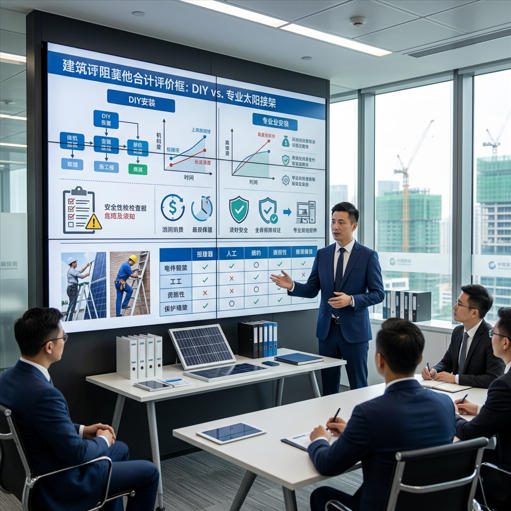
This guide compares the two main installation paths available to commercial building owners and developers: a self-managed DIY approach that leverages in-house or subcontracted labor without a turnkey solar EPC firm, and a full professional installation managed by a certified solar contractor or BIPV specialist. Neither path is universally superior. The right choice depends on your site conditions, internal capabilities, budget tolerance, and — critically — how the installation affects product and workmanship warranties.
Throughout this guide, we reference real product specifications from Jia Mao BIPV, a solar building integration supplier offering customizable BIPV modules — including transparent facade glass, solar roof tiles, and wall cladding systems — with installations documented across commercial and institutional projects. Their installation requirements and warranty conditions provide a practical, grounded reference for the decision framework below.
What Is Solar Siding and How It Works
Definition and Core Components
Solar siding — also referred to as BIPV (Building-Integrated Photovoltaics) wall cladding or solar facade panels — is a system where photovoltaic modules replace or supplement conventional exterior wall cladding material. Unlike rooftop solar arrays bolted onto existing surfaces, solar siding modules serve a dual function: they are simultaneously a structural weather barrier and an electricity generator.
A typical solar siding system consists of four core components:
- PV laminate (the panel itself): Monocrystalline silicon cells encapsulated between two layers of glass or between glass and a backsheet. Efficiency ratings for commercial-grade modules typically range from 18–22% at STC (Standard Test Conditions: 1,000 W/m², 25°C cell temperature, AM 1.5 spectrum).
- Mounting substructure: Aluminum rail or bracket system anchored to the structural wall, creating a ventilated cavity behind the panel — critical for thermal management and longevity.
- Electrical balance of system (BOS): DC wiring, connectors (typically MC4-type), string combiners, inverter (converts DC to usable AC), and monitoring hardware.
- Sealing and weatherproofing layer: Flashings, gaskets, and sealants that ensure the wall assembly remains watertight despite the presence of panel frames and cable penetrations.

Energy Savings and Aesthetic Appeal
On a south-facing commercial wall of 500 m² (not uncommon on a mid-rise building), an opaque BIPV cladding at 150 W/m² density could host approximately 75 kWp of DC capacity. At a vertical-surface yield factor of around 750–900 kWh/kWp per year (mid-latitude, south-facing), that translates to 56,000–67,500 kWh annually — enough to offset the HVAC and lighting load of a significant portion of the floor area below it.
Beyond energy: solar siding eliminates the need for separate cladding material procurement, supports LEED and BREEAM credit submissions, and — increasingly — serves as a visible ESG signal that tenants and investors evaluate during lease or acquisition decisions. For projects where conventional curtain wall or premium rainscreen materials are already budgeted at $200–$350/m², the incremental premium for BIPV siding narrows considerably.
DIY vs. Professional Installation: Weighing the Options
The decision between self-managed installation and a full-service professional contract is not primarily a cost question — it’s a risk allocation question. Cost is visible upfront. Risk manifests over years through failed inspections, voided warranties, performance shortfalls, and liability exposure.
⚒️ DIY / Self-Managed Installation
- Lower upfront cost: typically $1.40–$1.80/W DC all-in for commercial
- Greater control over subcontractor selection and scheduling
- Suitable for teams with existing envelope and electrical trade expertise
- Faster iteration on design changes during construction
- Requires owner or GC to coordinate envelope + electrical scopes directly
- Risk of warranty void if manufacturer specs not followed exactly
- Permit and inspection complexity falls on the owner’s team
- No single-point accountability if performance shortfalls occur
🏗️ Professional / Full-Service Installation
- Single-point accountability from design through commissioning
- Permit procurement, engineering stamps, inspections managed for you
- Product, workmanship, and performance warranties remain intact
- Certified electricians handle NEC 690 compliance and rapid shutdown
- Higher upfront cost: $1.83–$3.50/W DC before incentives
- Less direct control over daily schedule and subcontractor selection
- Contractor availability can extend project timeline
- Price variation is significant — quality of proposals requires due diligence
Source: Commercial installation cost ranges per Pure Power Solutions (2025) e GreenLancer (2026 Commercial Solar Guide).
Assessing Suitability: Surface, Climate, and Code
Mounting Surface Types: Roof vs. Wall
Solar siding specifically targets vertical wall surfaces, which behave very differently from roof-mounted arrays. The table below outlines how the two compare across key installation decision factors.
| Fator | Roof-Mounted PV | Solar Siding (Wall BIPV) | Impact on Install Approach |
|---|---|---|---|
| Annual yield per kWp | 900–1,400 kWh/kWp (tilted South) | 550–950 kWh/kWp (South-facing vertical) | Wall yield is 35–45% lower — requires larger area or adjusted ROI model |
| Structural load | 8–14 kg/m² (rack + panel) | 18–30 kg/m² (glass-glass BIPV + subframe) | Structural engineer sign-off often required for walls; critical for DIY path |
| Waterproofing risk | Roof flashing details | All four edges + cable penetrations | Wall installations have more water-entry points; envelope expertise required |
| Permit category | Typically electrical + building | Electrical + building + potentially structural | DIY teams may underestimate permitting scope for wall systems |
| Maintenance access | Roof walk + safety anchors | Scaffolding, BMU, or rope access | Access cost on walls often exceeds module cost for replacement; plan early |
| Fire code interaction | Setback rules (IFC) | NFPA 285 / EN 13501-1 assembly test may apply | Wall fire propagation requirements can affect module selection and framing |
Local Codes, Standards, and Permitting Considerations
Every solar siding project in the United States must comply with NEC Article 690 (Solar Photovoltaic Systems), which governs wiring methods, disconnects, rapid-shutdown requirements, labeling, and ground-fault protection. For BIPV wall systems specifically, the 2023 NEC update introduced stricter arc-fault circuit interrupter (AFCI) requirements for DC circuits over 80 volts that run through or inside building structures — a condition that wall-mounted PV wiring almost always meets.
Beyond the NEC, wall-integrated systems commonly trigger additional review under:
- IBC (International Building Code): Structural anchorage loads, seismic zone requirements, and glazing safety classifications.
- NFPA 285: Fire propagation testing for exterior wall assemblies in Type I–III construction (most commercial buildings). Individual module fire certifications do not substitute for assembly-level test compliance.
- IEC 61215 / IEC 61730: International performance and safety standards for PV modules. Most commercial banks and insurance underwriters require these for financed projects. IEC 61215 verifies durability and performance; IEC 61730 verifies electrical and mechanical safety.
- State-specific requirements: California’s Title 24 and 2025 Building Energy Efficiency Standards, for example, include specific solar provisions for new commercial construction.
Site and Climate Assessment Checklist
Before committing to either installation path, your team should complete a structured site assessment. Below is a condensed version of the pre-installation checklist used on commercial BIPV siding projects:
| Check Item | What to Evaluate | Who Does It | Relevant for DIY? |
|---|---|---|---|
| Wall orientation & solar access | South/East/West exposure, shading from adjacent structures, trees, HVAC equipment | Energy consultant or solar designer | Both |
| Structural capacity | Can wall accept 18–30 kg/m² additional dead load + wind pressure up to 2.4 kPa? | Structural engineer (licensed) | Both — required |
| Existing weatherproofing | Condition of WRB (weather-resistant barrier), flashing, window heads, and caulk joints | Envelope consultant or experienced GC | Critical for DIY |
| Electrical service capacity | Available panel capacity for interconnection; utility pre-application for net metering or export | Licensed electrician | Both |
| Climate stress factors | Coastal salt mist, freeze-thaw cycles, hail zone, high wind region (ASCE 7) | Solar designer + structural engineer | DIY teams often miss this |
| Fire assembly classification | Does the wall assembly require NFPA 285 compliance? Is the building Type I–III construction? | Architect / code consultant | Critical for DIY |
Required Tools, Materials, and Costs

Essential Tools and Equipment
Wall-mounted solar panel installation differs from a standard rooftop job because you are working on vertical surfaces, often at height, with a building material (not just a power device). The minimum tool set for a commercial project includes:
| Tool / Equipment Category | Specific Items | DIY Availability | Notes |
|---|---|---|---|
| Layout & measurement | Laser level, chalk line, digital inclinometer, tape measure | Rent / Buy | Precision critical — module grid must align with architectural facade grid |
| Drilling & anchoring | Rotary hammer drill, carbide masonry bits, torque wrench (to spec), setting tool for anchors | Rent / Buy | Pull-out strength must match engineering specs; torque records required |
| Panel handling | Glass-handling suction cups (min. 150 kg capacity), padded panel cradles, anti-scratch film | Rent from glazing suppliers | BIPV glass panels (10–12 mm tempered) require proper glass handling protocol to avoid edge damage |
| Electrical | MC4 crimping tools, string tester, clamp meter, insulation resistance tester (500V / 1000V), flashlight | Buy/Rent | IEC 62446-1 commissioning requires documented string IV curves or resistance measurements |
| Fall protection | Certified harnesses, lanyards, anchor systems, scaffolding or aerial lift (MEWP) | Rent scaffolding; hire certified rigging | OSHA 1926.502 (fall protection) applies; non-negotiable on any commercial project |
| Sealing & weatherproofing | Sealant gun, adhesive application tools, surface prep wipes, primer applicators | Buy | Sealant compatibility with module frame and substrate material must be verified by manufacturer |
Materials Overview and Typical Price Ranges
The materials cost structure for solar siding skews heavily toward modules and mounting — together they typically represent over 55% of the total installed cost. Here is a working breakdown for a mid-scale commercial project (100–500 kWp BIPV wall system):
🥧 Typical Installed Cost Distribution — Commercial Solar Siding / BIPV Wall System
Monocrystalline panels, glass-glass laminates, or custom BIPV cladding
Aluminum rails, brackets, clips, fasteners, thermal breaks
Inverter, wiring, connectors, combiner boxes, monitoring, protection devices
Licensed electrician for wiring, connection, and commissioning
Substructure installation, sealing, waterproofing, access equipment
Engineering, permits, inspections, commissioning, project management
Indicative only. Custom BIPV glass orders, high-rise access, and complex fire-assembly requirements can shift module and civil/labor proportions significantly. Based on U.S. commercial BIPV project data (2024–2025).
Planning and Permits: Code Compliance and Approvals
Permit Requirements and Timelines
Permit timelines are one of the most consistently underestimated factors in solar siding projects. According to data aggregated by Solar Permit Solutions, U.S. states average 25–64 days from submission to permit issuance — and that window begins after a complete, acceptable submission package is received.
For commercial wall-integrated systems, submissions that routinely trigger resubmit cycles include:
- Missing structural calculations for wall anchorage under combined wind uplift and dead loads
- Incomplete single-line electrical diagrams — especially rapid-shutdown labeling under NEC 690.56
- No fire propagation documentation for wall assemblies in Type I–III buildings
- Omitted utility pre-application for interconnection (separately required from the building permit)
| Permit Package Item | Required For | DIY Teams: Common Gap | Pro Installers: Typical Approach |
|---|---|---|---|
| Structural calculations (PE-stamped) | Building permit | Often skipped; causes resubmit or stop-work | Included in contractor scope |
| Single-line electrical diagram | Electrical permit | Sometimes incorrect for BIPV wall configurations | Standard deliverable from EPC team |
| Equipment cut sheets (modules, inverter, rapid shutdown) | Both permits | May use placeholder specs before equipment confirmed | Submitted with manufacturer-specific documentation |
| Fire assembly compliance evidence | Building permit (Type I–III buildings) | Frequently omitted entirely by DIY teams | Coordinated with project architect and AHJ |
| Utility interconnection pre-application | Utility / grid operator | Often initiated too late; delays energization by weeks | Submitted in parallel with design phase |
Impact on Warranties and Certifications
This is the section most B2B buyers read too late. For commercial solar siding products — including those from Jia Mao BIPV’s transparent facade glass line and other certified modules — warranty coverage typically requires:
- Installation per manufacturer’s published specifications, including torque values, ventilation gap dimensions, sealant compatibility, and cable routing clearances
- Use of certified electrical components (inverters, disconnects, and protection devices from the manufacturer’s approved list or equivalents)
- Final commissioning records including string-level verification, IR scan (where required), and as-built drawings that match installed configuration
Prep Work: Measurements, Surfaces, and Weather Readiness
Accurate Measurements and Layout Planning
Solar siding layout planning is not a task for a tape measure and a sketch. On a commercial facade, every millimeter of module-grid misalignment compounds across dozens of panels into visible aesthetic problems and potential edge-seal failures at panel intersections. Proper layout planning requires:
- A calibrated laser level to establish a true horizontal baseline across the entire wall plane
- Panel grid drawings coordinated with window openings, expansion joints, utility penetrations, and mechanical louvers — done before anchor drilling begins
- A module tolerance review: most commercial BIPV glass panels have dimensional tolerances of ±2–3 mm; the substructure must accommodate these without creating gaps or overloads at the mounting clips
- Electrical routing map confirmed before any holes are drilled in the WRB or insulation layers
Surface Preparation and Weather Considerations
The existing wall surface must be sound before any BIPV cladding is applied. A commonly overlooked step on DIY-managed projects is a systematic inspection of the substrate: loose mortar joints, delaminating EIFS, rusted embeds, or compromised WRB sections behind the new cladding will continue to degrade after installation — invisible, inaccessible, and expensive to fix.
Weather windows matter too. Sealant application temperatures, concrete anchor cure times, and electrical connector insertion (MC4 connections must be dry and clean) all have defined environmental constraints. Most solar siding manufacturers specify installation only at ambient temperatures between 5°C and 40°C with relative humidity under 80%.
Step-by-Step DIY Installation (Solar Siding)

Sequential Installation Steps
The following sequence reflects best practice for a commercial solar siding installation on a prepared masonry or concrete-frame wall. Each step should be completed and documented before the next begins.
Wall Inspection and Substrate Confirmation
Before any marking or drilling, conduct a systematic inspection of the wall surface: tap test for hollow areas, check anchor pull-out values at representative locations, and confirm that waterproofing details at windows and penetrations are sound. Document with photographs. Any deficiencies must be repaired before the substructure goes up — not after panels are installed.
Layout Marking: Horizontal Baseline and Anchor Grid
Establish a true horizontal baseline with a laser level at the desired bottom edge of the first row of panels. Mark the substructure anchor grid based on the manufacturer’s specified spacing — typically 600–800 mm horizontally and 400–600 mm vertically for standard BIPV wall rails. Verify that no anchor locations conflict with structural elements, service penetrations, or window flashings.
Install Mounting Brackets and Rail System
Drill anchor holes to the specified diameter and depth (manufacturer’s data sheet required). Install wall brackets using the specified anchor type and torque to the engineered specification — torque wrench with recorded values. Then attach horizontal or vertical rails to brackets, checking alignment continuously. Thermal break pads between bracket and rail must be installed where specified to prevent condensation and thermal bridging.
Pre-Route Electrical Conduit and Cable Paths
Before any panels go up, install all conduit runs, junction boxes, and cable trays. Wall penetrations for conduit must be sealed per the waterproofing specification — a step that is much easier before the panels are in place. Confirm that all cable paths maintain the required clearance from the back of the panel (typically 25–50 mm for ventilation) and that no cables will be pinched at mounting clips during panel installation.
Panel Installation: Bottom Row First, Upward
Install panels starting from the bottom-left corner and work upward and across. Use properly rated suction cups and a minimum two-person lift for glass-glass modules over 20 kg. Engage panel clips to the rail system following the manufacturer’s engagement sequence — avoid using mechanical force to correct misaligned clips as this can crack glass edges. Verify that each panel’s junction box is oriented per the wiring plan before finalizing clip engagement.
DC Wiring and String Connection (Licensed Electrician Required)
A licensed electrician must perform all DC wiring work in jurisdictions governed by the NEC or equivalent. This is not an optional step for DIY-managed projects — it is a code requirement. Connect module leads to strings per the approved single-line diagram, ensuring open-circuit voltage (Voc) at the coldest expected temperature stays within inverter DC input limits. All MC4 connections must be made with the correct crimping tool and tested for continuity and polarity before proceeding.
Rapid Shutdown System Installation and Labeling
NEC 690.12 requires rapid shutdown systems for PV arrays on or within buildings. Install and test the rapid shutdown devices (module-level or array-level, per your system design) and affix all required labels at the main service panel, AC disconnect, rapid shutdown initiator, and on the roof/wall array itself. Missing labels are the single most common reason for failed inspections on commercial solar projects.
Quality Assurance: Visual, Electrical, and Envelope Checks
Before closing any access panels or applying final sealants, conduct a systematic QA check. Visually inspect every panel for micro-cracks, edge chip, or connector damage. Verify string polarity and open-circuit voltage for each string. Apply a water test at critical envelope penetration points (window heads, conduit entries, rail-end flashings). Photograph everything and record in the commissioning log — this documentation protects warranty coverage and accelerates inspection approval.
What to Expect from a Professional Installation
Typical Process and Project Timeline
A professional solar siding installation by a certified contractor or BIPV-specialized EPC firm follows a structured process that integrates engineering, permitting, procurement, construction, and commissioning under a single scope of responsibility. For a typical commercial BIPV wall project (50–200 kWp), the timeline from signed contract to grid-energization typically runs 4–7 months.
| Phase | Duration (Typical) | Key Deliverables | Owner Involvement |
|---|---|---|---|
| Design & Engineering | 3–6 weeks | Structural calcs, electrical single-line, layout drawings, fire assembly documentation | Review and approve design package |
| Permit Submission & Approval | 25–64 days (varies by jurisdiction) | Stamped permit set, AHJ approval, utility interconnection application | Provide site access for inspections |
| Equipment Procurement | 6–16 weeks (BIPV custom glass: longer) | Modules, inverter, mounting, BOS delivered to site | Confirm storage area; track delivery schedule |
| Instalação | 2–8 weeks (scale-dependent) | Substructure, panels, wiring, rapid shutdown, labeling | Regular site walks; document progress |
| Commissioning & Inspection | 1–3 weeks | String testing, inverter startup, AHJ final inspection, utility interconnection energization | Attend commissioning; receive handover documentation |
Inspections, Commissioning, and Performance Testing
A professional EPC contractor should deliver a commissioning package aligned with IEC 62446-1 — the international standard that defines documentation requirements for grid-connected PV system handover. This includes string-level electrical test records, as-built drawings, equipment datasheets, warranty registration confirmations, and a maintenance plan.
For BIPV siding systems from suppliers like Jia Mao BIPV, the commissioning package should additionally include the manufacturer’s installation compliance certificate (confirming installation was completed per their specification) — this document is what validates the product warranty going forward. For reference, Jia Mao BIPV’s BIPV installation and design guide outlines the commissioning checkpoints required to maintain warranty coverage on their facade module range.
📺 Watch: Solar Siding Installation — Professional Process Walkthrough
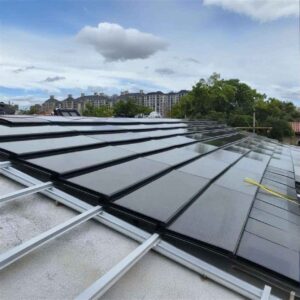
Video: Mitrex Solar Siding — Installation on an existing wall using an aluminum framing system. This footage illustrates the substructure-first, panel-second sequence that applies to most commercial BIPV wall systems.
Maintenance, Warranties, and Aftercare
Cleaning, Inspection Schedule, and Wear Checks
Solar siding panels face the same soiling and degradation factors as any exterior facade — with the added dimension that soiling directly reduces electricity generation. For a 100 kWp south-facing wall array losing 5% output to soiling, the annual energy penalty is approximately 2,750–4,750 kWh, depending on location. At $0.12/kWh commercial rate, that is $330–$570 per year in avoidable losses — just from cleaning neglect.
| Maintenance Task | Frequency | DIY Feasibility | Performance Impact if Skipped |
|---|---|---|---|
| Panel surface cleaning (deionized water or approved detergent) | 2–4x per year (climate-dependent) | Feasible with proper access equipment | 3–8% output reduction per soiling cycle |
| Visual inspection: chips, delamination, discoloration, cracked glass | Quarterly (visual); bi-annual (detailed) | Yes — document with photos each visit | Undetected cracks can cause moisture ingress and hot spots |
| Sealant and gasket inspection at panel edges and cable entries | Annual | Requires trained eye for sealant failure modes | Water ingress into wall assembly; potential structural damage |
| Electrical: string performance check via monitoring system | Monthly (automated); quarterly (manual verification) | Yes — requires monitoring system set up at commissioning | String faults can reduce output by 10–30% before detection |
| Torque check on mounting hardware (sample basis) | Every 5 years or after seismic / high-wind events | Requires torque wrench and anchor specs | Loose anchors under wind load pose safety risk |
| Professional electrical inspection (thermography + IV curve) | Every 5–10 years (or upon performance anomaly) | Requires licensed electrician with thermography equipment | Identifies degraded cells, connection failures, and early delamination |
Warranty Coverage and Transferring Ownership
Commercial solar siding projects typically carry three overlapping warranty layers:
- Product warranty (module manufacturer): Covers manufacturing defects, delamination, frame corrosion, and junction-box failures. Standard range: 10–15 years. Premium BIPV glass suppliers like Jia Mao BIPV offer up to 25 years on certified module products.
- Performance warranty: Guarantees that panel output will not fall below a threshold — typically ≥80% of rated power at year 25, with ≤0.4% annual degradation for IEC-certified modules. This warranty is the primary financial protection in a commercial generation model.
- Workmanship warranty (installer): Covers installation defects — sealant failures, loose wiring, incorrect torque. Range: 2–10 years, depending on contractor. Professional installers typically offer 5–10 years; DIY self-managed installations have no equivalent coverage unless a third-party inspection report is obtained.
Decision Checklist and Next Steps

Quick Decision Rubric for DIY vs. Professional
🧭 Which Path Is Right for Your Project?
⚒️ DIY / Self-Managed May Work When:
- You have an experienced GC with proven envelope and electrical trade coordination on similar projects
- The wall system is a standard rainscreen configuration (not curtain wall or Type I/II fire-rated assembly)
- System capacity is under 50 kWp and wall area is easily accessible at ground or low height
- Your team has already confirmed permit requirements with the AHJ before committing to this path
- You have obtained the manufacturer’s installation manual and confirmed that your planned execution meets every specification
- Project has no lender or insurer requiring certified installer documentation
🏗️ Professional Installation Is Required When:
- System is on a high-rise or requires scaffold / BMU for access — liability and safety mandate certified teams
- Wall assembly is a curtain wall, NFPA 285-rated system, or Type I/II construction requiring fire compliance documentation
- Project is financed (lender will require certified EPC + commissioning report)
- Owner wants a workmanship warranty in addition to product and performance warranties
- Custom BIPV glass (e.g., transparent facade modules from Jia Mao BIPV) is specified — manufacturer may require certified installer for warranty validation
- Project timeline requires fast permitting, with no budget for resubmission cycles
Questions to Ask Contractors Before Signing
| # | Question to Ask | Why It Matters | Red Flag Answer |
|---|---|---|---|
| 1 | How many commercial BIPV wall systems have you installed in the past 3 years? | Wall BIPV is different from rooftop PV; experience gap shows up in detailing | “We’ve done lots of rooftop — same thing” |
| 2 | Who stamps the structural calculations, and are they included in your scope? | Omitted structural calcs are the #1 cause of permit delays and resubmissions | “We usually let the AHJ tell us if they need it” |
| 3 | What rapid shutdown solution are you specifying, and how does it meet NEC 690.12? | Incorrect rapid shutdown design causes failed inspections and re-work | Vague answer or unfamiliarity with NEC 690.12 requirements |
| 4 | Can you provide the commissioning documentation format you’ll deliver at handover? | IEC 62446-1-aligned handover package is the baseline for warranty protection | “We’ll give you the inverter login and the datasheets” |
| 5 | What is your workmanship warranty period, and what does it explicitly cover? | Poorly defined workmanship warranties are effectively worthless | Oral assurance with no written coverage scope |
📖 Glossary: Key Terms for Solar Siding Projects
The choice between DIY and professional solar siding installation ultimately comes down to three variables: the structural and fire complexity of the wall system, the sophistication of your in-house trade coordination capability, and your risk tolerance with respect to warranties and code compliance.
For straightforward rainscreen-type solar cladding on low- to mid-rise buildings where your team has genuine envelope and electrical trade expertise — and where you have confirmed permit requirements with the AHJ before committing — a self-managed approach is technically viable and can deliver meaningful cost savings. The critical constraint is discipline: every step must be documented, every specification must be followed, and a licensed electrician must handle all DC work.
For high-rise buildings, curtain wall systems, fire-rated assemblies, financed projects, or BIPV glass systems where the manufacturer’s warranty requires certified installation documentation — professional installation is not a preference. It is the logical choice to protect the asset.
In either path, the principle that saves the most money over a 25-year system life is consistent: treat solar siding as an envelope system first and an energy system second. Get the waterproofing right. Document the commissioning. Plan the maintenance access before the scaffolding comes down.
For B2B teams evaluating BIPV wall cladding products — from standard opaque silicon panels to custom transparent glass modules — Jia Mao BIPV offers a range of certified facade-ready products with documented installation specifications, 25-year performance warranties, and technical support during the design phase. Explore the full product range at jmbipvtech.com or review their 10-step BIPV facade design guide to align your installation planning with manufacturer requirements from the start.
Perguntas frequentes
Planning a Commercial Solar Siding Project?
Jia Mao BIPV offers certified BIPV facade modules — including transparent glass panels, opaque wall cladding, and custom-sized laminates — with 25-year performance warranties, IEC certification documentation, and technical support from concept through commissioning.
Request a Technical Consultation →


-300x300.jpg)