- A current roof condition inspection report or verifiable age estimate
- Roof pitch, cardinal orientation, and usable unshaded surface area
- Structural engineer sign-off on dead-load capacity for a solar array
- Underlayment specifications from your roofing contractor — written, not verbal
- Warranty documents from both roofing manufacturer and solar installer
- Proof of installer credentials: licensed, insured, NABCEP-certified where applicable
Understanding Solar-Readiness and Roof Assessment
The phrase “solar-ready roof” carries genuine structural and logistical weight. A roof facing northeast beneath a canopy of oaks, or one with 2×4 rafters on 24-inch centers and no hurricane clips, is not solar-ready regardless of how new the shingles are. Before a single panel is spec’d, the roof must be assessed as a structural system — not just a weather barrier.

Aerial assessment of a residential solar installation: roof pitch, orientation, shading, and structural capacity must all be evaluated before any panel is purchased. Photo: Pexels (Free License).
Aligning Roof Age, Structure, and Solar Goals
One of the most expensive mistakes homeowners make is adding solar to a roof already 15 years into a 20-year lifespan. Removing and reinstalling a 7 kW residential system to re-roof underneath costs between $3,000 and $8,000 in labor alone — entirely avoidable with upfront planning. The industry rule: if your roof has fewer than 10 years of serviceable life remaining, replace it before going solar.
Structural alignment goes further than shingle age. Local building codes typically require residential roofs to sustain a minimum live load of 20 lbs/sq ft, but a standard 40-panel residential array adds 2–4 lbs/sq ft in permanent dead load. In older homes — particularly pre-1980 construction with 2×4 rafters on 24-inch centers — a structural engineering review is not optional. Many jurisdictions now require a stamped structural letter as part of the solar permit package.
Load Considerations and Local Code
Most U.S. jurisdictions require solar installation permits that include electrical schematics, property blueprints, structural information, and detailed roof characteristics. Bypassing this step can invalidate both your roof warranty and your solar panel warranty simultaneously. The SolSmart permitting and inspection guide is a practical reference for what different jurisdictions require.
Roofing Materials for Solar-Ready Systems
Not all roofing materials accept solar mounting equally. Some accommodate standard rack hardware with minimal modification; others require specialized brackets, risk voiding warranties with standard fasteners, or create long-term compatibility issues with solar components. Knowing the differences before material selection — not after installation — saves thousands.
Asphalt Shingles, Metal, Tile Compatibility
Asphalt shingles cover approximately 80% of U.S. residential roofs and represent the path of least resistance for solar. Standard L-bracket lag-bolt mounts penetrate the shingle and deck without specialized hardware, and most major manufacturers have documented protocols for maintaining warranty coverage when a certified installer follows their specifications.
Standing seam metal roofing is the technical gold standard for solar. Seam-clamp mounting attaches to raised seams without any roof penetrations, eliminating the single largest source of solar-related leak risk entirely. Metal roofs routinely last 40–70 years — meaning they will outlast both the first and second solar array installed on them. See DECRA’s solar and metal roofing guide for contractor-level detail.
Concrete and clay tile presents more complexity: tiles must be removed around each mounting point, and fired clay’s brittle nature means walking the roof carries real breakage risk. Specialized tile hooks exist but add cost and require experienced, specifically trained crews.
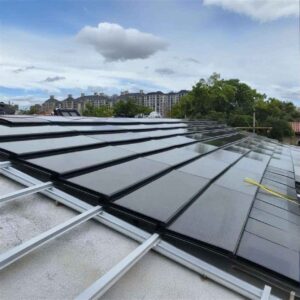
Rack-mounted solar array on a residential roof: material type determines mounting method, penetration risk, and long-term warranty compatibility. Photo: Pexels (Free License).
| Roofing Material | Solar Compatibility | Typical Lifespan | Mounting Method | Penetration Risk | Relative Cost |
|---|---|---|---|---|---|
| Asphalt Shingles | ⭐⭐⭐⭐ High | 20–30 yrs | Lag bolt + step flashing | Medium | $ Lowest |
| Standing Seam Metal | ⭐⭐⭐⭐⭐ Excellent | 40–70 yrs | Seam clamps (zero penetrations) | Very Low | $$$ High |
| Corrugated Metal | ⭐⭐⭐ Moderate | 30–45 yrs | Through-fastener + gasket | Medium | $$ Medium |
| Concrete / Clay Tile | ⭐⭐⭐ Moderate | 40–50+ yrs | Tile hook or removal method | Medium — breakage risk | $$$ High |
| BIPV Solar Tiles (integrated) | ⭐⭐⭐⭐⭐ Native | 25–30+ yrs power | Tile IS the panel — no separate mount | None by design | $$$$ Premium |
| Wood Shake / Slate | ⭐⭐ Low | 20–50 yrs | Specialist crews only | High — fragile | $$$$ |
Durability and Weather Resistance
A solar array is a 25-year commitment. Impact-resistant (Class 4) asphalt shingles qualify for insurance discounts of 15–30% in many states while maintaining full solar-mounting compatibility. In coastal environments, salt spray resistance of roofing fasteners and solar racking must be specified explicitly — standard galvanized hardware can corrode in 8–10 years in marine environments, requiring stainless steel or marine-grade aluminum alternatives.
Underlayment Options for Solar Projects
Underlayment — the membrane between the roof deck and surface material — is the most underappreciated component in any solar-ready roofing discussion. Once panels are installed, the underlayment beneath them is functionally inaccessible for 25 years. Choosing poorly is a mistake with a very long tail.
Peel-and-Stick Membranes vs. Synthetic Underlayment
Self-adhering (peel-and-stick) membranes bond directly to the roof deck, creating a watertight seal around every fastener penetration. When a lag bolt passes through peel-and-stick material, the membrane self-seals against the shaft, dramatically reducing water infiltration probability over the full 25-year system life.
Synthetic (polypropylene or polyester) underlayments offer significant improvements over traditional felt: higher tear resistance, UV tolerance of 6–12 months, lighter weight, and slip-resistant surfaces. However, they do not self-seal around fastener penetrations, making proper flashing technique at each mount point critical.
Hybrid approaches — full peel-and-stick in the solar zone, quality synthetic elsewhere — concentrate the waterproofing premium exactly where long-term risk is greatest. This strategy typically adds only $400–$1,200 to a project while providing 25 years of enhanced protection at the highest-risk areas of the assembly.
Proper underlayment installation is the most critical invisible decision in a solar-ready roofing project — once panels are installed, this layer is inaccessible for 25 years. Photo: Pexels (Free License).
| Underlayment Type | Self-Seals at Penetrations | Relative Cost | UV Tolerance | Best Use Under Solar |
|---|---|---|---|---|
| 15# / 30# Felt | ❌ No | $ Lowest | Days only | Not recommended under solar arrays |
| Synthetic (polypropylene) | ❌ No | $$ Moderate | 6–12 months | Acceptable with superior flashing execution |
| Self-Adhering / Peel-and-Stick SBS | ✅ Yes | $$$ Higher | Protected by roofing material | Best practice — ideal for full solar zone |
| Hybrid (P&S solar zone + synthetic elsewhere) | ✅ In solar zone | $$ Balanced | Good for phased installs | Optimal cost/protection for most projects |
Breathability and Moisture Control
Solar panels create a microclimate beneath them — blocking direct sunlight and reducing wind-driven drying. Vapor-permeable underlayments that allow moisture to diffuse upward without admitting liquid water are preferred in humid climates. Pairing breathable underlayment with adequate attic airflow (NRCA-recommended 1:150 or 1:300 net free vent area ratios) prevents gradual moisture accumulation that causes premature deck deterioration.
Roofing System Configurations with Solar
Roof-Integrated vs. Rack-Mounted Setups
Rack-mounted (BAPV) is the dominant global configuration: conventional solar panels fasten to aluminum rails anchored to the roof structure. Benefits include lower hardware costs, easier individual panel replacement, and natural ventilation in the 3–6 inch air gap that keeps panel temperatures lower — improving output efficiency by 3–5%.
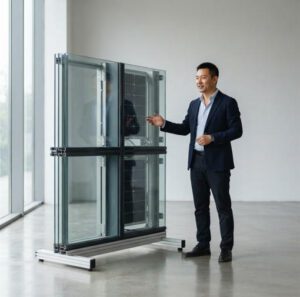
Roof-integrated (BIPV) takes a fundamentally different approach: the solar product replaces the roofing material itself. This is where solutions from manufacturers like Jia Mao BIPV operate — products where each tile simultaneously functions as weather barrier, structural element, and power generation unit. The integration removes the aesthetic compromise of panels mounted above the roofline and eliminates the structural complexity of adding dead load to an existing assembly.
Impact on Attic Space and Ventilation
Dense panel coverage reduces the solar-driven drying cycle that maintains attic moisture equilibrium. Research from the Florida Solar Energy Center found panel coverage can reduce attic peak temperatures by 5–10°F in summer — a passive cooling benefit, but also a signal the attic’s drying capacity has changed. Roofing and HVAC contractors should revisit ridge vent sizing and soffit vent free area once panels are installed.
Aesthetics and Curb Appeal
A U.S. DOE study found buyers willing to pay an average of $15,000 more for a solar-equipped home. Homes with flush, integrated solar tiles show stronger curb-appeal retention than those with older-style rack systems on architecturally prominent rooflines — particularly in high-value coastal and urban markets.
Solar Compatibility and Electrical Considerations
Roof Orientation, Shading, and Module Placement
South-facing roof planes at 15°–40° pitch capture the most annual solar energy in the Northern Hemisphere. A west-facing roof at 22° pitch typically produces only 15–20% less annual energy than the south-facing ideal — still sufficient for many homeowners’ goals. Shading analysis via Aurora Solar, HelioScope, or the NREL PVWatts calculator must model shade impact across all seasons before any layout is finalized. A chimney casting no shadow in June can shade 30% of a string in December, triggering disproportionate losses through inverter power-matching.
Roof Penetrations and Flashing
Every lag bolt anchoring a solar rack is a potential water entry point. A poorly sealed flashing can cause water damage costing more to remediate than the entire installation generated in two years. Best practice requires high-quality butyl tape or structural sealant at the underside of each flashing, woven into shingle courses above in a “U” pattern that diverts rainfall away from the penetration. See Arka360’s penetration risk guide for photographic detail on compliant vs. non-compliant technique.
Solar installation in progress: every mounting point penetration must be properly flashed and sealed — the quality of this detail determines whether the roof stays watertight for 25 years. Photo: Pexels (Free License).
▶ Video: A complete in-roof (BIPV-style) solar installation by Viridian Solar — demonstrating how integrated roofing systems avoid the penetration and flashing challenges of rack-mounted setups.
Warranties and Service Coverage
The warranty gap is where solar-ready roofing projects most often collapse into costly disputes. A homeowner facing a water-damaged room three years after installation discovers a roofing manufacturer who says penetrations voided their warranty, a solar installer who says the leak isn’t their problem, and a racking company whose product has no provision for structural damage caused by its own installation. This scenario plays out hundreds of times each year across the U.S. — and is almost entirely preventable with upfront diligence.
Manufacturer vs. Installer Warranties
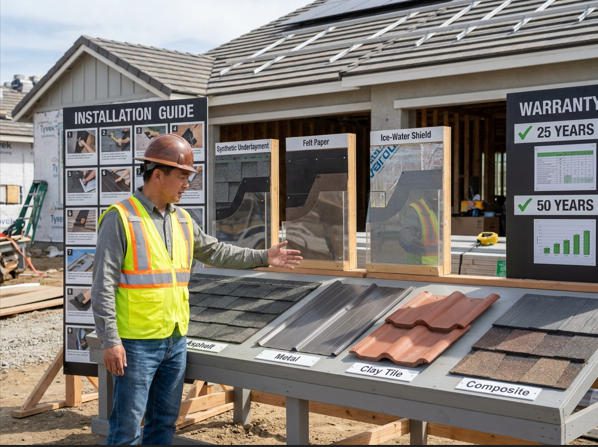
Roofing manufacturer warranties cover material defects but typically contain carve-outs for damage from third-party penetrations. The critical phrase to find in fine print is “installer qualifications”: GAF, CertainTeed, and Owens Corning each maintain lists of certified installers whose work qualifies for the strongest warranty tier.
Solar panel performance warranties typically guarantee output won’t degrade below 80–87% of nameplate capacity by year 25. Premium manufacturers now offer “linear” warranties guaranteeing no more than 0.5% annual degradation. Palmetto’s solar warranty comparison guide breaks down the critical terms clearly.
What Is Covered and Exclusions
Standard roofing warranties typically exclude: storm damage above a specified wind speed, hail damage unless the product has an impact resistance rating, damage from foot traffic, and damage from third-party attachments made without following manufacturer guidelines. Solar warranties commonly exclude: physical impact damage, roof-related water ingress, and in older documents, damage from installation on incompatible materials.
| 保証タイプ | Typical Duration | Covers | Common Exclusions | Key Question to Ask |
|---|---|---|---|---|
| Roofing Material (Manufacturer) | 25–50 yrs | Manufacturing defects, granule adhesion | Third-party penetrations, storm above threshold | Does solar mounting void this if done by a non-certified installer? |
| Roofing Workmanship (Installer) | 2–10 yrs | Leak-free install, proper flashing | Damage by later trades, storm events | Are solar penetrations explicitly included? |
| Solar Panel Product | 10–12 yrs | Manufacturing defects, frame integrity | Physical damage, roof water ingress | Does warranty cover labor to remove/reinstall for roof repairs? |
| Solar Panel Performance | 25 yrs | Output above guaranteed threshold | Panels removed, non-manufacturer damage | Is the guarantee linear (≤0.5%/yr) or a step function? |
| インバーター | 10–25 yrs | Electrical malfunction, component failure | Physical damage, improper wiring | Is there an extended warranty? Who services locally? |
| Solar Installer Workmanship | 5–10 yrs | Leak-free penetrations, proper electrical | Structural issues beyond scope, acts of nature | Who responds first for a leak within warranty period? |
How to Compare Warranty Terms
The single most important document to request before signing any contract is a written warranty responsibility matrix. Any contractor or manufacturer unwilling to produce this document is implicitly transferring gap risk to you. For integrated BIPV products from manufacturers like Jia Mao BIPV, this responsibility matrix is inherently simpler because the roof and solar system originate from a single manufacturer framework.
Installation Best Practices and Scheduling
Permits and Inspections
A permit-free solar installation is a liability waiting to materialize. Beyond legal exposure, unpermitted installations typically void both roofing and solar product warranties. Most U.S. jurisdictions require both a building permit and an electrical permit. The Enphase homeowner permit guide provides a clear walkthrough of what to expect at each stage.
Sequential Steps for a Solar-Ready Roof Install
- Roof Assessment & Structural Sign-Off: Licensed inspector evaluates deck condition, rafter dimensions, fastener pullout strength, and dead-load capacity. Structural engineer signs off if required.
- Material & Underlayment Selection: Specify solar-compatible material with peel-and-stick underlayment minimum in the solar zone. Confirm manufacturer certification requirements in writing.
- Permit Application: Submit combined building and electrical permit package including solar layout plan, structural letter, electrical schematics, and roof characteristics.
- Complete Roofing Installation: Install all underlayment, drip edge, and flashing. Pre-seal future mount locations with peel-and-stick patches if phasing work.
- Solar Racking Installation: Install all lag bolts, step flashing, and rail hardware immediately after roofing is completed. Never allow unflashed penetrations to weather through rain.
- Panel Mounting & Electrical: Mount panels, complete wiring, install rapid shutdown, connect inverter. All electrical work by a licensed contractor.
- Rough Inspection: Municipality inspects structural attachment, electrical rough-in, and waterproofing before access panels are closed.
- Final Inspection & Utility Interconnection: Final code inspection, utility approval, system commissioning, and monitoring activation.
Quality Control Checklists
Before accepting final work, physically verify: watertight flashing at every penetration point, panel level and rail alignment within ±⅛ inch, all wire management clips secure with no exposed cable subject to UV degradation, rapid shutdown device properly labeled, and all permit cards signed. Document every stage with photographs — these images become critical evidence if a warranty dispute arises years later.
Cost, ROI, and Financing for Solar-Ready Roofs
Upfront Costs vs. Long-Term Savings
The all-in cost of residential solar in the U.S. currently runs approximately $2.74–$3.30 per watt before incentives. For a typical 8 kW system, that’s $21,920–$26,400 gross. With simultaneous roof replacement, total combined project costs commonly run $35,000–$55,000. EnergySage’s 2024 data shows homeowners saving $37,000–$154,000 over 25 years depending on system size and local rates.
Illustrative midpoints for planning. Actual costs vary by region, complexity, and contractor market. Source: DOE benchmarks, EnergySage 2024, contractor surveys.
Federal ITC at 30% through 2032 under the Inflation Reduction Act. Split varies by state and utility.
Incentives and Financing Options
その Federal Residential Clean Energy Credit allows homeowners to deduct 30% of qualified solar costs through 2032. For a $28,000 solar component, that’s $8,400 in tax savings. The DSIRE database is the definitive resource for state-level incentive research. Solar-specific loans at 4–8% over 5–20 year terms are available through Mosaic, Sungage, and GreenSky.
Maintenance, Durability, and Longevity
Planned biannual inspections — spring and fall — catch the vast majority of maintenance issues before they become warranty claims or damage events. Photo: Pexels (Free License).
Inspection Intervals
The NRCA recommends twice-annual inspections for any roof carrying a solar array. Post-storm inspections are a critical supplement: after any hail event above 1″ diameter, wind event above 60 mph, or heavy ice accumulation, a visual check should occur within 30 days. Solar monitoring software provides an indirect early-warning signal — a sudden output drop from one string, absent a weather explanation, often indicates a physical connection issue that may also be creating water entry risk.
Weather Events and Repairs
When storm damage occurs to a paneled roof, repair sequencing matters critically. Before any roofing crew begins work, the solar system must be properly de-energized through the rapid shutdown system (NEC 2017+). The solar installer should always coordinate any roofing repair on a paneled roof. Failure to follow this protocol has caused contractor injuries and documented rooftop arc fault fires.
| Maintenance Task | Recommended Frequency | Who Performs | Urgent Trigger |
|---|---|---|---|
| Visual roof and penetration inspection | Biannually (spring + fall) | Roofing contractor | After hail >1″ or wind >60 mph |
| Solar panel cleaning | 1–2× per year | Solar installer or owner | Visible soiling; unexplained output drop |
| Electrical connection check | Every 5 years | Licensed electrician | Output loss not explained by shading |
| Flashing and sealant inspection | Every 5 years | Roofing contractor | Any interior moisture staining near penetrations |
| Inverter health check | Per manufacturer (typically yr 10) | Certified solar installer | Error codes on monitoring; unusual sounds |
| Full professional system audit | Every 10 years | Solar + roofing jointly | Prior to home sale; prior to inverter replacement |
Choosing a Contractor and Manufacturer Partners
Credentials, References, and Project Scope
Ask every candidate: “Can you provide three references for projects where you installed both the roofing system and the solar array?” Key credentials: state roofing contractor license, general liability insurance minimum $1M per occurrence (naming you as additional insured), workers’ compensation for all crew, and NABCEP認定 for the solar component.
Material Warranties Alignment
Ask manufacturers: “Do your warranty terms explicitly address solar panel installation, and which mounting systems and installers are pre-approved?” GAF, CertainTeed, and Owens Corning all have pre-cleared solar mounting programs; request the current written documentation before any purchase.
For builders and developers evaluating BIPV solutions, the cross-warranty complexity is substantially reduced when roofing and solar functions are unified in a single product. Jia Mao BIPV’s installation documentation integrates both roof performance and electrical performance within a unified warranty framework, providing a cleaner liability path for new construction projects.
BIPV solar tiles unified with the roofline: when the solar product IS the roof, manufacturer warranty responsibilities are consolidated under a single framework. Photo: Pexels (Free License).
Conclusion
Selecting a solar-ready roofing system is a sequence of aligned choices that compound across 25–30 years. The roof that performs best under solar was designed for it: structurally assessed before panels were sized, equipped with high-quality underlayment in the solar zone, installed with proper penetration flashing by trained professionals, backed by warranties that leave no gap between roofing and solar coverage, and maintained on a planned inspection schedule.
Homeowners and developers who capture that integration — and who do the upfront diligence on structural capacity, underlayment quality, and warranty alignment — consistently report 25-year ownership experiences that justify the investment multiple times over.
Your immediate next steps: commission a roof condition report if your roof is more than 5 years old; request written penetration specifications from your roofing material manufacturer; compare at least three installer proposals with specific focus on warranty terms; and consult the DSIRE database for current incentives in your state.
Ready to explore fully integrated solar roofing solutions that eliminate the warranty gap between your roof and your energy system?
Explore BIPV Solar Roofing Options →Key Terms Glossary
- BIPV (Building-Integrated Photovoltaics)
- Solar products that function as part of the building envelope itself — replacing roof tiles, facade cladding, or glazing. Example: a solar tile that simultaneously waterproofs and generates electricity.
- BAPV (Building-Applied Photovoltaics)
- Conventional solar panels mounted on racks above an existing finished roof surface.
- Underlayment
- The membrane between structural roof deck and surface roofing material. Functions as a secondary weather barrier — critical at solar mount penetration points.
- Peel-and-Stick (Self-Adhering) Membrane
- An underlayment that bonds directly to the deck and self-seals around fastener penetrations. Preferred option for solar mounting zones.
- Dead Load
- Permanent, static weight on a structure — including roofing materials and permanently mounted solar panels.
- Flashing
- Metal or rubberized material at roof penetrations to direct water away from entry points. Proper step flashing at each solar mount is the single most critical installation detail.
- ITC (Investment Tax Credit)
- U.S. federal tax credit — currently 30% of eligible solar installation costs through 2032 under the Inflation Reduction Act.
- Rapid Shutdown
- NEC code requirement (2017+) to de-energize rooftop solar quickly during emergencies. Must be verified, labeled, and accessible to emergency responders.
- NABCEP
- North American Board of Certified Energy Practitioners. The leading credentialing body for solar installation professionals.
- Linear Performance Warranty
- Solar panel warranty guaranteeing ≤0.5%/year degradation, versus a step warranty that only guarantees output at specific year milestones.


-300x300.jpg)