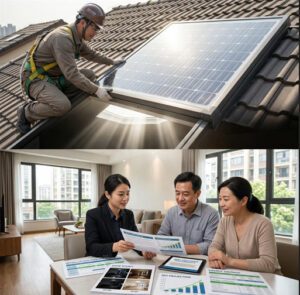
You install bipv solar roof tiles by following each step carefully. Check if your roof can hold the system. Look for any damage before you start. Always get the right permits. Follow the local rules. Safety is very important. Many accidents happen because of mistakes during installation. Some accidents even cause fires. Here are some examples:
| No. | Time | Accident Description | Cause |
|---|---|---|---|
| 1 | Sep 2003 | Residential fire in Simi Valley, CA, USA. | Module fire within the rooftop PV system. |
| 3 | Apr 2009 | Fire at a large retail store in Bakersfield, CA, USA. | Improper installation causing an arc. |
| 10 | Oct 2019 | Major fire in New South Wales, Australia. | Failure of DC isolator. |
Tip: If you do not feel sure about electrical work, ask a professional for help.
Key Takeaways
- Look at your roof before you start. Check for any damage. Make sure the roof can hold the solar tiles.
- Get all needed permits first. Follow the rules in your area. This stops delays and legal trouble.
- Safety is very important when you install. Wear safety gear every time. Do not work by yourself to stay safe.
- Read the manufacturer’s instructions with care. Install the tiles the right way. This helps your solar roof last longer and work well.
- Check your solar roof often. Fix problems early. This keeps your system working smoothly.
Prepare for BIPV Solar Roof Tiles
Assess Roof Structure
Look at your roof before you begin. Walk around and see if anything looks broken. Check for cracked shingles or soft spots. If you notice sagging or water stains, fix those first. Your roof must be strong enough for bipv solar roof tiles. If you are not sure, ask a roofing expert to check it. A strong roof helps the solar tiles work well and last longer.
Gather Tools and Permits
Get your tools and paperwork ready before starting. You need things like a drill, ladder, safety harness, and gloves. Some jobs need special tools, so read the manufacturer’s guide. Permits are important too. Rules are different in each place. Here is a table with some common rules:
| Region | Regulation/Requirement | Year/Effective Date |
|---|---|---|
| United States | California Building Energy Efficiency Code requires solar systems on new homes. | 2020 |
| France | Energy Transition Law mandates renewable energy systems in new commercial buildings. | N/A |
| Germany | Renewable Energy Sources Act provides incentives for BIPV installations. | N/A |
| United Kingdom | Future Homes Standard requires low-carbon energy generation for new homes. | 2025 |
| European Union | Requirement for solar panels in new buildings if permit submitted from 2027. | 2027 |
Ask your local building office what you need. Getting permits helps you avoid problems and delays.
Safety Checks
Safety is very important when you install bipv solar roof tiles. Always wear shoes that do not slip, gloves, and a hard hat. Use a safety harness and have someone hold your ladder. Never work alone—get help from a friend or family member. Here are some tips to keep you safe:
- Turn off all power before you start.
- Wear insulated gloves and safety glasses.
- Keep wires tidy so you do not trip.
- Follow grounding steps.
- Make sure the system is off and locked before you touch it.
- Read the manufacturer’s safety guide.
Tip: If you take time to get ready and follow safety steps, you can avoid accidents and make your work easier.
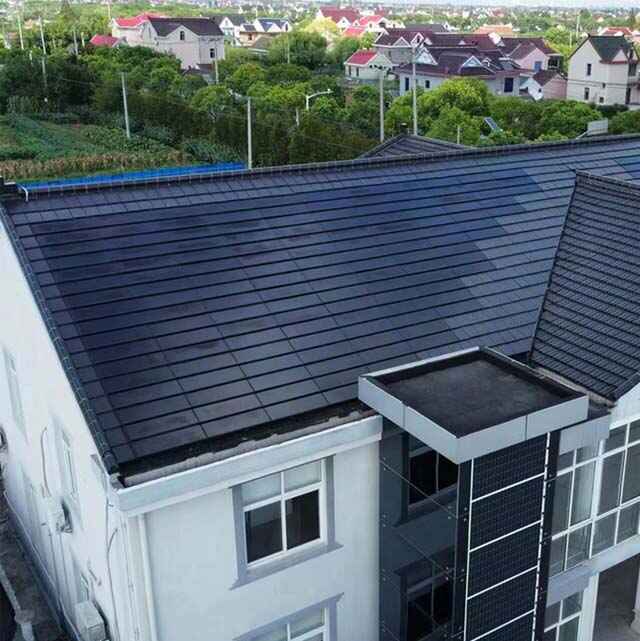
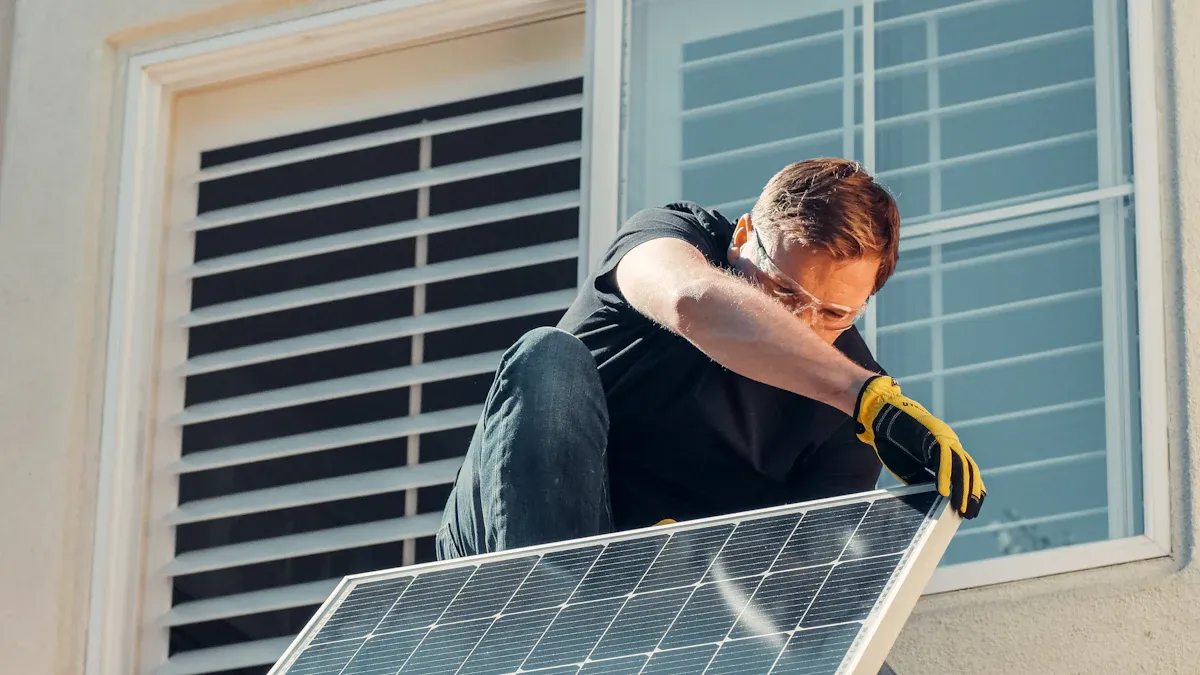
Install BIPV Solar Roof Tiles
Install Columns and Stringers
Start at the lowest edge of your roof. Lay out the columns and stringers according to the manufacturer’s diagram. If you use Jia Mao Bipv products, you will find a clear installation guide in the box. Place each column in a straight line. Make sure the spacing matches the diagram. This step sets the foundation for the rest of your project.
Tip: Double-check your measurements before you secure anything. A small mistake here can cause big problems later.
Secure with Anchor Screws
You need to attach the columns firmly to your roof. Use M20 anchor screws for this job. Each column needs four screws. Space them 150 mm apart in both directions. Leave 70 mm of each screw above the roof surface. Secure each screw with double nuts. This method keeps the columns steady, even in strong winds.
| Component | Specification |
|---|---|
| Anchor Screws | M20 |
| Number of Screws | 4 per column |
| Spacing | 150 x 150 mm |
| Exposed Length | 70 mm above ground |
| Securing Method | Double nuts |
If you skip this step or use the wrong hardware, your system might not last. Always follow the manufacturer’s instructions for your bipv solar roof tiles.
Lay Underlayment and Flashing
Before you add any tiles, you need to protect your roof from water. Lay down a waterproof underlayment. Make sure it covers every part of the roof where you will install tiles. Add flashing around edges, chimneys, and any roof openings. This keeps water from sneaking under your tiles.
- Multi-layer underlayment works best.
- Look for products with a water-blocking isolation layer.
- Good underlayment stops leaks, even in heavy rain.
| Feature | Description |
|---|---|
| Waterproof Structure | Multi-layer with internal water circuit design |
| Water-Blocking Isolation Layer | On the back of the module for extra protection |
| Performance Under Rain | No water seepage, even in heavy rain or low-pressure water column conditions |
Note: Proper flashing is one of the most important steps. If you miss a spot, you might get leaks later.
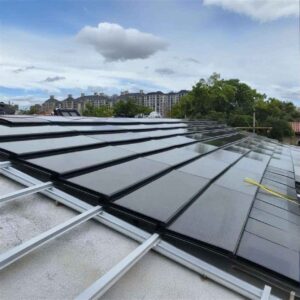
Place and Fasten Tiles
Now you can start placing your bipv solar roof tiles. Begin at the bottom row and work your way up. Follow the manufacturer’s diagram for the pattern. Use tile hooks or special mounting brackets. Do not drill directly through the tiles. This can crack them and cause leaks.
- Use tile hooks that slide under the tiles and attach to the roof deck.
- Replace old tiles with mounting-integrated versions if needed.
- Spread the weight across several tiles to keep everything stable.
| Fastening Technique | Description |
|---|---|
| Flashing | Seal at both the roof deck and tile level |
| Tile Hooks | L-shaped brackets that slide under tiles, attach to the roof deck without drilling through tiles |
| Tile Replacement | Remove tiles and replace with mounting-integrated versions for better stability |
Take your time with this step. If you rush, you might break a tile or miss a connection. According to industry reports, installing solar roof tiles can take 5 to 10 days. This is longer than traditional panels, but it gives you a roof that looks great and makes power.
Ensure Waterproofing
Check every seam, edge, and opening. Use waterproof membranes on low-slope roofs. Seal every crack and crevice with high-quality sealant. Good waterproofing keeps your roof safe for years.
- Inspect your work as you go.
- Ask a roofer to check your waterproofing if you are not sure.
- Regular inspections help you catch problems early.
| Key Waterproofing Practices | Description |
|---|---|
| Proper Flashing | Directs water away from roof penetrations |
| Waterproofing Membranes | Creates a watertight seal on low-slope roofs |
| Sealants | Ensures long-term waterproofing reliability |
Warning: Most leaks happen because of poor flashing or missed sealant. Take your time and do it right.
Common Mistakes to Avoid
- Drilling through tiles (can cause cracks).
- Skipping flashing or using the wrong sealant (leads to leaks).
- Ignoring rafter locations (roof may sag).
- Using mismatched hardware (tiles can break).
- Not managing wires (can cause leaks and damage).
If you follow each step and use the right tools, your bipv solar roof tiles will last for many years. Always check the manufacturer’s guide, especially if you use Jia Mao Bipv products. Their diagrams and specs help you avoid mistakes.
Installing bipv solar roof tiles takes time and care. On average, you will spend 6.9 worker-hours per kW installed. New construction goes faster, but retrofits take longer. Plan for 5 to 10 days for a standard home.
Electrical Integration and Final Checks
Connect Electrical Components
You must connect the electrical parts very carefully. Follow the manufacturer’s wiring diagram step by step. Certified electricians suggest these safe ways to connect:
- No metal parts should be exposed. This helps prevent electric shock.
- PV rapid shutdown array stops the system fast in emergencies.
- Module-level shutdown lowers power to a safe level in 30 seconds.
Use wires and connectors that meet safety rules. Check every connection to make sure it is tight and secure. If you are not sure, call a licensed electrician for help.
Tip: Put labels on each wire and junction box. This makes repairs easier and safer later.
System Inspection and Activation
Check everything before you turn on your system. Look for loose wires, broken tiles, or missing fasteners. National safety rules say you must do these checks:
- Fire testing
- Impact testing
- Wind resistance
- Wind driven rain
- Environmental testing for temperature and humidity
Make sure your installation matches the approved plan. Check electrical safety using the National Electrical Code (NEC). Also check the structure and fire code rules.
Here is a table with important codes and standards:
| Property | Article | Standards & Related Codes |
|---|---|---|
| Photovoltaic Systems | R324.3 | NFPA 70 (NEC), UL 1703, UL 61730 |
| Building-integrated PV Systems | R324.5 | Various |
| Photovoltaic Shingles | R324.5.1 | R905.16 |
| Deck requirements | R905.16.1 | Various |
| Deck slope | R905.16.2 | 2:12 or greater |
| Underlayment | R905.16.3 | R905.1 |
| Ice barriers | R905.16.3.1 | R905.1.2 |
| Material standards | R905.16.4 | UL 7103, UL 61730 |
| Attachment | R905.16.5 | Per Manufacturer |
| Wind resistance | R905.16.6 | ASTM D3161, UL 7103 |
| Fire classification | R902.3 | UL 790, ASTM E108, UL 7103 |
Safety Review
Safety is always the most important thing. Make sure all power is off before you touch any wires. Follow every step in the manufacturer’s guide. If you are unsure, ask a professional to check your work.
- Check all connections to make sure they are tight.
- Make sure rapid shutdown features work.
- Test the system with a multimeter before turning it on.
Remember: Careful checks now help stop accidents later. You want your system to work safely for many years.
Maintain Your BIPV Solar Roof Tiles
Regular Inspections
You want your solar roof to last for decades. Regular inspections help you spot problems early. Walk around your home and look for cracked or loose tiles. Check for any debris or leaves that might block sunlight. If you see anything unusual, call a professional for a closer look. Professionals can check the wiring and connections to make sure everything works safely.
- Schedule a professional maintenance visit at least once a year.
- Look for signs of damage, like broken tiles or missing fasteners.
- Ask your installer to check the wiring and connections.
Here’s a quick look at common maintenance tasks:
| Maintenance Task | Description |
|---|---|
| Inspection | Annual check to ensure no tiles are damaged or obstructed. |
| Cleaning | Occasional cleaning to remove debris, dust, or snow with a hose. |
Tip: Most solar tiles are tough. They can handle storms and harsh weather. You don’t need to worry about them being fragile.
BIPV solar roof tiles usually last between 25 and 30 years. Some brands even offer warranties up to 50 years. That’s much longer than most regular roofs.
Monitoring Performance
You can keep track of your system’s performance with built-in monitoring tools. These tools show you how much energy your roof makes every day. Real-time tracking helps you spot problems fast. If something goes wrong, remote troubleshooting can fix many issues without a service call.
- Use the app or online dashboard from your installer.
- Watch for drops in energy production.
- Contact support if you see anything strange.
Ongoing support keeps your system running smoothly. With regular checks and smart monitoring, you get the most from your solar roof for years to come. 😊
You now know the main steps to put in BIPV solar roof tiles. First, get your roof ready. Next, follow each step for installation. After that, check your roof often to keep it working well. If you find hard jobs or electrical work, ask a professional for help. Many people do this to stay safe and keep their warranty. Experts also make sure the job is done right. BIPV tiles help your house use less energy. They also lower your carbon footprint. Here are some good things about BIPV tiles:
| Environmental Benefit | BIPV Solar Roof Tiles | Traditional Roofing Materials |
|---|---|---|
| Greenhouse Gas Emissions | Much lower | High |
| Renewable Energy Integration | Yes | No |
You can save money with rebates and incentives from the government. 🌞
FAQ
How long does it take to install BIPV solar roof tiles?
Most homes need 5 to 10 days for installation. New homes go faster. Retrofits take longer. Weather and roof size can change the timeline.
Can I walk on BIPV solar roof tiles?
You should avoid walking on the tiles. They can crack or break. If you must step on them, use soft shoes and step gently.
Do BIPV solar tiles work on cloudy days?
Yes, they still make power on cloudy days. You get less energy than on sunny days, but your system keeps working.
What happens if one tile breaks?
You can replace a single tile. Call your installer or a professional. They will swap out the broken tile and check the wiring.
Do I need to clean my solar roof tiles?
Usually, rain keeps them clean. If you see dirt or leaves, use a garden hose. Never use harsh chemicals or scrub brushes.


-300x300.jpg)