Maximizing Efficiency: How to Incorporate Solar Roof Tiles into Your Building Design

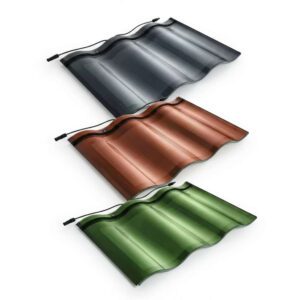
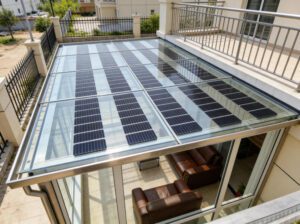
Caption: Solar roof tiles are no longer a residential experiment — they are a commercially viable building envelope component that delivers energy, aesthetics, and code compliance in a single system.
The solar roof tile market is no longer a niche curiosity. According to Grand View Research, the global solar roof tiles market was valued at USD 3.93 billion in 2025 and is projected to reach USD 8.81 billion by 2033, growing at a CAGR of 10.6%. The broader solar roofing market — including integrated systems on commercial and mixed-use structures — is expected to reach USD 22.59 billion by 2035 according to Market Research Future.
For curtain wall contractors, roofing specialists, EPC firms, and architects, this growth represents a fundamental shift in what clients expect from a roof specification. Solar is no longer an add-on. It is increasingly a core building envelope component — one that must be coordinated with structural, waterproofing, electrical, and code compliance workflows from day one.
This guide walks through every decision point: the technology, the design-phase integration strategy, structural and waterproofing requirements, brand selection, installation workflow, electrical compliance, aesthetic considerations, financial modeling, and long-term O&M. Every section is written for the professionals who actually deliver these projects — not for retail homeowners — and every recommendation is grounded in real cost data, field-tested protocols, and measurable performance outcomes.
のようなメーカーがある。 ジャ・マオ・ビップフ operate across this full stack — from photovoltaic glass module production to BIPV curtain wall integration — offering the kind of technical depth that multi-trade commercial projects demand. But product selection is step ten. Step one is understanding the technology.
Understanding Solar Roof Tiles — Technology, Materials, and Performance Metrics
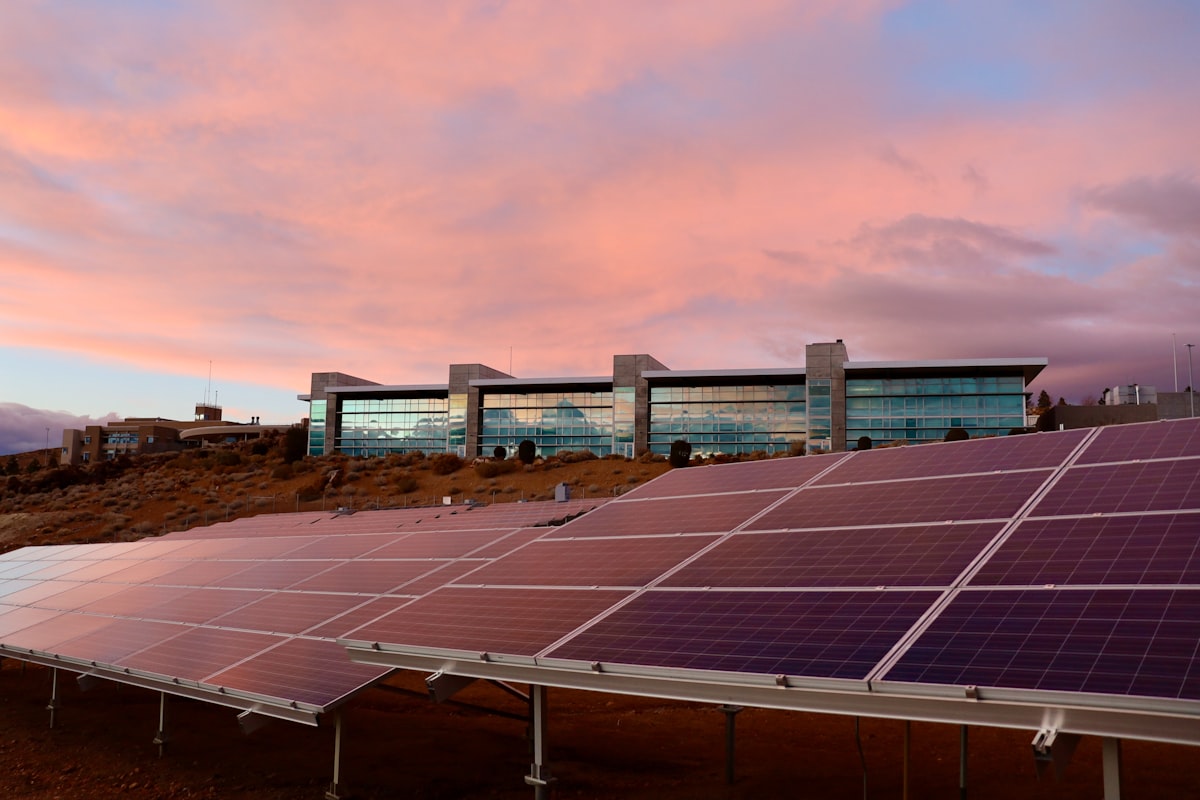
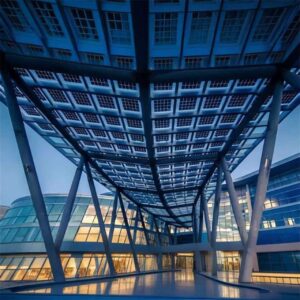
Caption: Unlike rack-mounted panels bolted over an existing roof, solar tiles are the roof — they replace conventional roofing material while generating electricity simultaneously.
What separates solar tiles from traditional rack-mounted PV panels is the integration concept. Traditional PV panels are external modules — mounted on racking systems above the finished roof surface, requiring separate weatherproofing underneath. Solar roof tiles, by contrast, are the weatherproofing layer. They replace conventional roofing material — asphalt shingles, concrete tiles, or metal panels — while simultaneously generating electricity. The building envelope function and the solar generation function are unified in a single product.
The core materials differ across product families. Most solar tile systems use tempered or laminated glass faces over crystalline silicon photovoltaic cells — the same cell technology used in conventional panels, but manufactured in tile-compatible form factors. The result is a product that can pass roofing material certification tests (Class A fire rating, ASTM D3161 wind resistance) while also meeting PV electrical safety standards (UL 1703, IEC 61730).
Efficiency ratings are the most frequently misunderstood metric in solar tile comparisons. Traditional high-efficiency monocrystalline panels reach 20–22% cell efficiency. Solar roof tiles typically achieve 14–20%, with some premium products in the 19–22% range. The efficiency gap is real but contextually relevant: if the roof is being replaced anyway, the question is not “which generates more per watt of PV” but “which generates more energy per square foot of roof area occupied — and what does the combined roofing-plus-solar cost look like as a single line item?”
Durability performance for leading systems is robust. Tesla Solar Roof tiles carry an ANSI FM 4473 Class 3 hail resistance rating, tested to withstand impacts at 110 mph winds. Most systems are tested to ASTM D3161 Class F for wind resistance (100 mph sustained). Class A fire resistance — the highest classification — is achieved by both Tesla Solar Roof and GAF Energy Timberline Solar through standardized ASTM E108 testing.
Expected system lifespan ranges from 25 to 30 years for the PV power output (with linear degradation guarantees typically at 90% at year 10 and 80–85% at year 25), with the physical roofing function often warrantied separately for comparable periods.
Climate compatibility varies by product design. Systems using tempered glass tile faces perform well in high-UV environments (Southwest U.S., Middle East, Southeast Asia). Thin-film variants offer better performance in diffuse-light conditions (Northern Europe, Pacific Northwest). Contractors should verify that the product’s operational temperature range and humidity resistance match the project’s climate zone before specification.
| Performance Metric | Traditional PV Panels | Solar Roof Tiles (Standard) | Solar Roof Tiles (Premium) |
|---|---|---|---|
| Cell Efficiency | 18–22% | 14–18% | 19–22% |
| Wind Resistance | Racking-dependent | ASTM D3161 Class F (100 mph) | ASTM D3161 Class F (110 mph) |
| Hail Rating | IEC 61215 (25 mm) | ANSI FM 4473 クラス 3 | ANSI FM 4473 Class 4 |
| Fire Classification | Class A (most models) | Class A | Class A |
| Lifespan (PV output) | 25–30 years | 25年 | 25–30 years |
| Lifespan (roofing function) | N/A (not a roofing product) | 25年 | 30年 |
| Installed Cost Range | $2.75–$3.50/W (panels only) | $4–$6/W | $6–$10/W |
Early Integration — Why Solar Roof Design Belongs in the Pre-Design Phase
The single most expensive mistake on solar tile projects is treating the PV system as a late-stage add-on. When solar arrives at the Construction Documents phase — after structural framing is designed, roof geometry is fixed, and MEP systems are coordinated — contractors face a compressing cascade of problems: structural reinforcement for unanticipated loads, electrical chase re-routing, and rework costs that can reach $60,000–$90,000 on mid-size commercial projects.
The correct decision point is Schematic Design (SD). At SD stage, the structural engineer can size framing members for solar tile dead loads from the beginning, the roof geometry can be optimized for solar yield rather than purely for aesthetics or drainage, and the electrical engineer can plan inverter placement, conduit routing, and utility interconnection without retrofitting decisions into a locked design.
What “early integration” means in practice is a coordination meeting at the start of schematic design that includes: the project architect, the structural engineer, the MEP engineer, the solar product specifier (or EPC consultant), and ideally the roofing contractor. The agenda: confirm the target roof areas for solar tile installation, establish structural load parameters, agree on inverter and monitoring system placement, and map electrical chase routes before wall framing is designed.
A real-world example of late integration: A 45,000 sq ft mixed-use building in Austin had solar tile installation specified during Design Development — four months after structural framing was completed. The existing roof framing was designed for asphalt shingles at 2–3 psf dead load. Solar tiles added 8–12 psf — requiring $47,000 in structural supplemental framing that would have cost under $12,000 if incorporated at SD. The electrical conduit routes were also not coordinated with MEP chases, requiring three field change orders and a six-week schedule delay.
Waterproofing and aesthetics are equally affected by design-phase integration. Solar tiles require specific underlayment systems — manufacturers specify compatible waterproof membranes, and using non-approved underlayments can void the weather warranty. Roof geometry decisions (pitch, ridge orientation, valley configuration) affect both solar yield and water drainage performance. These decisions become expensive to reverse after SD is complete.
The actionable recommendation for EPC firms and GCs: add a solar integration milestone at the SD-to-DD transition. This meeting, costing nothing in design fees, prevents the change orders, schedule delays, and rework costs that make solar tile projects unprofitable.
Optimizing Roof Geometry and Orientation for Maximum Solar Yield
Solar energy yield is not uniform across a roof surface. Pitch, azimuth (compass orientation), and shading all have measurable, quantifiable effects on annual kWh production — and on a commercial project where the system might generate 50–200 kWp, suboptimal orientation can represent tens of thousands of dollars in lost lifetime energy value.
The optimal configuration for maximum annual yield in the Northern Hemisphere is a south-facing roof surface at a pitch between 15° and 35° (roughly 3:12 to 8:12 roof slope). South-facing surfaces at this pitch range intercept peak solar irradiance during the high-sun summer months while still capturing meaningful production during low-sun winter periods. Yield within this pitch range typically varies less than 5–8% — meaning the difference between a 4:12 and a 6:12 pitch is marginal for most locations.
Azimuth deviation matters more than pitch. A roof surface rotated 45° east or west of true south (SE or SW orientation) produces approximately 87–92% of the yield of a true south surface — still commercially viable. East and west orientations produce 70–80% of a true south surface. North-facing surfaces in the Northern Hemisphere typically produce less than 40% of south-facing yield and are rarely economically viable for solar tile integration unless there are specific design constraints.
Shading analysis is non-negotiable on commercial projects with urban context. Chimneys, HVAC units, skylights, adjacent buildings, and seasonal tree canopy can reduce system yield by 10–40% if not accounted for in the design. Tools like PVsyst そして HelioScope allow designers to build 3D shading models that calculate shading losses by month and hour — and to compare alternative tile placement layouts that route tiles around shade sources.
| Roof Orientation | Relative Annual Yield (vs. True South = 100%) | Notes for Contractors |
|---|---|---|
| True South, 15–35° pitch | 100%(ベンチマーク) | Optimal; prioritize for tile placement |
| SE or SW, 15–35° pitch | 87–93% | Commercially viable; common on complex roofs |
| East or West, 15–35° pitch | 70–80% | Viable in high-electricity-rate markets |
| South, <10° or >45° pitch | 85–92% | Reduced by non-optimal pitch; still worthwhile |
| North-facing (Northern Hemisphere) | 30–45% | Typically not economically viable |
Multi-faceted roofs and urban environments require a zone-by-zone analysis rather than a whole-roof average. Use HelioScope or PVsyst to model each facet separately, establish which zones exceed a minimum viable yield threshold (typically 70% of optimal south-facing yield), and restrict tile placement to those zones. Tiles on non-viable zones add cost without proportional energy return.
The practical output of orientation analysis should be a roof zone map — a colored overlay on the roof plan showing which areas are designated for solar tiles, which for standard roofing material, and which are restricted due to shading, structural constraints, or orientation. This map becomes the coordination document for structural, electrical, and roofing workflows.
Structural and Waterproofing Integration — Bridging Roofing and Solar Expertise
Solar roof tiles change the structural and waterproofing equation of a roof in ways that roofing-only contractors may underestimate and solar-only installers may overlook. The convergence of these two trades — with their distinct vocabularies, code references, and liability structures — is where most solar tile project failures originate.
Dead load is the first structural consideration. Solar tile systems add a permanent, non-removable load to the roof structure. Standard asphalt shingles weigh 2–3 psf. Concrete tiles weigh 9–12 psf. Solar tile systems typically add 8–15 psf, depending on product type and underlayment system. A roof structure designed for asphalt shingles will need to be assessed — and in many cases reinforced — before solar tiles can be installed.
The correct workflow: the solar tile manufacturer provides confirmed dead-load values per product SKU (not a range — a specific number per square foot). The structural engineer applies these values to the existing or proposed framing analysis, following ASCE 7-22 for live loads, wind uplift, and seismic forces. Wind uplift is particularly critical — solar tiles at roof edges and ridges are exposed to significant uplift forces, and the fastening pattern specified by the manufacturer must match the structural engineer’s wind design requirements for the specific location.
Waterproofing integration is the other critical discipline. Solar tiles are the primary weather barrier — there is no conventional shingle layer underneath catching water that gets past the tiles. The underlayment beneath solar tiles must be a continuous, code-compliant waterproofing membrane. Most manufacturers specify self-adhering peel-and-stick membranes (ASTM D1970) as the required underlayment, rather than felt paper, because the waterproofing function of the assembly depends on it.
Flashing details at penetrations (chimneys, vents, skylights, roof valleys) are the highest-risk waterproofing locations. Tesla Solar Roof, for example, provides proprietary flashing components that integrate with the tile system at these transitions — substituting non-approved field-fabricated flashing is a warranty voiding condition. Roofing contractors need to study the manufacturer’s Installation Design and Construction Guide before the project begins, not during installation.
Key best practices for zero-leak installations:
- Require the solar tile manufacturer to review and approve the flashing and underlayment details at the pre-installation coordination meeting
- Install the full underlayment system and conduct a water-test (garden hose test per ASTM D5957 or equivalent) before tile installation begins
- Document all penetration flashing installations with dated photographs as a permanent record
- Ensure drainage planes are continuous — water must have a clear path from every roof surface to gutters or drip edges without being blocked by tile edges or mounting hardware
Selecting the Right Solar Tile System — A Comparative Guide for Contractors and Specifiers
The solar tile market has consolidated around a handful of commercially proven systems, each with distinct advantages for different project types, installer skill profiles, and client priorities. The decision is not simply “which one is most efficient” — it involves ease of installation, warranty structure, repairability, manufacturer support infrastructure, and total installed cost.
A practical comparison of leading systems:
| System | 効率性 | Installed Cost (approx.) | Fire Class | Installer Requirement | Warranty (Power) | Best For |
|---|---|---|---|---|---|---|
| テスラ・ソーラールーフ | 19–22% | $6–$10/W | Class A | Tesla-certified only | 25年 | Premium residential; design-forward projects |
| GAF Energy Timberline Solar | 17–19% | $4–$6/W | Class A | GAF-certified roofers | 25年 | Residential replacement; roofer-led projects |
| CertainTeed Solstice | 17–19% | $4–$6.50/W | Class A | CertainTeed-certified | 25年 | New construction; design-forward residential |
| Luma Solar | 18–22% | $5–$8/W | Class A | Luma-certified | 30年 | Premium residential and light commercial |
| Suntegra | 15–18% | $3.50–$5/W | Class A | General installer | 10–25 years (tiered) | Budget-sensitive residential projects |
Brand analysis for decision-makers:
テスラ・ソーラールーフ delivers the highest level of architectural integration — the tiles are nearly indistinguishable from standard tempered glass roofing at distance. The limitation is the installer restriction (only Tesla-certified crews, no independent contractors) and premium cost ($6–$10/W, potentially $100,000+ on a typical residential installation). For commercial projects, Tesla’s installer model creates scheduling and geographic constraints that can be prohibitive.
GAF Energy Timberline Solar has positioned itself deliberately for the roofing contractor market. Installation uses standard roofing methods — nailing directly to deck sheathing — and GAF-certified roofers (a large, existing installer network) can install without PV-specific training for the roofing portions. The electrical connection is handled by a licensed electrician. This split-trade model is the most compatible with existing contractor workflows.
CertainTeed Solstice (the successor to Apollo II) offers competitive efficiency and the backing of a 100+ year roofing brand. It is designed for new construction and full roof replacement, not overlay applications. The certification requirement for installers ensures quality control but limits the available labor pool.
Decision matrix for project types:
| Project Type | Recommended System | Rationale |
|---|---|---|
| Premium residential (new construction) | Tesla Solar Roof or Luma Solar | Design integration, lifetime performance |
| Residential roof replacement (GC-led) | GAF Energy Timberline Solar | Existing roofer workforce, no separate installation crew |
| Commercial low-slope/mixed-use (small) | CertainTeed Solstice + microinverters | Proven brand, warranty infrastructure |
| Budget-sensitive residential | Suntegra or GAF Energy | Lower upfront cost, shorter payback |
| BIPV façade integration (large commercial) | Jia Mao Bipv BIPV glass systems | Custom engineering support, full facade integration |
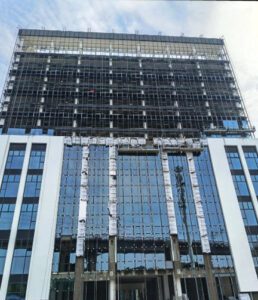
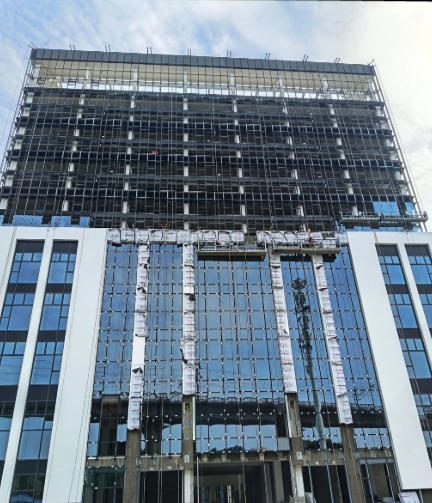
For large commercial and curtain wall projects requiring photovoltaic glass facades, standard roofing tile systems are not the right product category. ジャ・マオ・ビップフ offers engineered BIPV glass modules designed specifically for curtain wall and commercial facade applications — with traceable manufacturing, IEC-certified performance data, and technical support from specification through commissioning. Explore the full range of BIPV facade solutions for large-scale commercial specifications.
Streamlining Installation — Workflow Tips for Roofing and PV Contractors
Solar tile installation is a multi-trade operation. The roofing crew owns the weather barrier. The electrician owns the DC wiring, inverter, and AC interconnection. The solar tile manufacturer’s field representative (where required) coordinates the transition between the two. When these trades work in sequence without a defined handoff protocol, the most common results are: electrical rough-in that doesn’t coordinate with tile layout, junction boxes in inaccessible locations, and waterproofing compromised by conduit penetrations that weren’t planned.
Step-by-step installation sequence for solar tile projects:
Step 1 — Pre-Installation Survey and Design Lock Conduct a detailed roof survey: measure actual dimensions (not plan dimensions), document existing penetrations, confirm structural framing member locations, and photograph the existing roof condition. Lock the tile layout drawing — showing every tile position, electrical connection point, and bypass diode location — before any materials are ordered or installed.
Step 2 — Structural Preparation Address any identified structural deficiencies from the engineering assessment. Install blocking and bridging at tile anchor points per the structural engineer’s drawings. If the deck sheathing needs replacement (common on reroof projects), complete this before any waterproofing is applied.
Step 3 — Electrical Rough-In Install all conduit, junction boxes, and cable trays before the underlayment goes down. Every penetration through the deck must be sleeved and flashed before waterproofing is applied. Mark junction box locations with temporary weatherproof covers. This is the step most frequently skipped or combined with the tile installation — and the source of the most expensive field problems.
Step 4 — Underlayment and Flashing Install the manufacturer-specified waterproof membrane continuously across the entire tile area. Install all flashing components at valleys, penetrations, ridges, and eave edges per the manufacturer’s detail drawings. Conduct water testing before tile installation begins.
Step 5 — Tile Installation Install tiles per the manufacturer’s sequence, typically starting at the eave and working toward the ridge. Use the manufacturer-specified fastening pattern and hardware. Install bypass diodes and tile-level connectors as specified. Do not cut tiles in the field without manufacturer guidance — field cuts at roof edges or around penetrations must use manufacturer-provided edge tiles.
Step 6 — DC Wiring and Electrical Completion Complete DC string wiring from tiles to inverter. Verify string configuration matches the approved electrical design. Install inverter, AC disconnect, and monitoring equipment. Complete all NEC-required labeling. Conduct string-level open-circuit voltage (Voc) and short-circuit current (Isc) tests before energizing.
Step 7 — Commissioning and Documentation Conduct inverter startup, verify monitoring dashboard functionality, and document all commissioning test results. Complete a final water test of the finished assembly. Provide the building owner with the complete O&M package: tile layout drawing, electrical single-line diagram, inverter settings, monitoring login, and warranty documents.
Common field issues and how to prevent them:
Tile alignment errors accumulate across a large roof area — a 1/8″ error per tile course becomes a 2″ misalignment over 16 courses. Use laser layout lines established at the start of installation, not chalk lines re-snapped at each course.
Bypass diodes (components inside solar tile junction boxes that prevent reverse current flow when a tile is partially shaded) must be accessible for future replacement. Plan junction box locations to remain accessible after tile installation is complete — not buried under adjacent tiles.
Electrical interconnection between tiles uses proprietary connectors on most systems. Verify connector compatibility between tile-level connectors and inverter DC inputs before the project begins — not after tiles are installed.
Electrical Integration and Compliance — Inverters, Monitoring, and Grid Codes
Solar tile systems generate direct current (DC) electricity that must be converted to alternating current (AC) before it can power building loads or export to the grid. The choice of inverter technology affects system output, rapid shutdown compliance, monitoring capability, and long-term serviceability — and it interacts directly with the tile system design.
Microinverters vs. string inverters is the primary decision. String inverters connect multiple tiles in series — the string’s output is limited by its lowest-performing tile (the “Christmas lights” problem). Microinverters convert DC to AC at each individual tile, eliminating mismatch losses and allowing tiles with different orientations, shading conditions, or performance levels to operate independently.
For solar tile systems on complex roofs with multiple facets, chimneys, vents, or other shading sources, microinverters are strongly recommended. The yield improvement over string inverters on shaded or multi-orientation roofs typically ranges from 10–25% — a meaningful difference over a 25-year system life. The cost premium for microinverters ($0.20–$0.50/W additional) is typically recovered within 3–5 years through improved yield on shaded systems.
For large, unshaded, single-orientation tile arrays, string inverters with module-level power optimizers (MLPEs) offer a middle path — individual tile optimization without the full microinverter cost premium.
NEC 2023 Article 690 rapid shutdown requirements apply to virtually all grid-tied solar systems installed on buildings as of 2026. Rapid shutdown mandates that conductors outside the PV array boundary be de-energized to 30V or less within 30 seconds of shutdown initiation — a safety requirement for firefighters. Microinverter-based systems comply with rapid shutdown automatically, because each tile’s output is already AC at low voltage. String inverter systems require dedicated rapid shutdown devices (RSDs) at the array boundary or module level.
| Electrical Configuration | Rapid Shutdown Compliant (NEC 2023)? | Shading Performance | ベスト・アプリケーション |
|---|---|---|---|
| Microinverters at each tile | Yes (inherently) | Excellent | Complex roofs, multi-orientation, shaded systems |
| String inverter + module-level optimizers | Yes (with MLPE) | Good | Large unshaded arrays with some shading |
| String inverter + string-level RSD | Yes (with RSD) | Poor (shading losses) | Only for simple, unshaded, single-pitch roofs |
| String inverter only | No (non-compliant 2023+) | Poor | Not recommended for new installations |
Grid interconnection requirements vary by utility and jurisdiction. Most U.S. utilities operate under IEEE 1547-2018 for DER (Distributed Energy Resource) interconnection — defining voltage, frequency, and power factor requirements that inverters must meet. Verify the inverter is listed on the utility’s approved equipment list before purchasing. Some utilities with high solar penetration impose additional anti-islanding requirements or export limits that affect system design and sizing.
Monitoring systems should be specified as part of the electrical scope, not as an afterthought. Module-level monitoring (available with most microinverter systems) allows the building owner and maintenance contractor to identify underperforming tiles within hours — rather than discovering yield loss months later during a utility bill review. For commercial projects, monitoring platforms should offer API integration with the building’s BMS (Building Management System) for centralized energy dashboard visibility.
Aesthetic and Architectural Synergy — Designing Solar Roofs That Enhance Building Value

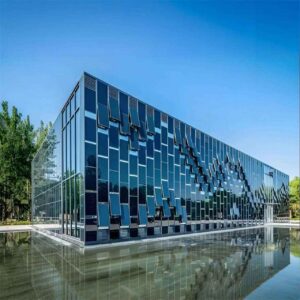
Caption: Solar roof tile color, texture, and visual continuity decisions are architectural choices with measurable impact on building value — not aesthetic afterthoughts.
The days of solar installations that look like an afterthought bolted to a finished roof are over for specifiers who approach the category seriously. Leading solar tile systems are designed with architectural intent — matching roofline geometry, minimizing visible hardware, and providing color and texture options that integrate with a building’s overall material palette.
Color matching and texture selection begins with understanding what the client values. For a residential property in a historic district, the goal may be near-invisibility — tiles that read as traditional roofing material from the street. For a commercial office development, the goal might be a premium, contemporary aesthetic that signals sustainability credentials. These are different specifications with different product recommendations.
Tesla Solar Roof tiles offer a single glass-texture appearance that works well on contemporary architectural styles but may look mismatched on traditional residential rooflines. GAF Energy Timberline Solar tiles are designed to match the visual profile of conventional asphalt shingles — the best option when the goal is minimal visual distinction from a standard roof. CertainTeed Solstice offers more color variety.
Visual continuity across the roof plane requires attention to the transition zone between solar tile areas and non-solar roofing material (required on roof sections that are not viable for solar). Most systems provide matching non-solar “dummy” tiles for these transition zones, maintaining a uniform visual appearance across the entire roofline. Specify these matching tiles in the BOM — they are easy to overlook and expensive to source separately after installation.
BIM object availability is increasingly important for design-team workflow. Autodesk’s BIM object library includes photovoltaic panel families, and platforms like ARCAT provide roofing BIM objects. Verify whether your specified solar tile brand provides a Revit family or BIM object before finalizing the design workflow — rebuilding the object from scratch during CD phase consumes design hours that could be used elsewhere.
Property value impact of solar roofs is documented. A well-integrated solar tile system signals energy efficiency, reduced operating costs, and sustainability credentials — all of which are valued by commercial tenants and institutional building buyers. For commercial office properties, energy performance certification (ENERGY STAR, LEED) supported by the solar roof can justify premium rents from sustainability-focused tenants. The aesthetic quality of the installation matters here: a visually disorganized or poorly integrated solar installation can actually undermine perceived building quality.
Cost-Benefit Analysis and Incentive Optimization for Clients

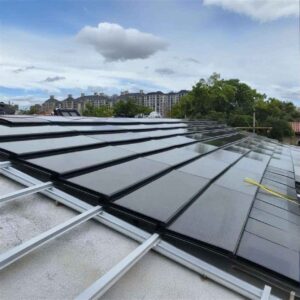
Caption: The financial case for solar tiles is most compelling when you calculate the combined roofing + energy cost — not just the solar premium in isolation.
The most common framing error in solar tile cost discussions is comparing the solar tile cost against a traditional PV-only installation. The correct comparison is solar tiles versus (conventional roofing + traditional PV panels). On any project where the roof is being replaced or newly installed, the conventional roofing material is a cost that would be incurred regardless — and it is substantially offset by the solar tile installation.
Cost structure breakdown for a representative residential project (2,500 sq ft, GAF Energy Timberline Solar):
| Cost Component | Solar Tile System | Conventional Roof + Traditional Panels |
|---|---|---|
| Roofing material + installation | Included in tile system | $12,000–$18,000 |
| Solar PV system (panels + racking) | Included in tile system | $18,000–$28,000 |
| Total gross system cost | $40,000–$55,000 | $30,000–$46,000 |
| Federal ITC (30%) | –$12,000–$16,500 | –$5,400–$8,400 (PV portion only) |
| Net effective cost | $28,000–$38,500 | $24,600–$37,600 |
| Payback period | 12–18 years | 6–10 years |
The net cost gap narrows significantly when federal incentives are applied. The 30% Federal Investment Tax Credit (ITC) under the Inflation Reduction Act applies to the full solar tile system cost — including the roofing component that has solar functionality — which is a significant advantage over rack-mounted panels where only the PV cost qualifies. For commercial projects, the 179D energy-efficient commercial buildings deduction (up to $5.00/sq ft under the 2023–2032 expanded program) provides additional tax benefit that can further reduce the net cost.
For commercial projects, the financial model must include the energy savings over the project hold period. A 45,000 sq ft commercial building in Dallas with 8,000 sq ft of viable solar tile roof area at 18% efficiency and $0.11/kWh electricity rate would generate approximately:
At a net installed cost of $320,000 (after 30% ITC on a $457,000 gross), the simple payback is approximately 18 years. With a 3% annual electricity escalation, the 25-year NPV of savings is positive, and the project contributes to LEED certification and ESG reporting targets that have measurable tenant and investor value.
LEED certification contributions from solar tile systems are multi-category. Onsite renewable energy generation contributes to EA Credit: Renewable Energy (up to 3 points based on percentage of building energy offset). Reduced peak demand may support EA Credit: Optimize Energy Performance. And for projects targeting LEED Zero Energy certification, a solar tile system generating a significant portion of building annual energy use is a direct pathway to certification. The U.S. Green Building Council’s LEED Zero program recognizes buildings achieving net-zero energy on an annual basis — solar tiles are a primary tool for reaching this threshold.
Proposal template for client presentations:
Effective solar tile proposals for commercial clients should include three financial views: a simple payback analysis (gross cost → ITC → net cost → annual savings → payback years), a 25-year NPV analysis at a discount rate matching the client’s WACC, and a lifecycle cost comparison (solar tile system versus conventional roofing plus traditional PV over the same period). Clients who see all three views have the complete picture needed to make a capital allocation decision.
Future-Proofing and Maintenance — Ensuring Long-Term Performance and Serviceability
A solar tile system that performs at 90% of its design output in year five but degrades to 70% by year fifteen due to inadequate maintenance represents a significant financial underperformance — one that is entirely preventable with a structured O&M protocol. For commercial project owners, the O&M plan is as important as the installation plan.
Cleaning protocols are the most impactful routine maintenance activity. Soiling — dust, bird droppings, pollen, and urban particulate accumulation — reduces output by 8–15% in urban environments if uncleaned for 12–18 months. Commercial solar tile installations should be cleaned 2–4 times per year in urban environments and 1–2 times per year in rural or low-particulate areas. Use only pH-neutral cleaning solutions (pH 6–8), soft brushes or squeegees, and water pressure below 40 psi. Alkaline detergents above pH 10 degrade coatings and seal systems.
Thermal imaging inspections using infrared cameras are the most effective diagnostic tool for identifying underperforming tiles. Hot spots — areas of elevated temperature visible in thermal imagery — indicate cell damage, delamination, bypass diode failure, or partial shading that is not captured in monitoring data alone. Commercial operators typically conduct thermal inspections annually via drone survey, which can cover an entire roof in hours and generate a report identifying specific tile positions for replacement. According to MoViTHERM’s solar inspection data, thermal imaging detects panel faults with over 94% accuracy — catching failures that string-level monitoring misses entirely.
SCADA and remote monitoring platforms (Supervisory Control and Data Acquisition systems) provide continuous system visibility at the string or tile level. For commercial projects, integrating solar monitoring data into the building’s BMS creates a unified energy dashboard that building managers can use to identify performance deviations in real time. The cost of retrofitting SCADA monitoring post-commissioning is typically $5,000–$15,000 — far more expensive than specifying it during design.
Module replacement strategy is the O&M question most frequently deferred until a tile fails. The time to answer it is during project specification: confirm with the manufacturer that individual tiles can be replaced without removing adjacent tiles, that replacement tiles will be available for the duration of the system warranty, and that the replacement tile color will match the installed tiles after years of UV exposure. Systems where individual tile replacement requires removing large sections of the surrounding roof are significantly more expensive to service.
Future energy system integration should be planned for at installation even if the client is not ready to add battery storage or EV charging today. Practical measures:
- Size the inverter’s DC input capacity at 120–130% of the current tile array output — providing headroom for future tile additions without inverter replacement
- Install conduit and electrical rough-in for a battery storage system in the electrical room adjacent to the inverter, even if no battery is installed at commissioning
- Install a solar generation sub-meter per utility interconnection requirements — this data becomes essential for demand response program participation and future battery dispatch optimization
- Verify the inverter supports IEEE 2030.5 communication protocol for future grid-interactive demand response enrollment
その DSIRE database maintains a state-by-state listing of solar incentive programs — including utility rebates, storage incentives, and demand response programs — that may become available to building owners as the energy landscape evolves.
For distributors and EPCs looking to future-proof client specifications across the BIPV glass and solar tile stack, ジャ・マオ・ビップフ‘s comprehensive BIPV installation and design guide covers the full integration workflow from schematic design through 25-year O&M planning.
Relevant Video Resource
Learn the technical differences between solar shingles and traditional panels — performance data, cost comparisons, and real-world installation considerations:
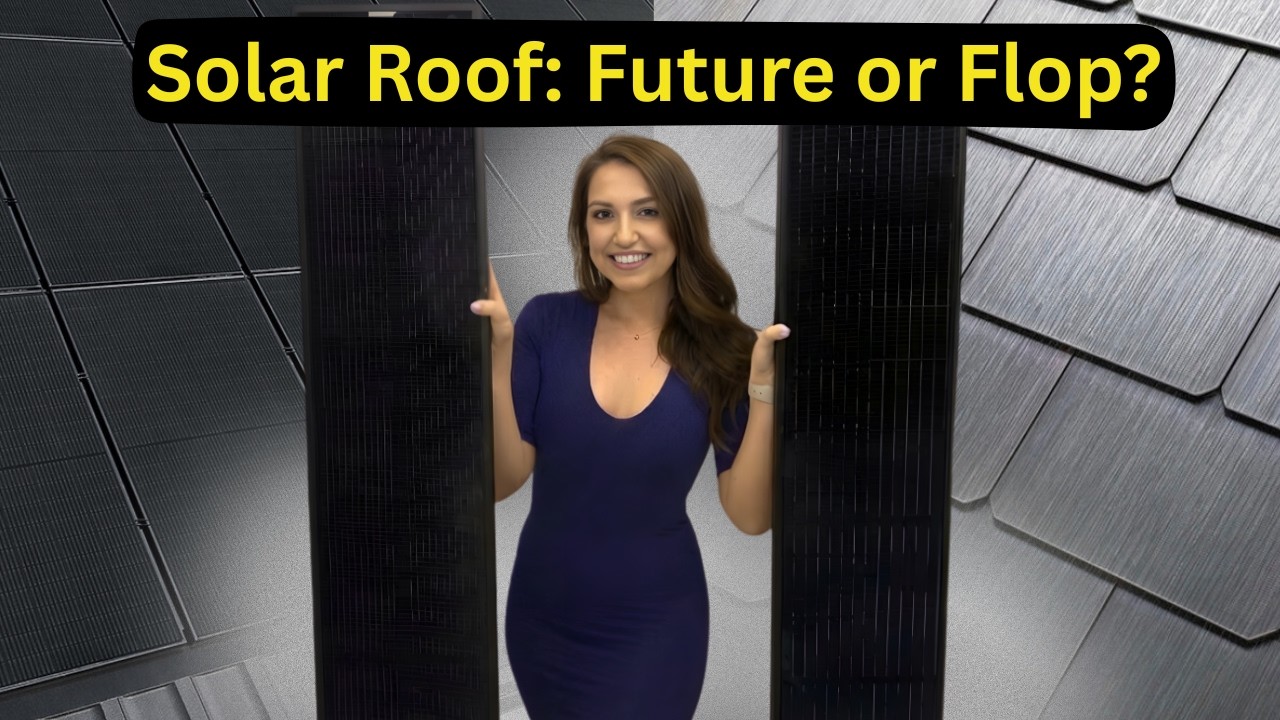
▶ Watch: Solar Shingles vs Traditional Solar Panels (2025) — Efficiency, Cost, and Performance Compared
Glossary of Key Terms
Understanding the technical vocabulary on solar tile projects prevents miscommunication between trades, clients, and manufacturers. The terms below appear frequently in specifications, manufacturer documentation, and permit submissions.
BIPV (Building-Integrated Photovoltaics): Photovoltaic modules integrated into the building envelope — roof, facade, or glazing — replacing conventional materials while generating electricity. Solar roof tiles are a form of BIPV.
Dead Load: The permanent, non-removable weight added to a structure by building components — including solar tiles. Must be calculated by a licensed structural engineer before installation on existing structures.
SHGC (Solar Heat Gain Coefficient): The fraction of solar radiation that passes through glazing and enters the building as heat. Relevant for BIPV glass products; lower values mean less heat gain.
ITC (Investment Tax Credit): The U.S. federal tax credit for solar energy systems, currently 30% of eligible system cost under the Inflation Reduction Act through 2032.
179D Deduction: Federal tax deduction for energy-efficient commercial buildings, up to $5.00/sq ft, available to building owners and, on government-owned buildings, to the designing professional.
NEC 690: The National Electrical Code article governing the design, installation, and inspection of solar photovoltaic systems.
Rapid Shutdown: NEC 690.12 requirement that solar system conductors outside the array boundary be de-energized to 30V or less within 30 seconds of shutdown initiation.
MLPE (Module-Level Power Electronics): Microinverters or DC power optimizers installed at each solar module or tile, preventing shading losses from propagating across an entire string.
ASTM D3161: Standard test method for wind resistance of steep-slope roofing products; Class F indicates resistance to 110 mph wind in driving rain.
ANSI FM 4473: Standard for impact resistance of roofing assemblies; Class 3 indicates resistance to 1.75″ diameter steel ball impact (approximately 1″ hail at terminal velocity).
PVsyst / HelioScope: Industry-standard software platforms for photovoltaic system energy production simulation, used to model annual yield based on location, orientation, shading, and system specifications.
VLT (Visible Light Transmittance): The percentage of visible light that passes through glazing; relevant for BIPV glass products used in skylights, curtain walls, or transparent roofing applications.
PR (Performance Ratio): The ratio of actual energy output to theoretical maximum output; a well-designed commercial solar tile installation typically achieves PR of 0.75–0.85.
Frequently Asked Questions (FAQ)
Q1: How do solar roof tiles compare to traditional rack-mounted PV in terms of energy output?
Solar roof tiles typically achieve 14–20% cell efficiency, compared to 18–22% for premium rack-mounted panels. The output difference per watt of rated capacity is real, but the correct comparison for project economics is output per square foot of roof area — and on that metric, the gap narrows significantly. More importantly, solar tiles eliminate the separate roofing material cost, which changes the total project economics substantially. On projects where the roof is being replaced or newly built, the combined roofing-plus-solar cost of solar tiles is often competitive with or superior to the combined cost of conventional roofing plus a separate PV system.
Q2: Can solar tiles be installed on commercial flat roofs, or only pitched residential roofs?
Most solar tile systems are designed for pitched roofs (typically 2:12 minimum slope) because the tile-based waterproofing system relies on water running off the tile surface by gravity. Flat or low-slope commercial roofs (below 2:12) are better served by rack-mounted panels on ballasted systems or BIPV glass systems designed specifically for low-slope applications. Jia Mao Bipv’s commercial BIPV glass solutions address flat-roof and curtain wall applications where conventional solar tiles are not appropriate.
Q3: What structural assessments are required before installing solar roof tiles?
A licensed structural engineer must review the proposed installation and confirm that the existing or proposed framing can carry the additional dead load of the solar tile system (typically 8–15 psf), the live loads required by code (per ASCE 7-22), wind uplift forces at the tile fastening points (per local wind speed requirements), and seismic loads in applicable zones. For existing buildings, the assessment must also evaluate the condition of the existing roof deck and framing members. PE-stamped structural calculations are required for permit submission in most jurisdictions.
Q4: How do I handle roof penetrations and ensure long-term waterproofing integrity?
Every penetration through the tile layer — for vents, chimneys, skylights, and electrical conduit — must use manufacturer-specified flashing components installed per the manufacturer’s detail drawings. Field-fabricated flashing at penetrations is the most common source of post-installation leaks and is typically a warranty-voiding condition. Conduct a positive-pressure water test (garden hose test per ASTM D5957 or equivalent) of the completed flashing before tile installation covers any penetration. Document all flashing installations with dated photographs as a permanent project record.
Q5: Are solar roof tiles compatible with metal roofing or standing seam systems?
Standard interlocking solar tile systems are designed for pitched-deck substrates and are not compatible with standing seam metal roofing profiles. However, some manufacturers (including certain BIPV glass manufacturers) offer photovoltaic laminates specifically designed to bond to standing seam metal roofing. For standing seam applications, thin-film PV laminates bonded directly to the metal roof surface are the appropriate product category — not traditional solar tiles. Always confirm compatibility with both the roofing manufacturer and the solar product manufacturer before specification.
Q6: What are the fire safety classifications for leading solar tile products?
Tesla Solar Roof, GAF Energy Timberline Solar, CertainTeed Solstice, and Luma Solar all carry Class A fire resistance classification under ASTM E108 — the highest available rating, indicating that the roofing system effectively resists severe fire exposure from outside the building. Class A is required by most building codes for commercial buildings and is strongly preferred for residential projects. Verify the specific product configuration tested for Class A — some products carry the rating only for specific tile-underlayment combinations, and using a non-tested underlayment may affect the fire classification.
Q7: How do I coordinate between the roofing crew and the electrical/PV subcontractor?
The most effective coordination tool is an Interface Responsibility Matrix (IRM) — a document that assigns each installation task to a specific trade (roofing, electrical, or general contractor), defines the hold points where inspections are required before the next trade proceeds, and specifies the documentation required at each milestone. Create this matrix at the pre-construction coordination meeting and make it a contract exhibit for both subcontractors. The most critical handoff point: the electrical conduit rough-in and junction box installation must be completed and inspected before the waterproof membrane is installed — not after.
Q8: What warranties are offered, and who is responsible — manufacturer, installer, or both?
Leading solar tile systems offer dual warranty coverage: the manufacturer warrants the product (power output, physical integrity, weather resistance) and the installer is responsible for the workmanship quality of the installation (water-tightness, fastening, electrical connections). Disputes over warranty responsibility typically arise at the interface between product performance and installation quality — for example, a leak that might be attributable to either a defective flashing component or to incorrect installation. To minimize exposure, select an installer that is certified by the manufacturer (which typically requires the manufacturer to share responsibility for installation quality) and document the installation with photographs at each milestone.
Q9: Can damaged solar tiles be replaced individually without removing surrounding tiles?
Most leading systems (GAF Energy, Tesla Solar Roof, CertainTeed Solstice) are designed for individual tile replacement without disturbing adjacent tiles — a critical serviceability advantage over older integrated solar roofing systems that required large-section removal. Confirm this capability with the specific manufacturer and document the replacement procedure in the O&M manual before project closeout. Note that color matching between original and replacement tiles may be imperfect after several years of UV exposure — document the installed tile batch numbers so the manufacturer can supply the closest available match.
Q10: How do shading from chimneys, vents, or nearby structures affect performance?
Shading affects solar tile system performance in proportion to the shading loss percentage and the inverter architecture. On string-wired systems, a single shaded tile can reduce the output of the entire string — not just the shaded tile. On microinverter-based systems, shading affects only the shaded tile, leaving the remainder of the string at full output. This is why microinverters are strongly recommended on roofs with any significant shading sources. Quantify shading losses during design using PVsyst or HelioScope 3D shading simulation — and design tile placement to minimize tiles in heavily shaded zones.
Q11: What building codes or permitting challenges should I anticipate?
Solar tile installations typically require two permit streams: a building permit (structural, envelope, and fire compliance) and an electrical permit (PV system, inverter, utility interconnection). Some jurisdictions with limited experience reviewing solar tile projects may require a pre-application meeting with the Authority Having Jurisdiction (AHJ) to establish the review framework. California Title 24 (effective January 1, 2026) has expanded solar-ready and renewable energy requirements for new construction — review the GreenLancer solar code guide for a state-by-state permit requirements overview.
Q12: Are BIM models or Revit families available for major solar tile brands?
BIM availability varies by manufacturer. Revit photovoltaic families are available through Autodesk’s BIM library and third-party platforms. Some manufacturers provide brand-specific BIM objects; others expect design teams to build from generic PV panel families. SOLARSTONE provides BIM libraries for Revit and ArchiCAD. Verify BIM availability directly with your specified manufacturer at the start of design development — not during CD phase when the schedule impact of building a custom family from scratch is significant.
Q13: How do I calculate the payback period when combining roofing and energy costs?
The correct payback formula for solar tiles on a roof-replacement project is:
This approach credits the conventional roofing cost that the solar tiles replace, producing a net incremental cost that is substantially lower than the gross tile system cost. The annual energy savings should include both electricity cost savings and any applicable demand charge savings. At $0.11/kWh commercial electricity rates with 3% annual escalation, typical commercial payback periods range from 12–18 years for solar tiles — improving to 8–14 years when demand charge savings are included.
Q14: Can solar tiles be integrated with battery storage or demand-response systems?
Yes — and this integration should be planned for at the installation stage even if battery storage is not in the immediate project scope. Specify an inverter with DC-coupled or AC-coupled battery integration capability. Install conduit and electrical panel space for a future battery system. For commercial projects, verify that the inverter supports IEEE 2030.5 communication protocol, which is required for grid-interactive demand response program enrollment in many utility service territories. Storage integration adds significant ROI to solar tile projects in markets with time-of-use electricity pricing — including California, New York, and most large commercial utility territories.
Q15: What training or certification programs are available for solar tile installers?
Certification requirements vary by product. Tesla Solar Roof requires Tesla-certified crews. GAF Energy certification is available to GAF-certified roofing contractors through a training program that covers the roofing and electrical interconnection workflow. NABCEP (North American Board of Certified Energy Practitioners) offers the PV Installation Professional (PVIP) certification — the industry-standard electrical credential for solar PV installers — which is recommended for anyone managing the electrical scope of a solar tile project regardless of product brand.
For contractors, EPC firms, and distributors ready to add solar tiles and BIPV systems to their project portfolio:
📋 Download Your Solar Tile Project Checklist A structured pre-construction checklist covering structural assessment, design coordination, permit preparation, installation milestones, and commissioning documentation — ready to use as a contract exhibit.
🎓 Run a Training Session Use this article as the agenda for a 90-minute coordination meeting with your roofing, electrical, and structural subcontractors at project kickoff. Assign each section to the responsible trade and use the Interface Responsibility Matrix template to define handoff points before work begins.
🔧 Download the O&M Maintenance Template A 25-year maintenance schedule covering cleaning frequency, thermal imaging inspection intervals, monitoring review cycles, inverter replacement planning, and tile replacement procurement — formatted for building owner handover at project close.
Explore the full BIPV and solar glass product range from Jia Mao Bipv:
- 🌐 BIPV facade and curtain wall solutions — engineered solar glass systems for large commercial projects
- 📊 Solar glass ROI calculator and energy savings guide — quantify the financial case for your clients
- 🔍 How to select and install solar glass for commercial buildings — specification decisions from schematic design through commissioning
- 🪟 Compare transparent solar panels for windows and skylights — performance data for vision glazing and skylight applications
For incentive program verification by state, reference the DSIRE incentive database — the authoritative source for U.S. solar incentive programs updated in real time. For federal ITC and 179D documentation requirements, review SEIA’s tax policy resources.
Published by the Jia Mao Bipv technical editorial team. Data current as of Q3 2026. Market statistics sourced from Grand View Research and Market Research Future. Code references based on NEC 2023, ASCE 7-22, and ASHRAE 90.1-2022. Always verify local permit requirements and structural conditions with licensed professionals before specification.