Building-integrated photovoltaics (BIPV) replace conventional building-envelope materials — roof tiles, facade cladding, skylight glazing, spandrel panels — with components that simultaneously protect the building interior and generate electricity. The IEA-PVPS Technical Guidebook defines BIPV as photovoltaic products that “serve as a building element and generate electricity,” distinguishing them from building-applied photovoltaics (BAPV), which are mounted on top of an existing envelope. This distinction is more than semantic: it means a BIPV product must satisfy both photovoltaic module standards (IEC 61215, IEC 61730) and building-construction standards (fire, structural, weatherproofing) simultaneously — a dual compliance burden that shapes every specification decision.
Integrating BIPV early in the design process — during the schematic or pre-design phase rather than as a construction-phase add-on — is the single most impactful decision a project team can make. An NREL workflow analysis measured that new-construction BIPV installations required approximately 3.5 worker-hours per kW, nearly half the 6.4 worker-hours per kW recorded on retrofit sites. The earlier BIPV enters the conversation, the more efficiently it can be woven into the structural, electrical, and waterproofing scopes of work that are already part of every building project.
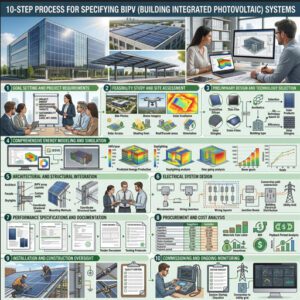
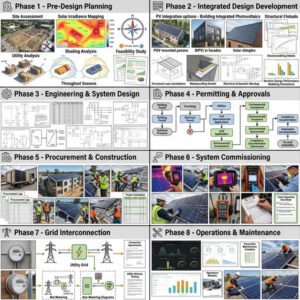
This guide presents a ten-step specification process that runs from initial project scoping through post-occupancy monitoring. Each step identifies the key deliverables, the responsible stakeholders, and the success metrics that define “done.” The process is designed for commercial and institutional projects but applies, with minor adjustments to scale and complexity, to residential BIPV as well.
1) Define Project Scope and Goals
Clarify Performance Targets (Energy, Aesthetics, Footprint)
Performance targets for BIPV projects fall into three categories that must be ranked, not merely listed. Energy targets define how many kWh/year or what percentage of building electricity consumption the BIPV system must offset. Aesthetic targets define acceptable module colors, transparency ranges, surface textures, and the degree to which the BIPV should be visually indistinguishable from conventional cladding. Footprint targets define the maximum physical area of building envelope available for BIPV, considering fire-access pathways, maintenance zones, and mechanical-equipment exclusions. Document these targets in the Owner’s Project Requirements (OPR) and assign a priority ranking so that downstream trade-off decisions — e.g., “do we sacrifice 15% energy yield to achieve a color match with the adjacent stone cladding?” — can be resolved against an agreed framework rather than a debate.
Identify Stakeholders and Decision Milestones
BIPV specification touches at least six disciplines: architecture, structural engineering, MEP/electrical engineering, facade consulting, PV system design, and construction management. Assign a RACI (Responsible, Accountable, Consulted, Informed) matrix at kickoff. The architect typically leads aesthetic decisions; the MEP engineer leads electrical interconnection; the facade consultant leads weatherproofing integration; and the PV designer — often a specialist sub-consultant or the BIPV manufacturer’s engineering team — leads module selection, string configuration, and energy-yield modeling.
Establish Budget, Schedule, and Risk Thresholds
Set a BIPV budget range (expressed as $/Wp and $/m² of envelope area) and a schedule milestone for each design phase: schematic design (SD), design development (DD), construction documents (CD), and construction administration (CA). Define risk thresholds early — for example, “If the interconnection study reveals distribution-grid upgrade costs exceeding $50,000, the project will scale back from a 200 kWp to a 150 kWp system.” These guardrails prevent the scope creep that derails BIPV projects when ambitions outpace budgets.
2) Establish Architectural and Integration Objectives
Assess Form, Facade Rhythm, and Visible vs. Concealed BIPV
BIPV can be integrated as a visible design feature — expressed modules with intentional cell patterns or colored glass — or concealed behind uniform opaque surfaces that appear identical to conventional cladding. The choice depends on the building’s architectural language. A parametric facade on a tech campus may celebrate the PV cells as a pattern generator; a historic-district infill project may require BIPV panels that match the adjacent limestone facade to within ΔE ≤ 3.0 (a colorimetric tolerance standard for architectural finishes). At this stage, collect facade-elevation drawings and identify every zone where BIPV is architecturally viable.
Determine Mounting Surfaces and Shading Considerations
Map all potential BIPV surfaces: roof planes (pitched and flat), facade elevations (south, east, west, north), canopies, parapets, and spandrel zones. For each surface, note the orientation (azimuth), tilt (from horizontal), and expected shading from adjacent structures, vegetation, and the building’s own geometry. Surfaces with annual shading losses exceeding 25% should be flagged as low-priority for BIPV and considered for conventional cladding instead. This architectural survey — ideally conducted with a 3D model in Rhino/Grasshopper or Revit with Ladybug/Honeybee — produces the “BIPV opportunity map” that feeds into the energy-modeling step.

3) Site Characterization and Climate Assessment
Analyze Solar Access, Local Weather Patterns, and Shading
Import TMY (Typical Meteorological Year) weather data for the project site into PVsyst, Helioscope, or an equivalent simulation tool. Generate an annual irradiance map for every candidate BIPV surface. A south-facing vertical facade at 40°N latitude receives approximately 60–70% of the irradiation that hits an optimally tilted rooftop; east and west facades capture 40–50%; north facades in the northern hemisphere collect 20–30%. These ratios shift near the equator, where east and west surfaces rival south-facing ones during equinox months.
Map Solar Resource and Seasonal Variability
Beyond annual totals, map the monthly distribution of irradiance to identify production peaks and valleys. A building in a heating-dominated climate (e.g., Stockholm, lat 59°N) will generate most of its BIPV electricity in May–August, with minimal output in December–January. Aligning PV production with the building’s load profile — or coupling with battery energy storage systems — maximizes self-consumption and financial return. A building in a cooling-dominated climate (e.g., Dubai) may find that the PV peak coincides with the air-conditioning peak, creating a natural demand-offset synergy that reduces peak-demand charges.
4) Building Energy Modeling and Load Analysis
Create Baseline Energy Model and Target Reductions
Build a whole-building energy model in EnergyPlus, eQUEST, or IES-VE to establish the annual electricity-consumption baseline. For a typical 5,000 m² commercial office building in a temperate climate, the model might project 600,000–900,000 kWh/year of electricity consumption. Define the BIPV offset target as a percentage of this baseline — commonly 20–50% for commercial projects pursuing LEED or BREEAM certification, or 100%+ for net-zero-energy buildings.
Evaluate Time-of-Use, Demand, and PV Potential
Overlay the building’s hourly load profile against the hourly PV production profile. In markets with time-of-use (TOU) electricity tariffs, PV production during peak-rate hours (typically 12:00–18:00) is worth 2–3× more per kWh than off-peak production. A south-facing facade BIPV system may have lower total annual yield than a rooftop system but higher economic value per kWh because its production profile peaks later in the afternoon when TOU rates are highest — a counter-intuitive finding that only emerges from hour-by-hour modeling.
| Parameter | 価値 | Source / Notes |
|---|---|---|
| Annual electricity consumption | 750,000 kWh | Energy model (EnergyPlus) |
| BIPV offset target | 40% | OPR / LEED EA Credit requirement |
| Required annual PV generation | 300,000 kWh | 750,000 × 40% |
| Site-specific yield (rooftop, 35°N) | 1,350 kWh/kWp/yr | PVsyst simulation |
| Required system capacity | 222 kWp | 300,000 ÷ 1,350 |
| Module power density | 195 Wp/m² | Mono c-Si BIPV module datasheet |
| Required BIPV area | 1,138 m² | 222,000 ÷ 195 |
| Available south-facing roof + facade area | 1,400 m² | Architectural survey (Step 2) |
| Area utilization ratio | 81% | 1,138 ÷ 1,400 — feasible |
5) BIPV Integration Strategy and System Sizing
Decide on Semi-Integrated vs. Fully Integrated BIPV
Semi-integrated BIPV uses modules that are mounted within the building envelope but retain a visible frame or gap — similar to a curtain-wall window unit. Fully integrated BIPV eliminates all visible framing, producing a flush, seamless surface indistinguishable from conventional cladding. Fully integrated systems typically cost 15–25% more due to custom edge details, structural silicone glazing, and tighter manufacturing tolerances. The choice depends on the architectural priority ranking established in Step 1.
Establish System Size, Modules, Inverters, and Back-Up Provisions
Using the sizing worksheet from Step 4, select a preliminary module (or module family) and an inverter topology. If the building has multiple BIPV surfaces with different orientations, plan for multi-MPPT inverters or module-level power optimizers to avoid mismatch losses. Reserve 5% of the total module order as attic stock (spare inventory) for construction-damage replacement and early-life warranty claims. At this stage, reach out to two or three shortlisted manufacturers — such as Jia Mao Bipv’s integrated module range — for preliminary datasheets and budget pricing.
6) Technology Selection: Modules, Inverters, and Balance of System
Compare Module Technologies and Efficiencies
Chart 1 — BIPV Module Cell Efficiency by Technology
HJT / TOPCon
Mono PERC (c-Si)
CIGS Thin-Film
CdTe Thin-Film
a-Si / OPV
Source: NREL ATB 2024, IEA-PVPS Task 15, manufacturer datasheets.
Choose Inverters, Monitoring, and Smart Grid Interfaces
Select inverter topology based on array uniformity. Uniform arrays (single orientation, minimal shading) → string inverters. Mixed orientations or partial shading → module-level power optimizers + central inverter. Maximum flexibility → microinverters. For commercial BIPV above 100 kWp, string inverters with 2–4 MPPT inputs are standard. Specify an integrated monitoring platform — either the inverter manufacturer’s cloud dashboard or a third-party solution — that provides string-level performance tracking, automated fault alerts, and exportable data for O&M reporting. Jia Mao Bipv’s monitoring and accessories catalog includes both hardware and cloud-based options compatible with their module range.
7) Electrical System Design and Interconnection
Layout of DC/AC Wiring, Combiner Boxes, and Safety Clearances
Route DC wiring through concealed channels within the curtain-wall mullions or roof-deck chase. Use fire-rated conduit (EMT or rigid metal) and maintain NEC 690.31(G) labeling on all PV conduits. Combiner boxes should be accessible from interior maintenance corridors. String voltage design must stay within NEC 690 limits: 1,000 V DC for U.S. commercial (or 1,500 V DC if the jurisdiction permits IEC-aligned design). On rooftop installations, maintain IFC Section 605.11 fire-access pathways: 914 mm minimum width from the roof access point to the array.
Grid Interconnection, Net Metering, and Storage Considerations
File the utility interconnection application at the DD phase. For U.S. projects, follow IEEE 1547-2018 and the local utility’s tariff. Systems ≤25 kW typically qualify for Level 1 simplified review (10–15 business days). Larger systems require Level 2/3 review (30–90 days) and may trigger distribution-system upgrade costs. If battery storage is included, coordinate with NFPA 855 for fire-safety compliance and with the utility’s storage-interconnection protocol — which may differ from the PV-only protocol. For international projects, consult IEC 62548 (PV array design) and the local grid code (e.g., EU EN 50549-1 for low-voltage connections).
Watch: Understanding Building-Integrated Photovoltaics
Source: YouTube — a guide to BIPV technology, integration strategies, and a path toward sustainable architectural futures.
8) Building Codes, Standards, and Permitting
Compliance with Fire, Wind, Seismic, and Electrical Codes
BIPV modules must pass dual certification: PV module safety (IEC 61730) and building-material performance (fire, structural, weatherproofing). In the U.S., facade BIPV above 12 m must pass NFPA 285 (fire propagation) and NEC 690.12 (rapid shutdown). NEC 2023 clarified PV circuit terminology and tightened labeling requirements. Seismic zones require anchorage design per ASCE 7 Chapter 13 (nonstructural components). Wind-load analysis follows ASCE 7 Chapter 29 and SEAOC PV2-2017.
Accessibility, Warranty, and Lifecycle Documentation
Compile a permit-application package that includes: site plan with PV array layout, electrical single-line diagram, structural load letter, fire-access pathway plan, rapid-shutdown compliance narrative, and module/inverter IEC certification letters. For jurisdictions with streamlined solar permitting (check SolSmart designation status), the review timeline is typically 5–10 business days. For complex BIPV facade installations in major cities, anticipate 4–8 weeks of plan review and potential third-party peer review requirements.
9) Construction Documentation, Procurement, and Quality Assurance
Prepare Integration Drawings, Specs, and BOM
Construction documents should include CSI Division 26 (Electrical) specifications for inverters, wiring, and disconnects, and Division 48 (Electrical Power Generation) or Division 07/08 (Thermal/Moisture Protection / Openings) specifications for the BIPV modules themselves, depending on whether the module is specified as an electrical product or a building-envelope product. Include a detailed bill of materials (BOM) with module part numbers, quantities, and attic-stock reserves (5% of total module count).
Establish Procurement Paths and QA/QC Procedures
Issue the BIPV module purchase order no later than the 50% CD milestone. Standard products ship in 6–10 weeks; custom-sized or custom-colored BIPV panels require 12–24 weeks. Define QA/QC inspection points: incoming module inspection (check for glass chips, cell cracks, and junction-box integrity), post-installation electrical testing (Voc, insulation resistance, polarity), and pre-commissioning thermal imaging (to detect hot spots). Working with a manufacturer that controls both glass processing and cell lamination — such as Jia Mao Bipv at its Shanghai production facility — compresses lead times and ensures consistent quality because there is no hand-off between separate fabricators.

10) Commissioning, Testing, and O&M Planning
Develop Commissioning Plan for Performance Verification
Commissioning follows IEC 62446-1 and includes: Voc measurement on every string (±5% of expected value), insulation-resistance testing (≥1 MΩ per string at 500 V DC), polarity verification, ground-fault detection, inverter functional testing (MPPT tracking, anti-islanding), rapid-shutdown functional test, and a 72-hour performance-ratio (PR) test comparing measured output to irradiance-adjusted expected output. Document all results in a formal commissioning report.
Create Operation and Maintenance (O&M) Manuals and Warranty Tracking
Deliver a complete O&M manual as part of the handover package, including: cleaning protocol (frequency, water quality, tools), inspection checklist (semi-annual visual, annual thermal imaging, biennial inverter PM), fault-response escalation procedure, and a warranty-tracking spreadsheet listing every module’s serial number, installation date, warranty expiration, and replacement history. Budget O&M at $10–$15/kW/year for commercial systems, with one inverter replacement cycle at year 12–15.
Set Monitoring and Performance Guarantees Post-Occupancy
Specify a contractual performance guarantee — typically expressed as a minimum annual PR (e.g., ≥78% in year one) or a minimum annual energy yield (kWh/kWp) — tied to liquidated damages if the BIPV system underperforms. Conduct a one-year post-occupancy evaluation comparing actual production to the design-phase energy model, and feed the calibration data back into the design team’s modeling templates for future projects. An NREL analysis found that formal post-occupancy evaluations improved second-project modeling accuracy by 5–8%.
The ten steps outlined above transform BIPV specification from an ad-hoc process — where PV is layered onto a nearly finished design — into a structured workflow that is embedded in the building’s standard design milestones from day one. The payoff is measurable: lower installed costs (10–15% less than retrofit), higher energy yields (because the envelope is optimized for PV), simpler warranty structures (because the building material and PV system are co-specified), and faster permitting (because the documentation is complete at first submission).
Collaboration across architecture, engineering, and construction disciplines is the mechanism that makes early integration work. Use the RACI matrix from Step 1 to assign accountability. Use the sizing worksheet from Step 4 to ground aesthetic aspirations in energy-model reality. Use the QA/QC checkpoints from Step 9 to catch defects before they are sealed behind drywall. And use the post-occupancy evaluation from Step 10 to close the feedback loop and improve the next project.
For practitioners ready to apply this workflow to a live project, start by downloading the IEA-PVPS Technical Guidebook for BIPV, request datasheets and budget pricing from two or three BIPV solution providers, and schedule a site-specific solar-access simulation. The difference between a BIPV project that delivers on its promise and one that becomes a cautionary tale almost always traces back to whether these ten steps were followed — in order, on time, and with the right people at the table.
Frequently Asked Questions About Spec’ing BIPV Systems
What are the main benefits of BIPV in building design?
BIPV provides three simultaneous functions: weather protection (replacing conventional cladding or roofing), electricity generation (offsetting building energy consumption), and thermal management (absorbing solar heat that would otherwise enter the building, reducing cooling loads by 10–22% in documented studies). Unlike rack-mounted panels, BIPV eliminates the cost of the conventional material it replaces — offsetting 40–60% of the total system cost — and contributes to green building certifications (up to 18 LEED points across EA and MR categories). Aesthetically, BIPV allows architects to use the building envelope as an energy-producing surface without the visual disruption of bolt-on racking.
How early should BIPV decisions be made in the design process?
BIPV should be introduced at the schematic design (SD) phase — before the structural system, roof geometry, and facade grid are finalized. Projects that introduce BIPV at SD achieve 10–15% lower installed costs and 15–25% higher energy yields compared to those that add BIPV during construction documents or construction administration. The SD-phase deliverables are a BIPV feasibility memo, a preliminary capacity estimate, and a BIPV opportunity map showing all viable envelope surfaces with their expected irradiance and shading losses.
What considerations are critical for grid interconnection and performance monitoring?
For grid interconnection, file the utility application at the design-development phase, verify IEEE 1547-2018 compliance (or equivalent local standard), and confirm that the rapid-shutdown system meets NEC 690.12 requirements. For performance monitoring, specify string-level or module-level monitoring with automated PR tracking and fault alerts. A well-performing commercial BIPV system should maintain a performance ratio of 78–85% in year one. Budget one inverter replacement at year 12–15, and conduct a formal post-occupancy evaluation at the one-year mark to calibrate future energy models.
What certifications should BIPV modules carry?
At minimum, BIPV modules should carry IEC 61215 (design qualification), IEC 61730 (safety qualification), and EN 50583-1/2 (BIPV-specific building-product qualification). For fire safety, U.S. projects require UL 790 Class A (rooftop) or NFPA 285 (facade above 12 m). EU projects require EN 13501-1 classification of B-s1,d0 or better. Hail resistance should meet UL 2218 Class 3 or 4. Verify all certificates are current and issued by an accredited testing laboratory (TÜV, UL, CSA, or equivalent).
What does a BIPV commissioning test include?
A BIPV commissioning test per IEC 62446-1 includes open-circuit voltage (Voc) measurement on every string (within ±5% of expected value), insulation-resistance testing at 500 V DC (minimum 1 MΩ per string), polarity and ground-fault verification, inverter functional tests (MPPT tracking, anti-islanding, ramp-up/ramp-down), rapid-shutdown functional test, and a 72-hour performance-ratio (PR) test comparing measured energy output to irradiance-adjusted modeled output. All results are documented in a formal commissioning report included in the handover package.
How much does a commercial BIPV system cost per square meter?
Commercial BIPV costs range from $200–$600 per m² of envelope area, depending on module technology, transparency, customization level, and regional labor rates. This includes the BIPV modules, inverters, wiring, structural integration, and installation labor. When the cost of the replaced conventional cladding ($100–$300/m² for a high-performance curtain wall) is subtracted, the net BIPV premium is typically $100–$350/m². After the 30% U.S. Federal ITC, the net premium drops further. For the most accurate project-specific pricing, request quotes from specialized BIPV manufacturers with the project’s architectural drawings and energy targets.
Can BIPV be installed on existing buildings or only new construction?
BIPV can be installed on both new construction and existing buildings (retrofit), though new construction is more cost-effective because the structural, electrical, and waterproofing systems are designed to accommodate BIPV from the start. Retrofit BIPV requires verification of existing structural capacity, re-routing of electrical conduit (often through occupied spaces), and coordination with the existing roof or facade warranty. NREL data shows that new-construction BIPV installations require approximately 3.5 worker-hours per kW versus 6.4 worker-hours per kW for retrofits — a 45% labor premium for retrofit projects.


-300x300.jpg)