
A BIPV system is sold on a 25-year yield curve. Then it is handed over, and nobody looks at it again until something fails.
That gap is where the money goes. The design team assumed a clean surface, a cool module, and a working inverter. The building gets dust, heat, and a dead string that nobody notices for eleven months.
This guide is for the people who inherit that gap: curtain wall contractors, roofing contractors, EPCs, and the facility teams they hand over to. It covers what to check, how often, and what it costs.
The short version. BIPV does not fail suddenly. It drifts. Small losses stack up quietly until the asset is worth 15% less than the model said. Maintenance is how you stop the drift.
Plain-English glossary: the words in this guide
| Term | What it means | Why you will use it |
|---|---|---|
| Performance ratio (PR) | Actual yield divided by the yield the array should have made | The one number that tells you if the system is healthy |
| Specific yield | Annual kWh per kWp installed | Lets you compare two buildings fairly |
| String | A group of modules wired in series | Most faults show up as one weak string, not one weak module |
| Soiling | Dirt, dust and pollution blocking light | The cheapest loss to fix, and often the least cost-effective |
| Derating | Power lost because the module is hot | Costs 2–3% a year on a poorly ventilated facade |
| Hot spot | One cell overheating because it is shaded or damaged | A fire risk and a warranty claim |
| IV curve trace | A test that plots current against voltage for one string | Shows whether a fault is in the modules or the wiring |
| Digital twin | A live digital model of the installed asset | Keeps 25 years of history in one place |
1. Why BIPV costs more to run than the model predicts
Design models are optimistic by default. They assume a clean glass surface, a 25 °C cell, and a perfectly matched array.
Real buildings rarely cooperate. A neighbouring tower throws shade from October to February. The ventilation gap behind the facade gets blocked during a fit-out. A junction box fills with water in year three.
The gap in numbers. On a 110 kWp facade producing 95,700 kWh a year, about 11% of the design yield leaks away before anyone touches the system.
That is roughly 10,500 kWh a year, or about $1,700 at $0.16 per kWh. It is not a disaster. It is a slow leak.
Why it matters more than it looks. Each lost percentage point is worth about $150 a year on this array. Over 25 years, with degradation, that is over $3,500 per point. Recover four points and you have paid for a decade of monitoring.
What clients actually complain about. Not module efficiency. They complain that nobody told them the east elevation would underperform, that the inverter alarm went to an email address nobody reads, and that the first repair quote arrived with a scaffold bill attached.
2. Start with a baseline: the post-installation audit
You cannot manage a number you never recorded. The first job after handover is to measure what was actually built, not what was drawn.

Commissioning tests that catch real defects
Run these before the retention period ends. Every one of them has caught a defect on a real project.
- IV curve trace on every string. Compare the measured curve with the flash report from the factory. A step or a droop means a wiring fault, a cracked cell, or a mismatched module.
- Insulation resistance and earth continuity. Moisture in a junction box shows up here first, long before it shows up as a fault.
- Thermal imaging in good daylight. Look for cells running 10 °C hotter than their neighbours.
- Water spray test, witnessed. One bay, full pressure, thirty minutes. Photograph it.
- Performance ratio run. Three clear days, measured irradiance, calculated PR. Record it as your benchmark.
Write these five tests into the supply contract, not just into the O&M plan. A supplier who will not commit to them in writing is telling you something. Our notes on solar glass procurement for EPC projects list the documents to ask for before you sign.
Set the benchmark, then watch it
The benchmark is the PR you will defend for 25 years. A glass facade usually lands between 0.78 and 0.85. If you measure 0.71 on day one, you have a problem now, and it is cheap to fix now.
Record four numbers on the handover certificate: PR, specific yield, availability, and the date of the last clean. Everything later is a comparison against these.
Align expectations before the first bill
Architects expect a beautiful surface. EPCs expect a passed test. Owners expect the yield on the brochure.
Put all three in one room and agree the same number. A facade that produces 870 kWh per kWp is not underperforming a rooftop array at 1,150. It is doing its job at a different angle. Say so in writing, or you will spend year three explaining physics to a finance director.
3. Monitoring: from manual checks to live data
Manual inspection costs a site visit every time. Monitoring costs a subscription and finds problems while they are still small.

String-level beats system-level
A system-level meter tells you the array is down 8%. It does not tell you why. A string-level monitor tells you which of the twelve strings is dead, and that turns a two-day hunt into a two-hour fix.
On a 1,000 m² facade, one dead string is about 10% of output, roughly $1,500 a year. The monitoring channel that catches it costs a fraction of that.
Sensors worth paying for
- Module or junction-box temperature. Catches a blocked ventilation gap before it costs you a summer of yield.
- Irradiance sensor on the same plane as the facade. Without it, you cannot calculate PR. Without PR, you cannot prove a warranty claim.
- Humidity inside the curtain wall cavity. Water and electricity share that space. Watch it.
- Inverter DC input voltage per MPPT. A slow drift here means connection resistance is rising.
Alerts that people actually act on
Most monitoring systems fail for a human reason, not a technical one. They send 400 emails and the owner stops reading.
Set three tiers only:
| Tier | Trigger | Who gets it | Response time |
|---|---|---|---|
| Critical | String offline, insulation fault, inverter trip | O&M lead plus site manager | Same day |
| Warning | PR down 5% week on week, one MPPT underperforming | O&M lead | 5 working days |
| Watch | Slow drift in temperature, soiling ratio rising | Monthly report | Next scheduled visit |
If your platform cannot do three tiers, use three saved views and a weekly human review. That works too.
Kits vary a lot in what they include. The surveillance et accessoires range we supply at Jia Mao Bipv shows the usual split between string-level and module-level hardware.
4. Cleaning: the cheapest loss and the worst payback
Cleaning is the first thing everyone budgets and the last thing that pays for itself. That sounds wrong, so here is the arithmetic.

The numbers on a 1,000 m² facade
- Cleaning cost, standalone: about $1.20 per m² per pass, so $1,200 a pass.
- Two passes a year: $2,400.
- Soiling loss at 3.5%: about 3,350 kWh, worth roughly $535.
Spend $2,400 to recover $535 and the energy case collapses. This is why honest O&M plans do not sell cleaning as an energy measure.
So what do you actually do?
You piggyback. Almost every commercial building already washes its glass. Adding the PV facade to that existing contract costs far less than a dedicated visit.
| Soiling level | Energy recovered per year | Standalone clean cost | Incremental cost inside an existing facade wash |
|---|---|---|---|
| Light, 1.5% | $230 | $2,400 | $400 — not worth it |
| Moderate, 3.5% | $535 | $2,400 | $400 — worth it |
| Heavy or dusty, 7% | $1,070 | $3,600 | $600 — clearly worth it |
The rule: never schedule a clean for the watts alone. Schedule it for the glass, and count the watts as a bonus.
Cleaning without wrecking the coating
Anti-reflective coatings and hydrophobic layers are thin. They come off with the wrong cloth.
- Use pH-neutral agents. Avoid anything alkaline or abrasive.
- Use demineralised water for the final rinse. Hard water leaves spots that bake on.
- Keep pressure low near edge seals and junction boxes.
- Follow the module maker’s written cleaning instructions. Deviating is one of the few ways to void a glass warranty.
Vertical facades soil more slowly than roofs because rain runs down them. They also cost three to five times more per square metre to clean, because access is the expensive part, not the labour.
Robots versus people
Robotic cleaning pays above roughly 5,000 m² of continuous, accessible surface. Below that, mobilisation eats the saving. On facades, rail-guided systems work but need to be designed in. Retrofit robots on a glass tower are usually a research project, not a maintenance plan.
5. Heat: the quiet 3% you never see
A hot module makes less power. That is physics, not a fault. But a badly ventilated BIPV facade runs 15 °C hotter than it should, and that heat also ages sealants and gaskets.
What to inspect
- The ventilation gap. Design is usually 60–100 mm behind the module. Fit-out crews block it with insulation, cable trays, or fire stops. Check it in year one, not year ten.
- Airflow at the top and bottom of each bay. If both ends are sealed, you have built an oven.
- Module temperature on a hot afternoon. Compare the facade reading with the ambient plus 25 °C rule of thumb. A 15 °C overshoot means the gap is blocked or the cavity is not venting.
When the facade engineer and the PV supplier disagree about how much ventilation a cavity needs, go back to the building services standards. The ASHRAE guidance on envelope and cavity ventilation settles most of those arguments with a number.
What heat does to the assembly
Thermal expansion moves a 3 m glass unit by around 5 mm between winter and summer. That movement has to go somewhere. It goes into the sealant, the gasket, and the fixing.
Look for these in the annual walk-round:
- Sealant pulling away at corners, where movement concentrates.
- Gaskets that have gone hard or shrunk back from the frame.
- Water staining under a joint, which means the seal has already failed.
Passive fixes that cost little
- Clear the gap and reinstate the ventilation path.
- Add a light-coloured soffit or shield at the top of the bay to reduce radiant heat.
- Choose a lighter module backsheet or a ventilated sub-frame at design stage. Retrofitting cooling to a sealed facade is expensive.
A 10 °C reduction in module temperature is worth roughly 3% of yield on a crystalline module, whose power falls about 0.3% per degree. That is more than a cleaning programme will ever give you.
6. Predictive maintenance beats emergency repair
Reactive maintenance means you fix things after they break, at the worst possible time, at the emergency rate. Predictive maintenance means you fix them on a Tuesday morning with a booked crew.

Plan the inverter replacement before it fails
Inverters are the first major component to go. Median time to first failure is around 10 to 12 years, and the replacement costs $95–$130 per kWp.
Watch these signals in the year before failure:
- Conversion efficiency dropping below 96%.
- Fan running constantly, or a cabinet temperature 10 °C above ambient.
- Repeated grid-fault trips that clear on their own.
- DC input voltage drifting on one MPPT.
Book the replacement in a low-season month. An inverter that fails in July costs you peak yield plus an emergency callout.
Component reliability in commercial arrays gets regular coverage in the trade press. PV Magazine is a reasonable place to check current failure rates before you set a replacement reserve.
Drone thermography: the cheapest inspection you are not doing
A drone survey with a thermal camera covers a 1,000 m² facade in about two hours. Rope access with a handheld camera takes two technicians two days, and the safety paperwork takes longer than the flight.
Typical cost: $1,500–$3,000 for a drone survey against $8,000–$15,000 for rope access on the same area.
The real return is not the survey price. It is finding the fault before it becomes a module replacement. A hot spot caught early is a $400 module. The same hot spot after two summers is a delaminated unit, a water path into the cavity, and a facade repair.
The test method is standardised. IEC TS 62446-3 covers outdoor infrared thermography for PV modules and plants, so ask for a report that follows it.
Rank repairs by yield impact, not by noise
Every site has a long list. Sort it by what it costs you to wait.
| Tier | Example | Yield at stake | Response |
|---|---|---|---|
| 1 | Water in a junction box, exposed conductor, cracked glass | Safety, plus 5–10% | 24 hours |
| 2 | Dead string, failed bypass diode, inverter MPPT fault | 2–10% | 7 days |
| 3 | Single weak module, cosmetic blemish, loose label | Under 1% | Next scheduled visit |
Tier 1 is about people, not watts. Everything else is about money.
7. Electrical integrity: where cheap maintenance gets expensive
Most BIPV failures that reach a lawyer start as an electrical detail. A loose connection, a corroded terminal, a ground bond that was never tightened.

Insulation resistance and grounding
Test insulation resistance annually, at 1,000 V DC, on every string. A reading that halves year on year is moisture working its way in.
Check earth continuity on the frame and the mounting structure. A facade module sits in an aluminium frame on a steel building. That is a lot of metal, and it all has to be bonded.
Connections and resistive heating
A loose MC4 connector does not fail politely. It heats, it carbonises, and in the worst case it starts a fire inside a cavity nobody can reach.
- Torque-check accessible connections at every annual visit.
- Thermal-scan the combiner box and the inverter DC terminals during the drone survey. It costs nothing extra.
- Replace any connector that shows discolouration. Do not clean it and put it back.
Conversion efficiency
Check inverter efficiency against its commissioning record, not against the datasheet. A 2% drop in conversion efficiency on 187,000 kWh a year is real money, and it usually means a failing cooling fan or a dirty heatsink.
When the inverter reaches end of life, the replacement does not have to be the same model. Newer units are more efficient and often smaller. Our inverter options page lists the usual three-phase range for facade and roof systems.
8. The building envelope side: waterproofing and interfaces
For BIPV, the array is also the wall. Water damage does not stay in the electrical box. It travels into the cavity, the insulation, and the ceiling below.

Audit the seals every year
- Walk the facade after heavy rain and photograph every damp patch.
- Check the horizontal joints first. Water sits there.
- Look at the base of each bay, where water collects if a weep path is blocked.
- Check the cable penetration points. Every hole in a waterproof membrane is a future leak.
Coordinate with the facade contractor
Electrical maintenance on a BIPV facade is also envelope work. Someone has to open a joint, and someone has to close it properly.
Write the rule into the O&M contract: no electrical access without the facade contractor’s method statement. This one clause prevents most of the arguments that follow a leak.
Watch the adhesives and gaskets
Structural silicone and EPDM gaskets age. Heat, UV, and movement do the damage. After 10 years, expect hardening and shrinkage at the corners.
Test adhesion on one unit at year 8. If the bond is failing, plan a targeted replacement instead of waiting for a unit to come loose in a storm.
Much of this comes down to the glass build-up you chose at design stage. Our guide to choosing solar glass for a BIPV project covers the edge sealing, coating and laminate choices that decide how the facade ages.
The design detail that decides everything
Service access is designed, not improvised. A facade built with removable spandrel panels takes an hour to open. A facade built with bonded modules takes a week.
This webinar from Acelab walks through how BIPV assemblies are designed and coordinated between the PV supplier and the facade team. Pay attention to the parts about unit layout and cable routing. Those are the details that decide how painful year 12 will be.
https://www.youtube.com/watch?v=ZX-JbDQVBPo
9. Extending the asset’s life
Every extra year of service spreads the same capital cost over more kWh. That is the simplest way to raise the net present value of a BIPV project.
Build a digital twin, not a folder of PDFs
A digital twin is a live model of the installed asset: which module sits where, what it tested at handover, and what has happened to it since.
You do not need a full BIM model to start. You need three things:
- A module map with serial numbers matched to positions.
- Every test result, dated, in one system.
- Every repair, with photos and the part replaced.
That record is what turns a warranty discussion from an argument into a claim. Without it, the manufacturer asks for evidence you no longer have.
Asset management frameworks help here. The ISO 55000 family sets out how to manage a physical asset across its life, and it maps well onto a 25-year BIPV system.
Plan upgrades, not replacements
The modules will outlive the electronics by a decade. Plan for it:
- Inverter replacement at year 12, with a like-for-like or better unit.
- Monitoring hardware refresh at year 10, because communications protocols age faster than glass.
- Module replacement only for physical damage, not for output alone.
Replacing one module in a bonded facade can cost 10 times the module price. Replacing an inverter is a scheduled expense. Keep them in separate budget lines so nobody raids one to pay for the other.
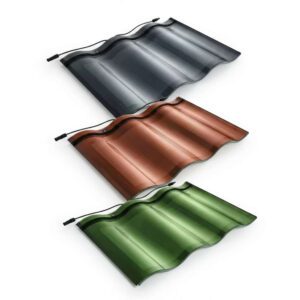
Roof BIPV follows the same logic with different details. Access, waterproofing and tile fixing all change the maintenance plan, and our solar roof tile systems guide sets out what differs on a pitched roof.
Documentation that keeps the warranty alive
Warranties are lost on paperwork, not on hardware. Keep these for 25 years:
- Commissioning test reports, signed.
- Cleaning records with dates and agents used.
- Thermal survey reports with the original images.
- Repair records with photos before and after.
- A log of every alarm and how it was closed.
10. Monitoring, maintenance, and management
Three things hold the asset value together. Monitoring tells you what is happening. Maintenance keeps the small faults small. Management turns both into a plan with a budget.
The financial case. On the same 1,000 m² facade and 80 kWp roof used throughout this guide, a planned O&M programme costs about $26,000 a year. Over 25 years that is roughly $650,000.
A reactive model, where faults are found late and fixed at emergency rates, lands around $980,000 over the same period. The difference is about $330,000, which is close to 40% of the original capex.
What that does to NPV. Discount those savings at 6%, add the recovered yield, and the planned model lifts project NPV by a low six-figure sum on a mid-size facade. It also removes the unpredictable repair spikes that make finance teams nervous about BIPV.
Who has to cooperate. The designer decides whether the facade can be serviced. The contractor decides whether the handover data is usable. The O&M provider decides whether any of it gets used. Break one link and the other two are wasted.
Where to start this month. Pick one facade. Run the five commissioning tests. Set the PR benchmark. Put three alert tiers in place. Book one drone survey for the spring. That is a programme, not a project, and it starts with a single afternoon of measurement.
If you are taking over a BIPV asset and want the O&M scope checked against the as-built drawings, send us the drawings and the handover pack. The Jia Mao Bipv project team will tell you what is missing before the defects period closes.
Frequently asked questions
1. How often should a BIPV curtain wall be professionally cleaned?
Two to three times a year in most cities, and more in dusty or industrial areas. But the schedule should follow measured soiling, not a calendar. Measure the soiling ratio once a quarter. If it stays under 2%, skip the clean and save the money. On a vertical facade, cleaning rarely pays for itself in electricity. Do it because the glass needs it, and add the PV surface to the facade washing contract you already have.
2. What is the typical degradation rate for BIPV modules compared with rooftop panels?
They are close. Glass-glass BIPV modules typically lose 0.5% to 0.7% of output a year. Framed rooftop modules lose 0.55% to 0.8%. Thin-film products such as CIGS can be slightly higher in the first year, then settle. Most performance warranties promise 80% to 85% of rated output at year 25 or 30. Treat any claim above 0.7% a year as a reason to ask for the test data.
3. How do I tell a systemic failure from a local module defect using monitoring data?
Look at how the loss is shaped. If every string drops by the same small amount on the same days, the cause is environmental: heat, soiling, or shading. If one string drops hard while its neighbours hold steady, the fault is local: a module, a connector, or a bypass diode. If all strings drop at once and stay down, look at the inverter or the grid connection.
4. What causes hot spots in integrated facade systems?
Four causes cover most cases: partial shading from a neighbouring building or a structural fin, a cracked cell, a failed bypass diode, and a soldered joint that has degraded. In facades, shading is the usual suspect, because the geometry is fixed for 25 years. Design the string layout around the winter shade pattern, and check it with thermal imaging in the first year.
5. Can the wrong cleaning agent void the BIPV glass warranty?
Yes, and it happens more often than suppliers admit. Abrasive pads, alkaline detergents, and high-pressure jets near edge seals can all damage the coating or the laminate. Most module warranties require cleaning to follow the manufacturer’s written instructions. Keep a log of the agents and the dates used. Without that log, a coating failure becomes your problem, not theirs.
6. How do I balance ventilation with the building’s insulation requirements?
Treat the ventilation gap and the insulation as two separate layers. The gap sits directly behind the module and must stay open top and bottom. The insulation sits behind a sealed air barrier, outside the ventilated path. The common failure is a fit-out crew pushing insulation into the gap to hit a thermal target. Mark the gap on the drawings and inspect it before the facade is closed.
7. What is the ROI of drone-based infrared thermography?
For a 1,000 m² facade, a drone survey costs $1,500 to $3,000. Rope access costs $8,000 to $15,000 for the same coverage. The direct saving is already more than the survey. The bigger return comes from finding faults early: one hot spot caught in year two avoids a module replacement, a water path, and a facade repair. Most owners run one survey a year, or one every two years on low-risk sites.
8. How do we replace one failed BIPV module without disrupting the facade?
Only if the system was designed for it. Unitised systems allow a single module to be released from the front with a vacuum lifter, then re-glazed and re-sealed in a day. Bonded or structurally sealed systems may need a run of modules removed. Check two things before you need this: whether a spare module is in stock, and whether the fixing method allows single-unit removal.
9. What are the early warning signs of waterproofing failure in BIPV roofing?
Three signs appear before any water reaches the ceiling. First, staining or dirt tracks under a joint, which means water is already tracking. Second, a rising humidity reading inside the roof build-up. Third, sealant pulling away at corners or at penetrations. Any of the three justifies opening one bay and inspecting, rather than waiting for a stain on the ceiling below.
10. Which monitoring KPIs should a general contractor track during the warranty period?
Four are enough. Performance ratio against the handover benchmark. Availability, meaning the share of time every string was producing. Soiling ratio, measured not guessed. And mean time to repair, which is the number that shows whether the O&M contract is actually working. Track them monthly, and put them in one page. If a KPI drifts for three months in a row, it is a trend, not noise.